
 ChatGPT
 Claude
 Perplexity
 Google AI Mode
 Microsoft Copilot
 Grok
Grok Mistral Le Chat
设置其他AI App(Cursor、Claude Code、VS Code等)
Claude和ChatGPT以外的编程助手和AI App,也用同一个服务器地址https://bcl.my/mcp连接到BCL。有些通过浏览器让你登录(OAuth),有些需要BCL的Personal Access Token。本页提供Connect AI Agent页面上每个App的设置方法。
claude.ai、Claude Desktop和ChatGPT,请看把Claude或ChatGPT连接到BCL。
选择你的App和登录方式
Section titled “选择你的App和登录方式”BCL在Platform Setup → Connect AI Agent的Quick start标签页列出15个App。每个App支持以下方式:
| App | OAuth(浏览器登录) | Personal Access Token | 在哪里设置 |
|---|---|---|---|
| Claude Desktop / claude.ai | 是 | 否 | Settings → Connectors → Add custom connector |
| ChatGPT | 是 | 否 | Settings → Apps & Connectors → Advanced → Developer mode → Create |
| Claude Code | 是(推荐) | 是 | claude mcp add,或项目根目录的.mcp.json |
| Cursor | 是(推荐) | 是 | ~/.cursor/mcp.json(全局)或.cursor/mcp.json(项目) |
| VS Code (GitHub Copilot) | 是 | 是 | code --add-mcp,或.vscode/mcp.json |
| Codex | 是 | 否 | ~/.codex/config.toml |
| Gemini CLI | 是(推荐) | 是 | gemini mcp add,或~/.gemini/settings.json |
| Windsurf | 是(推荐) | 是 | ~/.codeium/windsurf/mcp_config.json |
| Warp | 是 | 是 | Settings → Agents → MCP servers → + Add |
| Zed | 是(推荐) | 是 | Agent Panel → Add Remote Server,或~/.config/zed/settings.json |
| OpenCode | 是 | 否 | opencode.json或~/.config/opencode/opencode.json |
| Cline | 否 | 是 | MCP Servers → Configure MCP Servers |
| JetBrains AI | 否 | 是 | Settings → Tools → AI Assistant → Model Context Protocol (MCP) → Add |
| Hermes Agent | 否 | 是 | ~/.hermes/config.yaml |
| OpenClaw / Custom | 否 | 是 | openclaw mcp set,或任何MCP SDK |
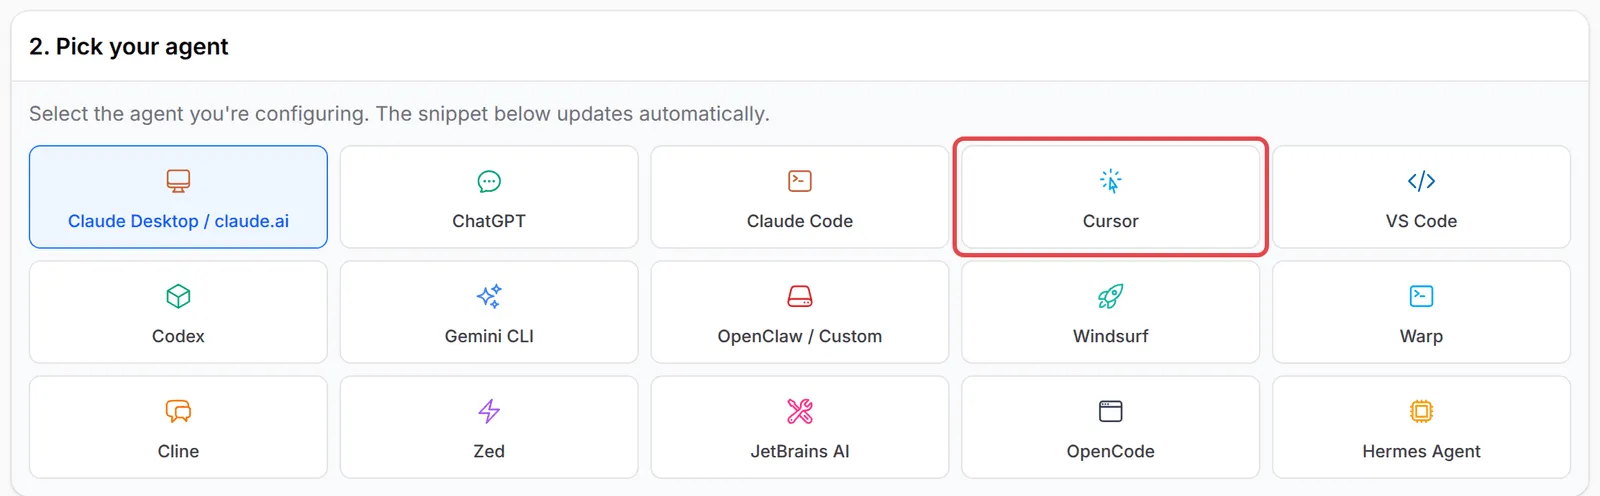
使用OAuth时,App会在你的浏览器打开BCL。登录,检查权限,然后点击Authorize,详情请看Approve the connection。访问权限和撤销方式都和Claude一样。
为MCP创建token
Section titled “为MCP创建token”如果你的App用OAuth,就跳过这个部分。要创建token,你必须是管理员:
-
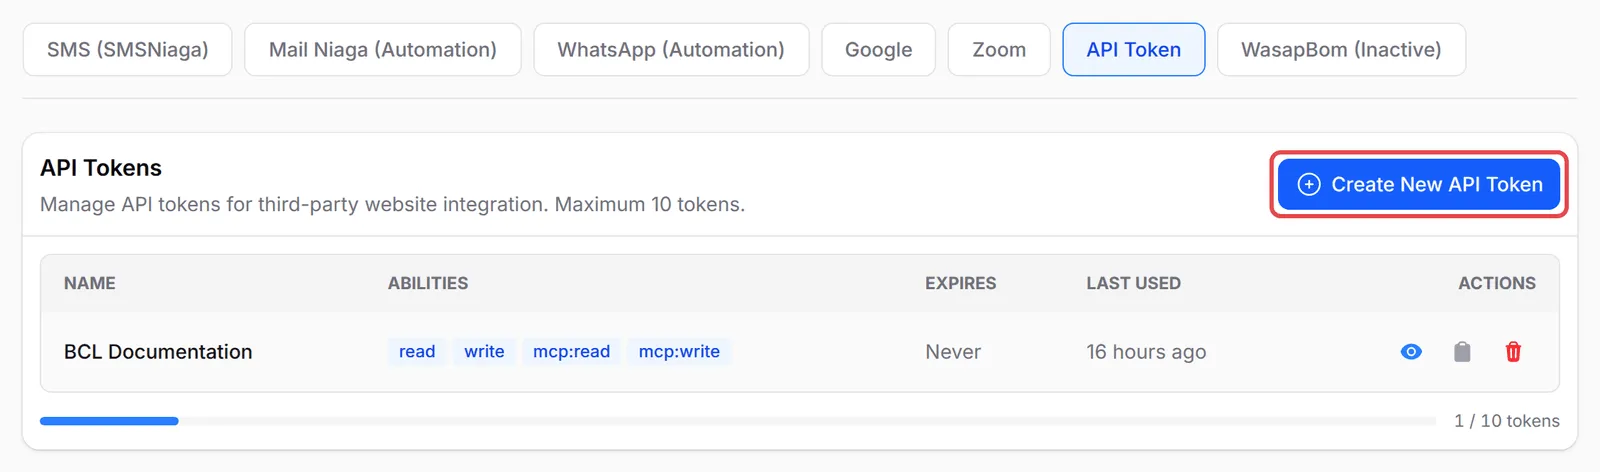
前往Platform Setup → Integrations,打开API Token标签页。
-
点击Create New API Token。
-
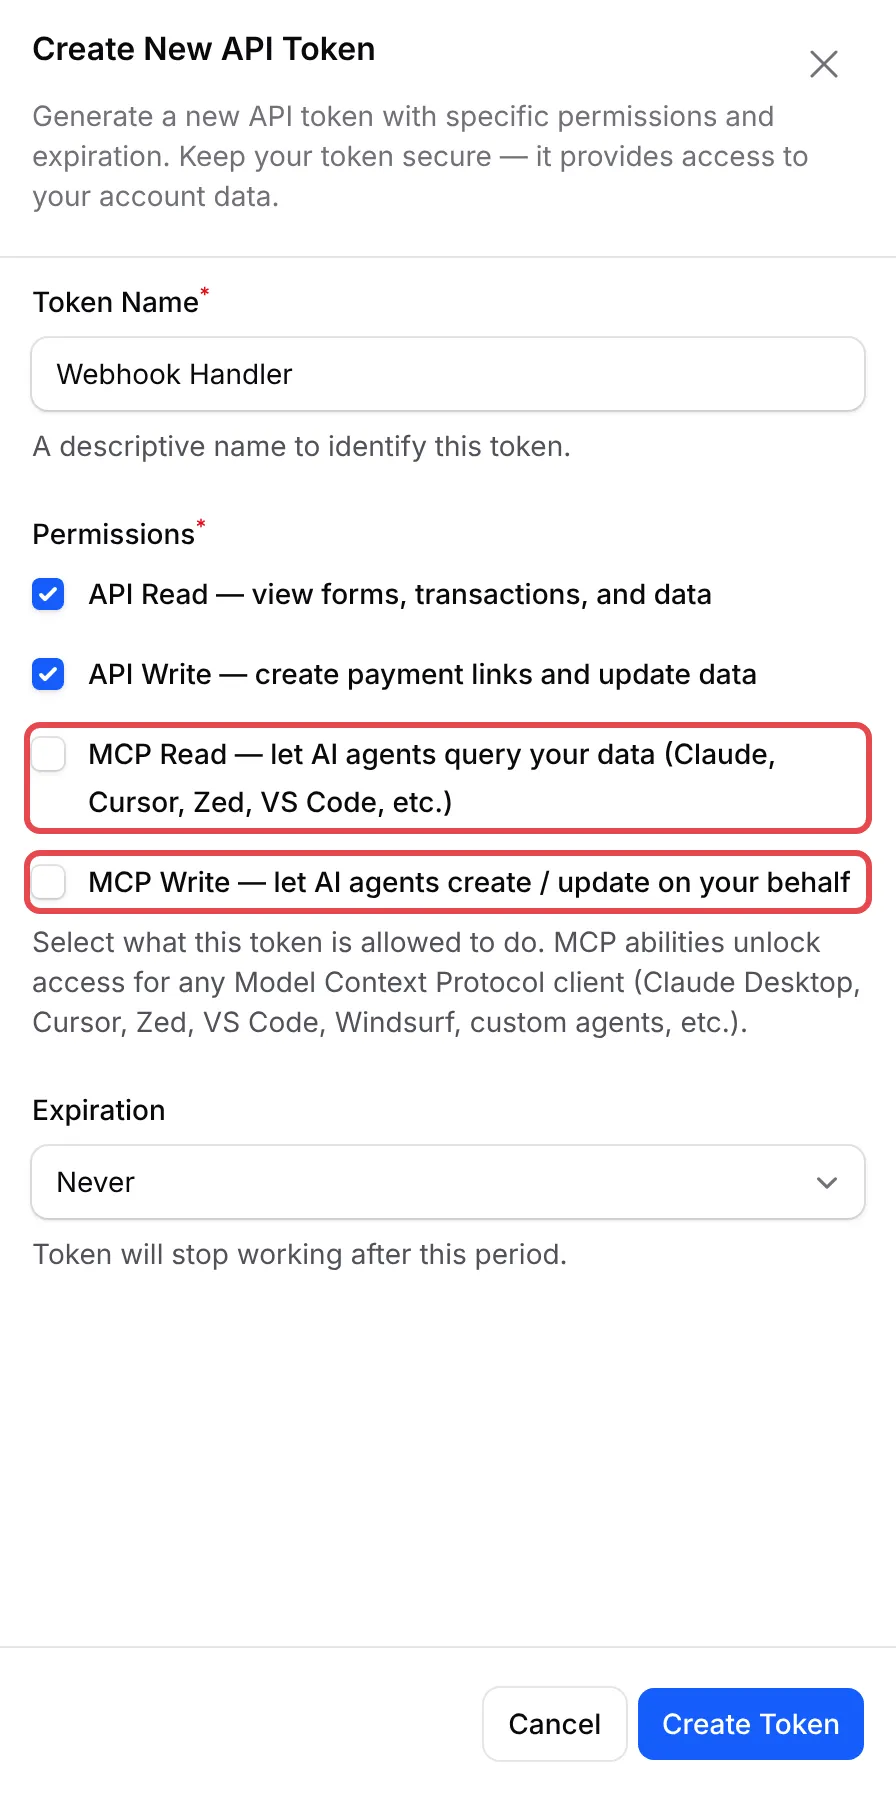
输入一个说明用在哪里的Token Name,例如“Cursor on office laptop”。
-
在Permissions下勾选MCP Read。只有在App需要做更改时,才同时勾选MCP Write。除非同一个token也要调用BCL API,否则取消勾选API Read和API Write。
-
选择Expiration,例如90 days。
-
点击Create Token,然后用复制图标从列表复制token。
更多关于token的资料,包括怎样查看或删除token,请看创建API token。
在下面每段代码里,把<YOUR_PAT_HERE>换成你的token。保留Bearer这个词和它后面的空格。
Claude Code
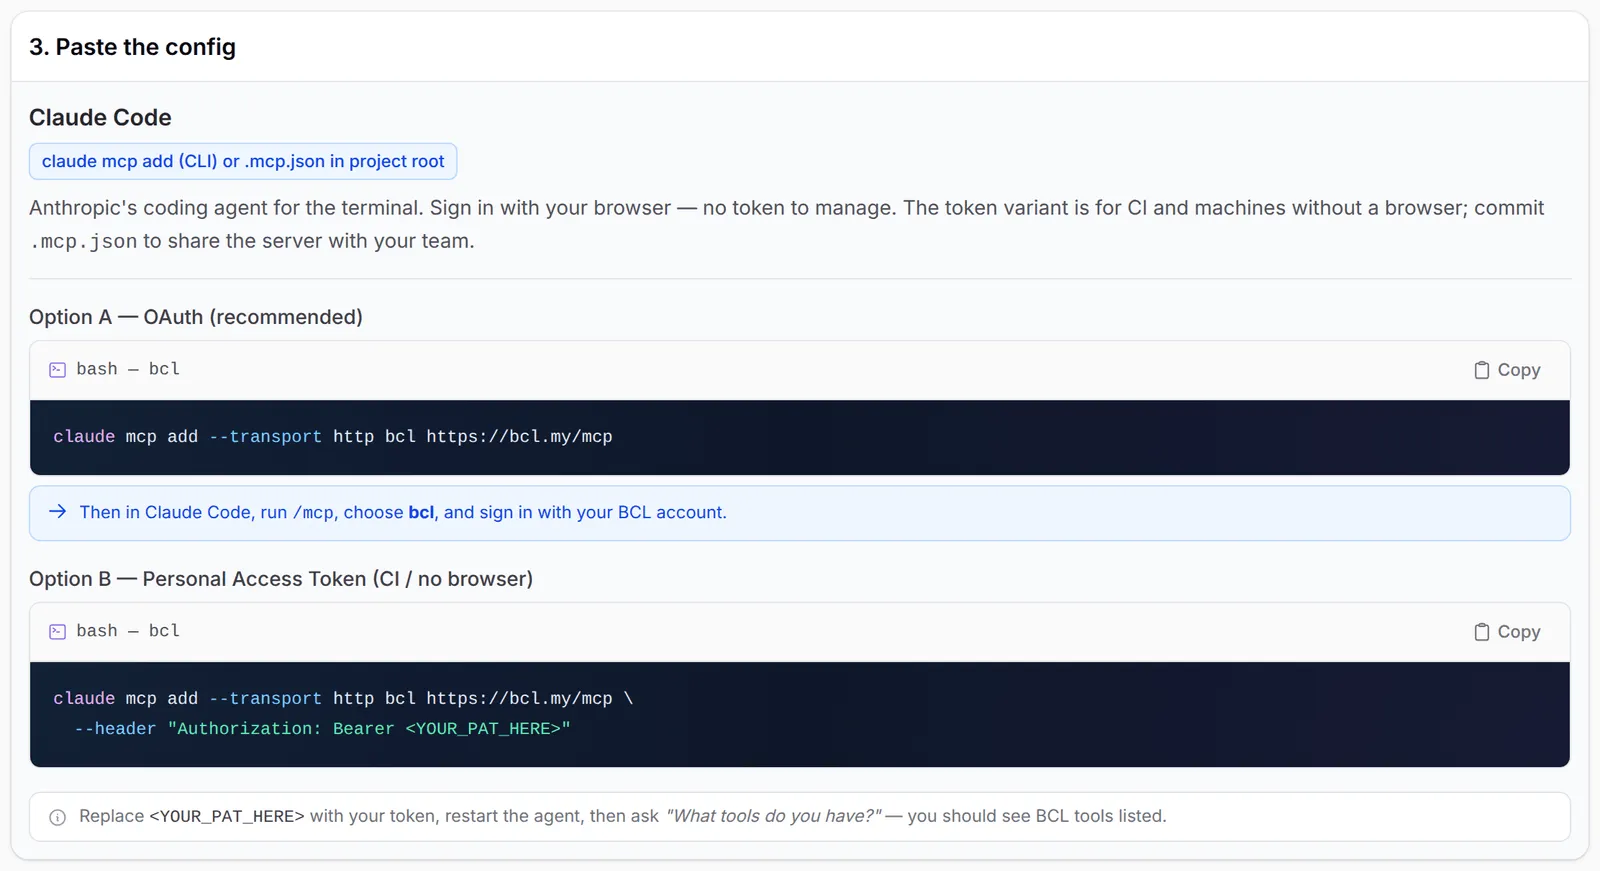
Section titled “Claude Code”Claude Code通过你的浏览器登录。用一个命令添加服务器:
claude mcp add --transport http bcl https://bcl.my/mcp然后在Claude Code运行/mcp,选择bcl,用你的BCL账号登录。
如果是CI或没有浏览器的机器,就改用token:
claude mcp add --transport http bcl https://bcl.my/mcp \ --header "Authorization: Bearer <YOUR_PAT_HERE>"要和团队共享这个服务器,就在项目根目录commit一个.mcp.json文件。不要把token放进去。
Cursor
Section titled “Cursor”把这段保存在~/.cursor/mcp.json(所有项目)或.cursor/mcp.json(单一项目),然后在Settings → MCP开启服务器。Cursor会在服务器旁显示Needs login:点击它,用你的BCL账号登录。
{ "mcpServers": { "bcl": { "url": "https://bcl.my/mcp" } }}改用token的话:
{ "mcpServers": { "bcl": { "url": "https://bcl.my/mcp", "headers": { "Authorization": "Bearer <YOUR_PAT_HERE>" } } }}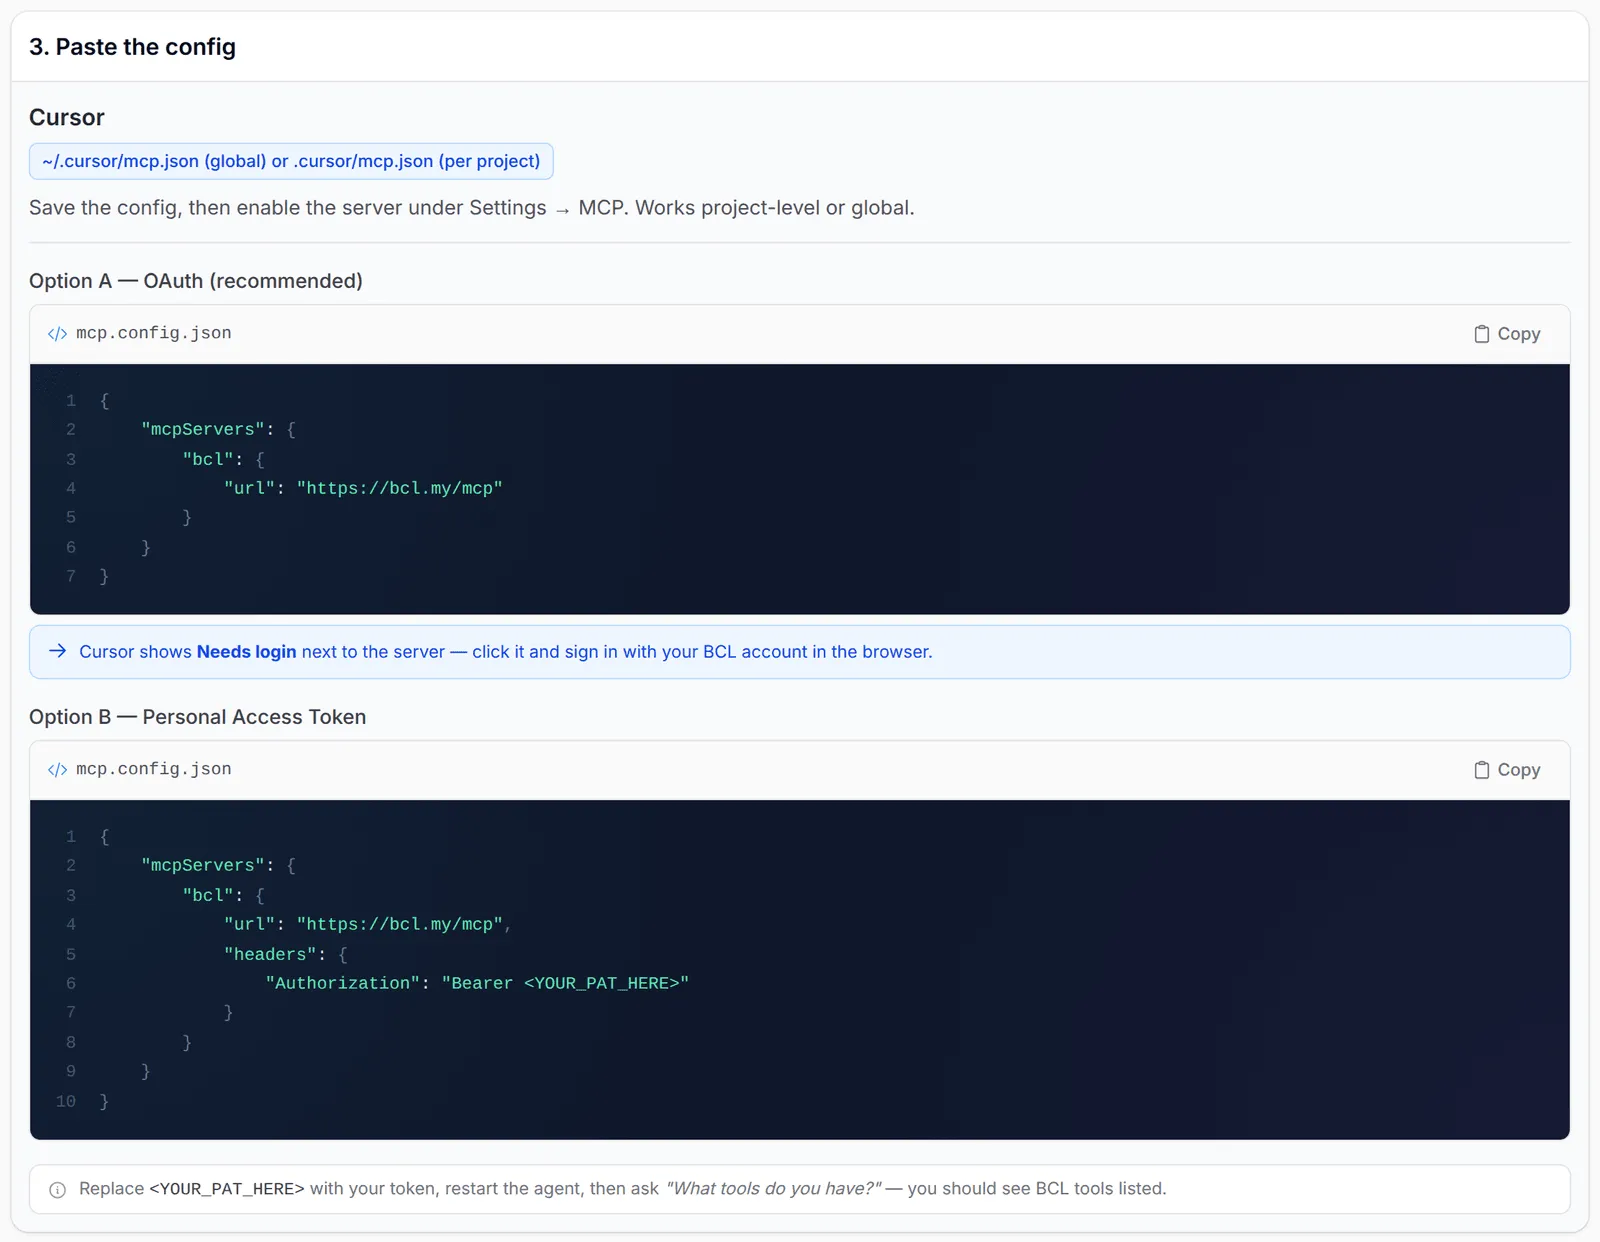
VS Code
Section titled “VS Code”VS Code在GitHub Copilot的Agent Mode使用MCP。在Copilot Chat开启Agent Mode,然后运行:
code --add-mcp '{"name":"bcl","type":"http","url":"https://bcl.my/mcp"}'VS Code会请你信任这个服务器,然后打开浏览器让你登录。使用token的话,把这段放进.vscode/mcp.json。注意VS Code用的是servers,不是mcpServers,而且需要type:
{ "servers": { "bcl": { "type": "http", "url": "https://bcl.my/mcp", "headers": { "Authorization": "Bearer <YOUR_PAT_HERE>" } } }}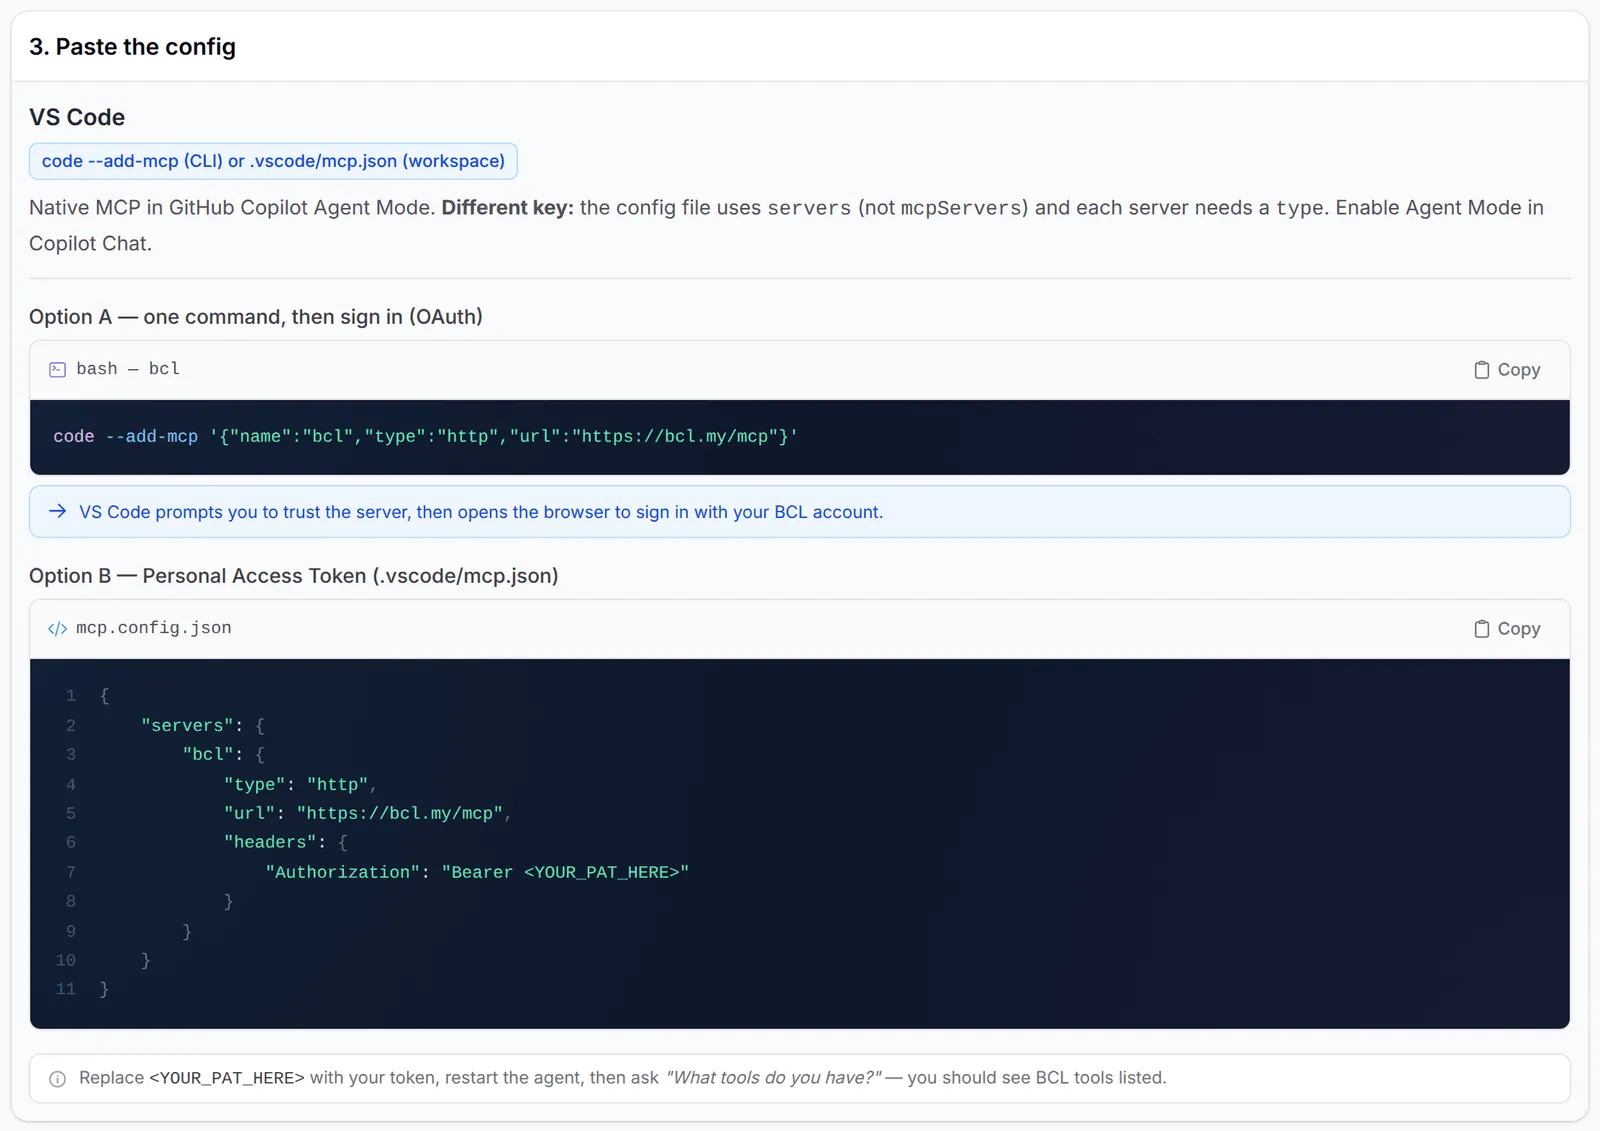
Windsurf
Section titled “Windsurf”Windsurf用serverUrl,不是url。把这段保存在~/.codeium/windsurf/mcp_config.json,然后在Cascade MCP面板点击Refresh。没有header的话,Windsurf会打开浏览器让你登录:
{ "mcpServers": { "bcl": { "serverUrl": "https://bcl.my/mcp" } }}使用token的话,在serverUrl旁加上"headers": { "Authorization": "Bearer <YOUR_PAT_HERE>" }。
Zed原生支持连接远程服务器。最简单的方法是Agent Panel → Settings → Add Remote Server。或者把这段加进~/.config/zed/settings.json;没有header的话,Zed会请你在浏览器登录:
{ "context_servers": { "bcl": { "url": "https://bcl.my/mcp" } }}使用token的话,在url旁加上"headers": { "Authorization": "Bearer <YOUR_PAT_HERE>" }。
Cline需要token。最简单的方法是把这段贴进Cline的聊天里,并把占位符换成你的token:
Add this MCP server to your Cline MCP settings: name "bcl", type "streamableHttp", url https://bcl.my/mcp, with an Authorization header of "Bearer <YOUR_PAT_HERE>". Then confirm the BCL tools are available.或者在MCP Servers → Configure MCP Servers手动添加。Type必须完全是streamableHttp:
{ "mcpServers": { "bcl": { "type": "streamableHttp", "url": "https://bcl.my/mcp", "headers": { "Authorization": "Bearer <YOUR_PAT_HERE>" }, "disabled": false, "autoApprove": [] } }}JetBrains AI
Section titled “JetBrains AI”IntelliJ IDEA、PhpStorm、WebStorm、PyCharm和其他JetBrains IDE都需要token。前往Settings → Tools → AI Assistant → Model Context Protocol (MCP) → Add,选择As JSON,然后粘贴:
{ "mcpServers": { "bcl": { "url": "https://bcl.my/mcp", "headers": { "Authorization": "Bearer <YOUR_PAT_HERE>" } } }}如果IDE没有读取header,就改用mcp-remote桥接。它需要Node.js:
{ "mcpServers": { "bcl": { "command": "npx", "args": [ "-y", "mcp-remote", "https://bcl.my/mcp", "--header", "Authorization: Bearer <YOUR_PAT_HERE>" ] } }}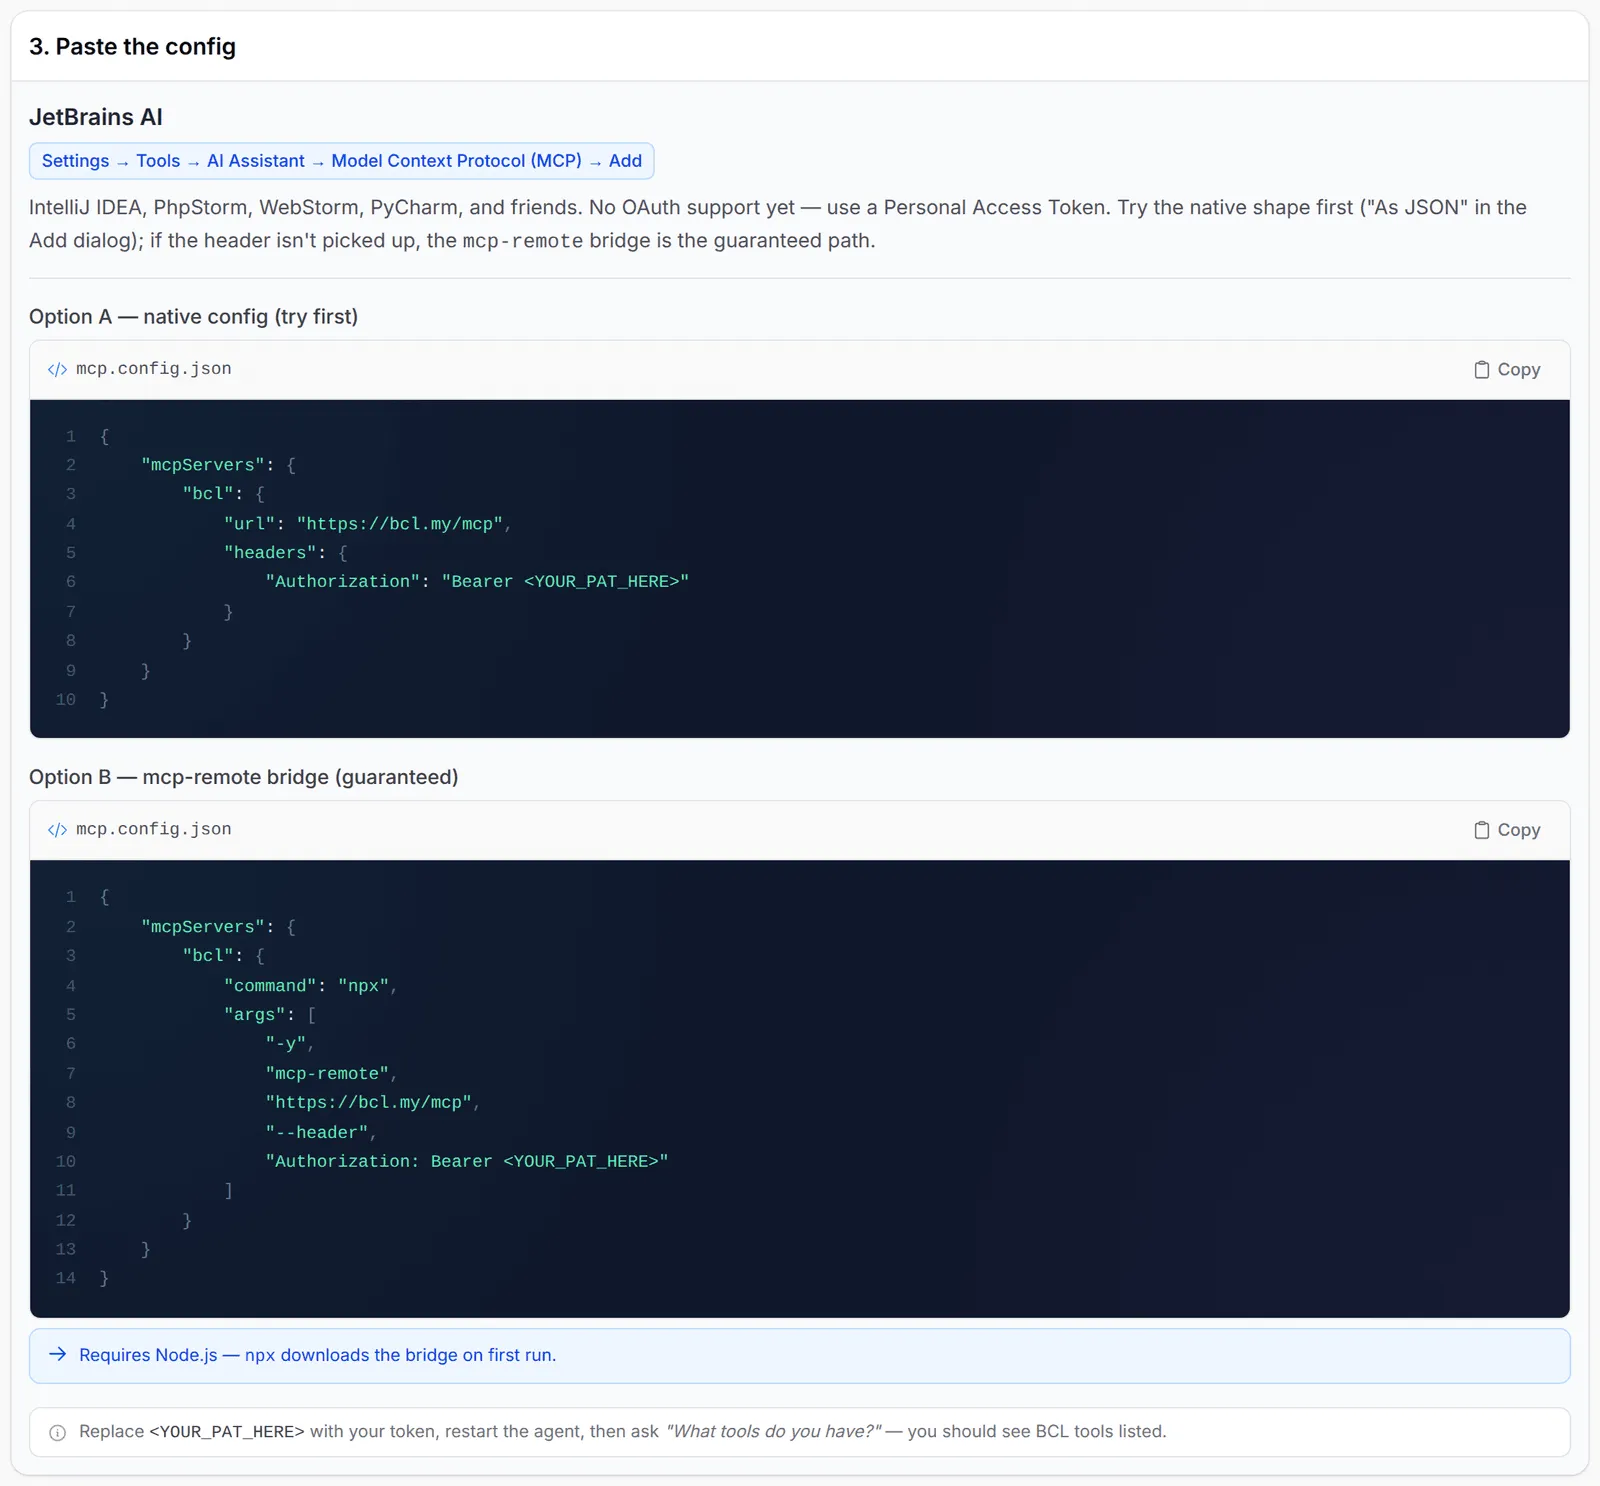
Codex、Gemini CLI、OpenCode & Warp
Section titled “Codex、Gemini CLI、OpenCode & Warp”这些App通过浏览器登录。
Codex(CLI、桌面App和IDE扩展共用一个文件):把这段加进~/.codex/config.toml,然后运行codex mcp login bcl。
[mcp_servers.bcl]url = "https://bcl.my/mcp"oauth_resource = "https://bcl.my/mcp"Gemini CLI:运行下面的命令。第一次使用时,它会打开浏览器让你登录。
gemini mcp add --transport http --scope user bcl https://bcl.my/mcp使用token的话:gemini mcp add --transport http --scope user --header "Authorization: Bearer <YOUR_PAT_HERE>" bcl https://bcl.my/mcp。在~/.gemini/settings.json里,键是httpUrl,不是url。
OpenCode:把这段加进opencode.json,然后运行opencode mcp auth bcl。
{ "$schema": "https://opencode.ai/config.json", "mcp": { "bcl": { "type": "remote", "url": "https://bcl.my/mcp" } }}Warp:在Settings → Agents → MCP servers → + Add,选择Streamable HTTP or SSE Server (URL),然后粘贴:
{ "mcpServers": { "bcl": { "url": "https://bcl.my/mcp" } }}Hermes Agent、OpenClaw和你自己的AI助手
Section titled “Hermes Agent、OpenClaw和你自己的AI助手”这些使用token。
Hermes Agent:把这段加进~/.hermes/config.yaml,然后重启AI助手。
mcp_servers: bcl: url: "https://bcl.my/mcp" headers: Authorization: "Bearer <YOUR_PAT_HERE>"OpenClaw:它默认使用SSE,所以要设置transport:
openclaw mcp set bcl '{"url":"https://bcl.my/mcp","headers":{"Authorization":"Bearer <YOUR_PAT_HERE>"},"transport":"streamable-http"}'你自己的AI助手:把你MCP SDK的Streamable HTTP客户端指向https://bcl.my/mcp,并带上Authorization: Bearer header。要测试连接,就列出工具:
curl -X POST https://bcl.my/mcp \ -H "Authorization: Bearer <YOUR_PAT_HERE>" \ -H "Content-Type: application/json" \ -d '{"jsonrpc":"2.0","method":"tools/list","id":1}'拥有MCP Read和MCP Write的token会拿到62个工具。BCL以普通JSON通过POST回复每个请求,不会开启event stream。工具列表、限制和错误,请看MCP工具参考。
确认可以使用
Section titled “确认可以使用”保存设置后,重启App,然后问它:
What tools do you have? Summarise what I can ask you to do.它应该会列出BCL工具。之后每个请求都会显示在Tools → MCP Audit Log,Auth列会显示pat或oauth。请看查看你的AI助手做了什么。
几个好习惯,让token和连接更容易管理:
- 每个App和每台电脑一个token。如果手提电脑不见了,你只需删除那个token,其他App照常运作。
- 尽量使用OAuth。没有token需要复制,而且你可以在Connected Apps撤销App。
- 为token设置有效期。设为Never的token会一直有效,直到有人删除它。
常见问题
OAuth和Personal Access Token,哪个比较好?
如果你的App支持OAuth,就用OAuth:你在浏览器用BCL账号登录,没有token需要复制,也不怕外泄。JetBrains AI、Cline、Hermes Agent、OpenClaw、脚本和没有浏览器的机器,就用token。
我的token可以用于BCL API,但AI App说不允许。为什么?
MCP需要自己的权限。Token必须有MCP Read(要做更改还需要MCP Write)。只有API Read和API Write会被拒绝。
AI App连接了,但没有显示BCL工具。我要检查什么?
检查地址是否完全是https://bcl.my/mcp、你是否已把<YOUR_PAT_HERE>换成你的token,以及token是否已过期。然后重启App,问它“What tools do you have?”。