
Ask an AI about this page
 ChatGPT
 Claude
 Perplexity
 Google AI Mode
 Microsoft Copilot
 Grok
Grok Mistral Le Chat
Set up other AI apps (Cursor, Claude Code, VS Code and more)
Updated

Coding assistants and AI apps other than Claude and ChatGPT connect to BCL with the same server address, https://bcl.my/mcp. Some sign you in through the browser (OAuth), and some need a Personal Access Token from BCL. This page gives the setup for each app on the Connect AI Agent page.
For claude.ai, Claude Desktop and ChatGPT, see Connect Claude or ChatGPT to BCL.
Pick your app and sign-in method
Section titled “Pick your app and sign-in method”BCL lists 15 apps under Platform Setup → Connect AI Agent, on the Quick start tab. Each one supports the methods below:
| App | OAuth (browser sign-in) | Personal Access Token | Where the setting goes |
|---|---|---|---|
| Claude Desktop / claude.ai | Yes | No | Settings → Connectors → Add custom connector |
| ChatGPT | Yes | No | Settings → Apps & Connectors → Advanced → Developer mode → Create |
| Claude Code | Yes (recommended) | Yes | claude mcp add, or .mcp.json in the project root |
| Cursor | Yes (recommended) | Yes | ~/.cursor/mcp.json (global) or .cursor/mcp.json (project) |
| VS Code (GitHub Copilot) | Yes | Yes | code --add-mcp, or .vscode/mcp.json |
| Codex | Yes | No | ~/.codex/config.toml |
| Gemini CLI | Yes (recommended) | Yes | gemini mcp add, or ~/.gemini/settings.json |
| Windsurf | Yes (recommended) | Yes | ~/.codeium/windsurf/mcp_config.json |
| Warp | Yes | Yes | Settings → Agents → MCP servers → + Add |
| Zed | Yes (recommended) | Yes | Agent Panel → Add Remote Server, or ~/.config/zed/settings.json |
| OpenCode | Yes | No | opencode.json or ~/.config/opencode/opencode.json |
| Cline | No | Yes | MCP Servers → Configure MCP Servers |
| JetBrains AI | No | Yes | Settings → Tools → AI Assistant → Model Context Protocol (MCP) → Add |
| Hermes Agent | No | Yes | ~/.hermes/config.yaml |
| OpenClaw / Custom | No | Yes | openclaw mcp set, or any MCP SDK |
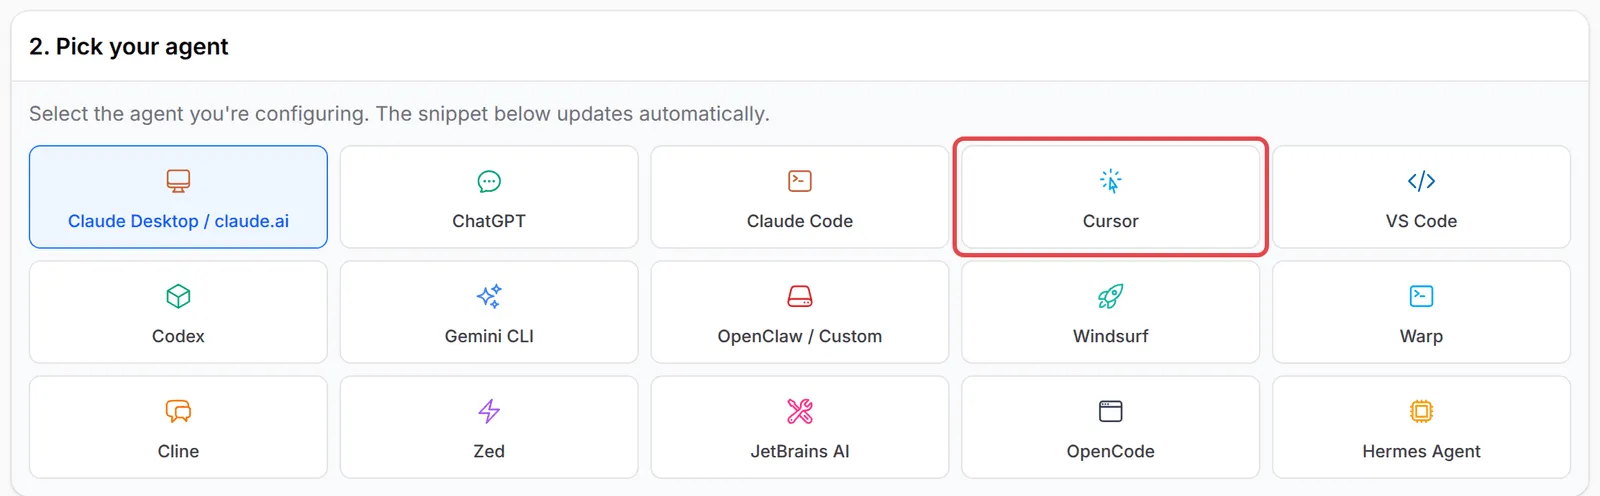
With OAuth, the app opens BCL in your browser. Sign in, check the permissions and click Authorize, as described in Approve the connection. Access and revoking work the same as for Claude.
Create a token for MCP
Section titled “Create a token for MCP”Skip this section if your app uses OAuth. For a token, you must be an Admin:
-
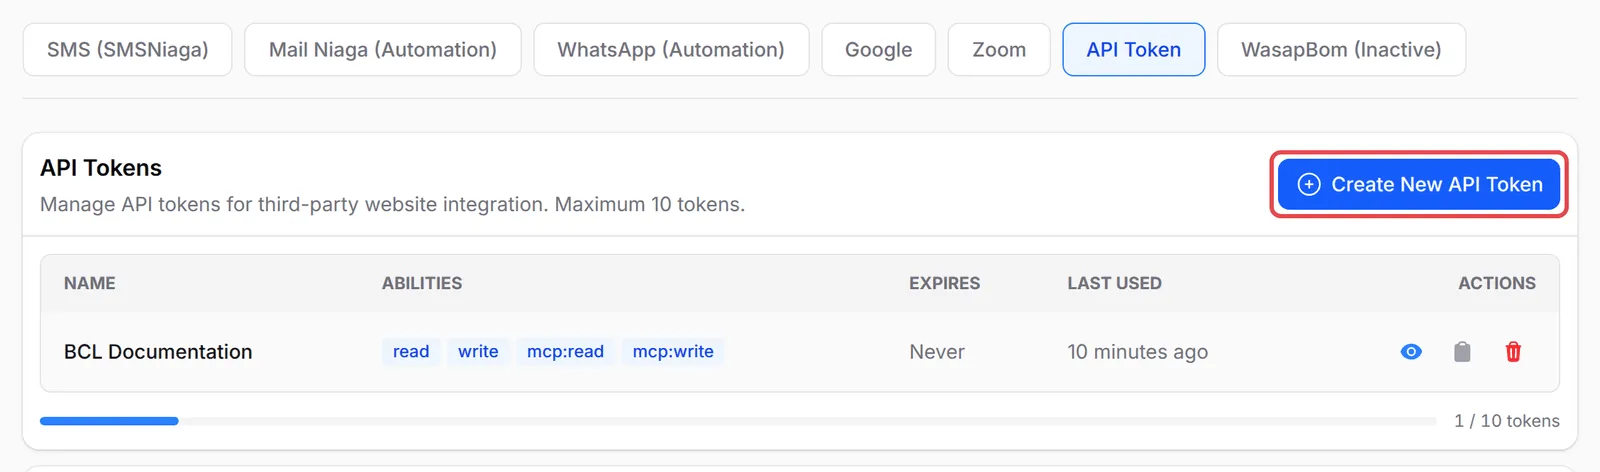
Go to Platform Setup → Integrations and open the API Token tab.
-
Click Create New API Token.
-
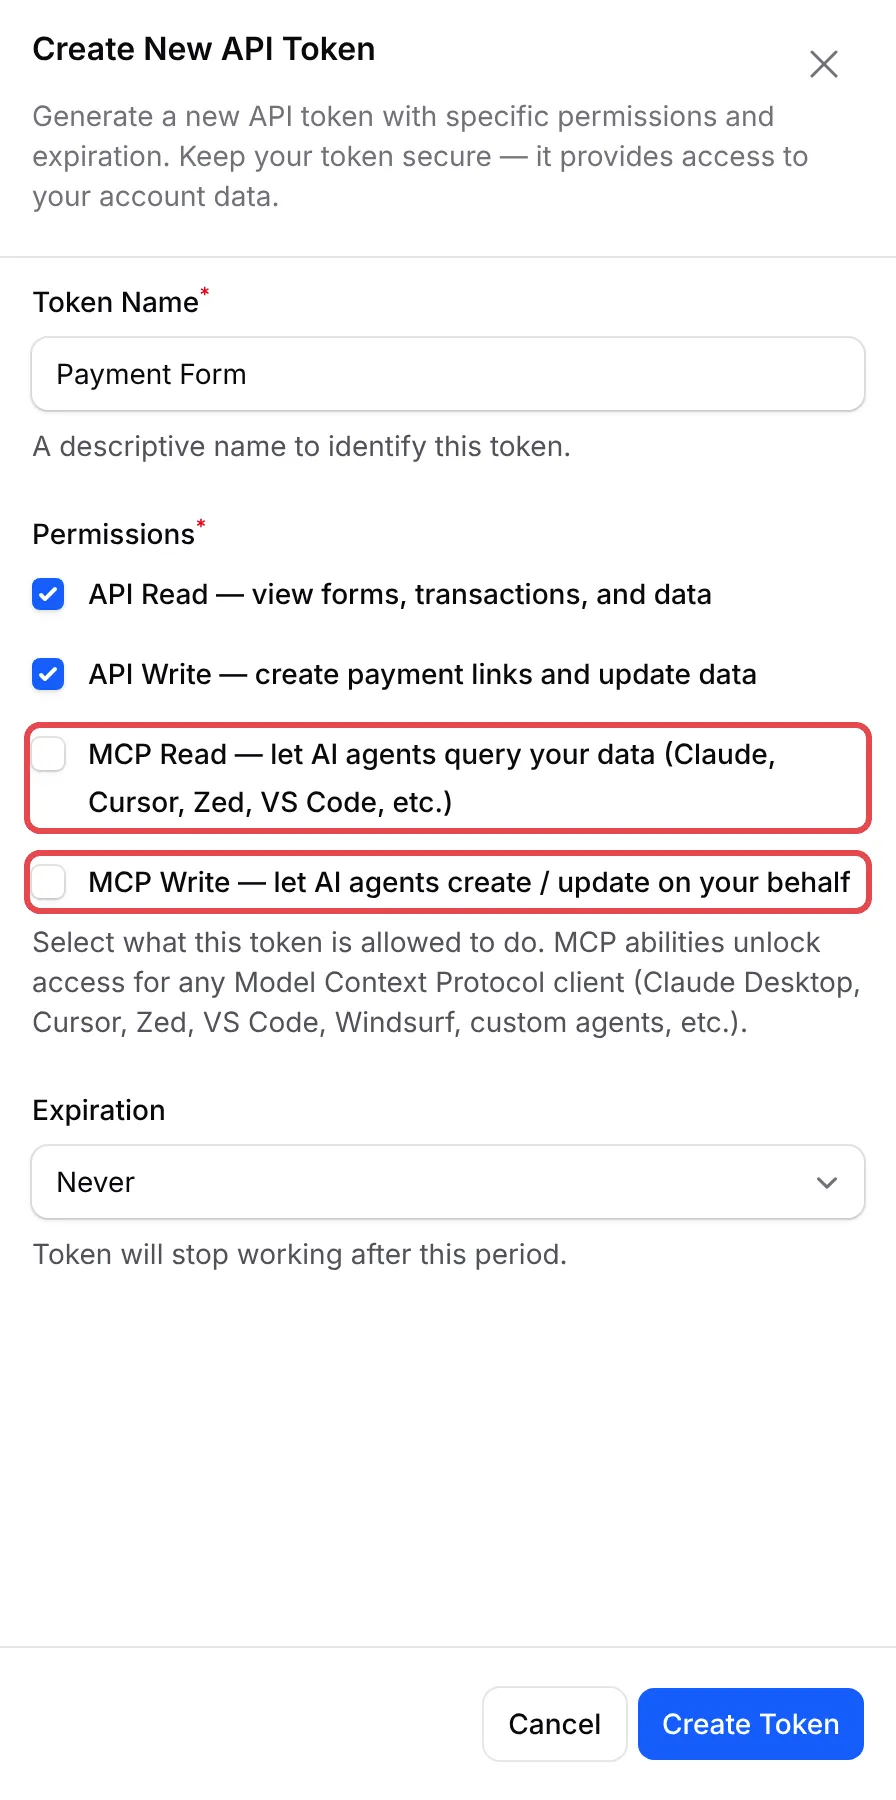
Enter a Token Name that says where you will use it, such as “Cursor on office laptop”.
-
Under Permissions, tick MCP Read. Tick MCP Write too only if the app should make changes. Untick API Read and API Write unless the same token also calls the BCL API.
-
Choose an Expiration, for example 90 days.
-
Click Create Token, then copy the token from the list with the copy icon.
For more on tokens, including how to view or delete one, see Create an API token.
In every snippet below, replace <YOUR_PAT_HERE> with your token. Keep the word Bearer and the space before it.
Claude Code
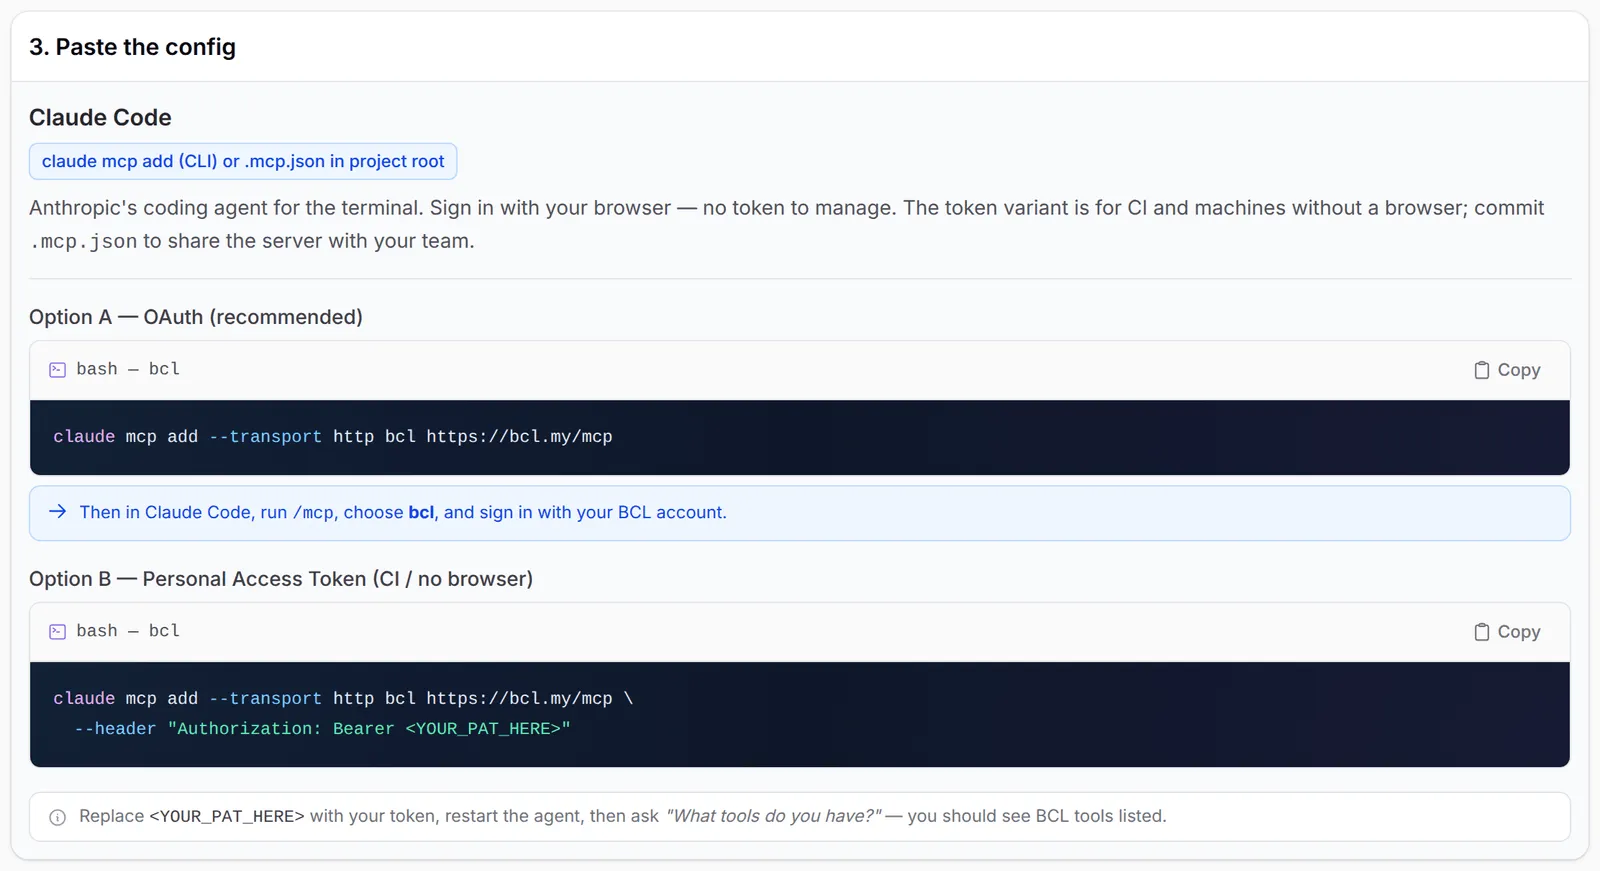
Section titled “Claude Code”Claude Code signs in through your browser. Add the server with one command:
claude mcp add --transport http bcl https://bcl.my/mcpThen run /mcp in Claude Code, choose bcl and sign in with your BCL account.
For CI or a machine without a browser, use a token instead:
claude mcp add --transport http bcl https://bcl.my/mcp \ --header "Authorization: Bearer <YOUR_PAT_HERE>"To share the server with your team, commit a .mcp.json file in the project root. Do not put a token in it.
Cursor
Section titled “Cursor”Save this in ~/.cursor/mcp.json (all projects) or .cursor/mcp.json (one project), then turn the server on under Settings → MCP. Cursor shows Needs login next to the server: click it and sign in with your BCL account.
{ "mcpServers": { "bcl": { "url": "https://bcl.my/mcp" } }}With a token instead:
{ "mcpServers": { "bcl": { "url": "https://bcl.my/mcp", "headers": { "Authorization": "Bearer <YOUR_PAT_HERE>" } } }}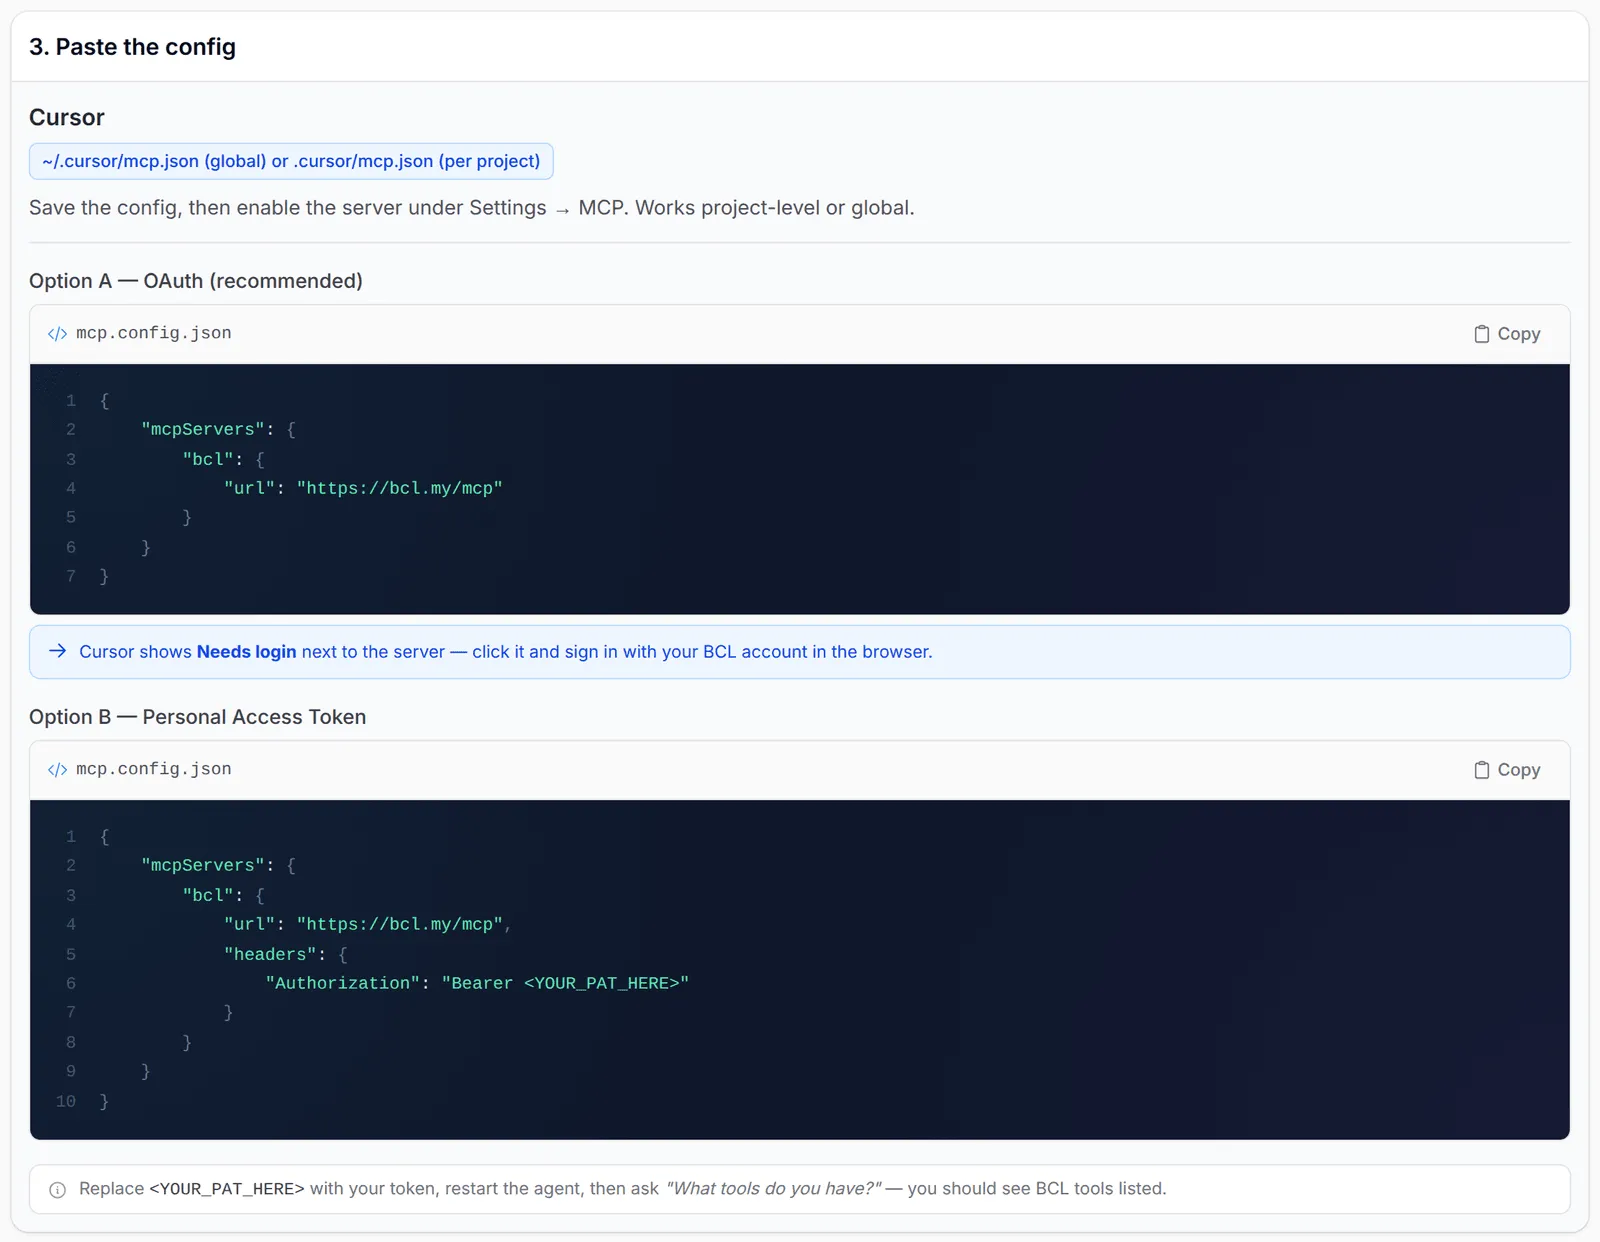
VS Code
Section titled “VS Code”VS Code uses MCP in GitHub Copilot Agent Mode. Turn on Agent Mode in Copilot Chat, then run:
code --add-mcp '{"name":"bcl","type":"http","url":"https://bcl.my/mcp"}'VS Code asks you to trust the server, then opens the browser to sign in. With a token, put this in .vscode/mcp.json. Note that VS Code uses servers, not mcpServers, and needs a type:
{ "servers": { "bcl": { "type": "http", "url": "https://bcl.my/mcp", "headers": { "Authorization": "Bearer <YOUR_PAT_HERE>" } } }}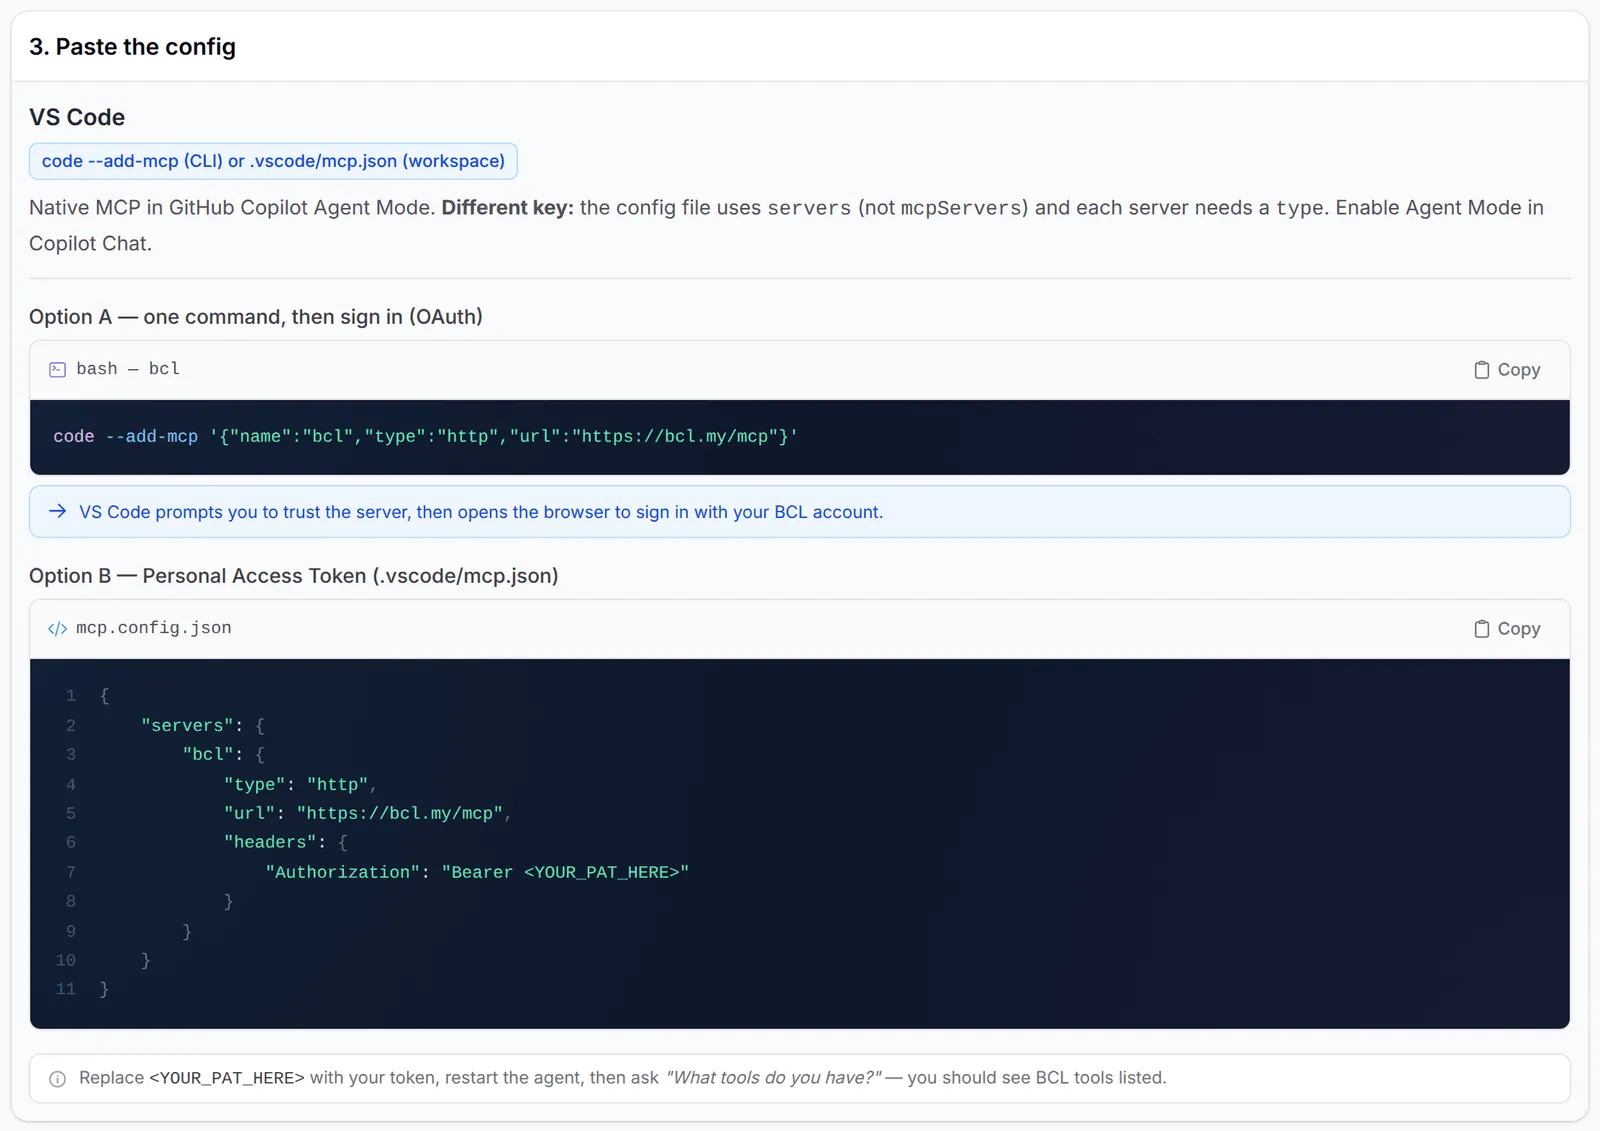
Windsurf
Section titled “Windsurf”Windsurf uses serverUrl instead of url. Save this in ~/.codeium/windsurf/mcp_config.json, then click Refresh in the Cascade MCP panel. With no headers, Windsurf opens the browser to sign in:
{ "mcpServers": { "bcl": { "serverUrl": "https://bcl.my/mcp" } }}For a token, add "headers": { "Authorization": "Bearer <YOUR_PAT_HERE>" } next to serverUrl.
Zed connects to remote servers natively. The easiest way is Agent Panel → Settings → Add Remote Server. Or add this to ~/.config/zed/settings.json; with no headers, Zed asks you to sign in in the browser:
{ "context_servers": { "bcl": { "url": "https://bcl.my/mcp" } }}For a token, add "headers": { "Authorization": "Bearer <YOUR_PAT_HERE>" } next to url.
Cline needs a token. The easiest way is to paste this into a Cline chat, with your token in place of the placeholder:
Add this MCP server to your Cline MCP settings: name "bcl", type "streamableHttp", url https://bcl.my/mcp, with an Authorization header of "Bearer <YOUR_PAT_HERE>". Then confirm the BCL tools are available.Or add it by hand under MCP Servers → Configure MCP Servers. The type must be exactly streamableHttp:
{ "mcpServers": { "bcl": { "type": "streamableHttp", "url": "https://bcl.my/mcp", "headers": { "Authorization": "Bearer <YOUR_PAT_HERE>" }, "disabled": false, "autoApprove": [] } }}JetBrains AI
Section titled “JetBrains AI”IntelliJ IDEA, PhpStorm, WebStorm, PyCharm and the other JetBrains IDEs need a token. Go to Settings → Tools → AI Assistant → Model Context Protocol (MCP) → Add, choose As JSON and paste:
{ "mcpServers": { "bcl": { "url": "https://bcl.my/mcp", "headers": { "Authorization": "Bearer <YOUR_PAT_HERE>" } } }}If the IDE does not pick up the header, use the mcp-remote bridge instead. It needs Node.js:
{ "mcpServers": { "bcl": { "command": "npx", "args": [ "-y", "mcp-remote", "https://bcl.my/mcp", "--header", "Authorization: Bearer <YOUR_PAT_HERE>" ] } }}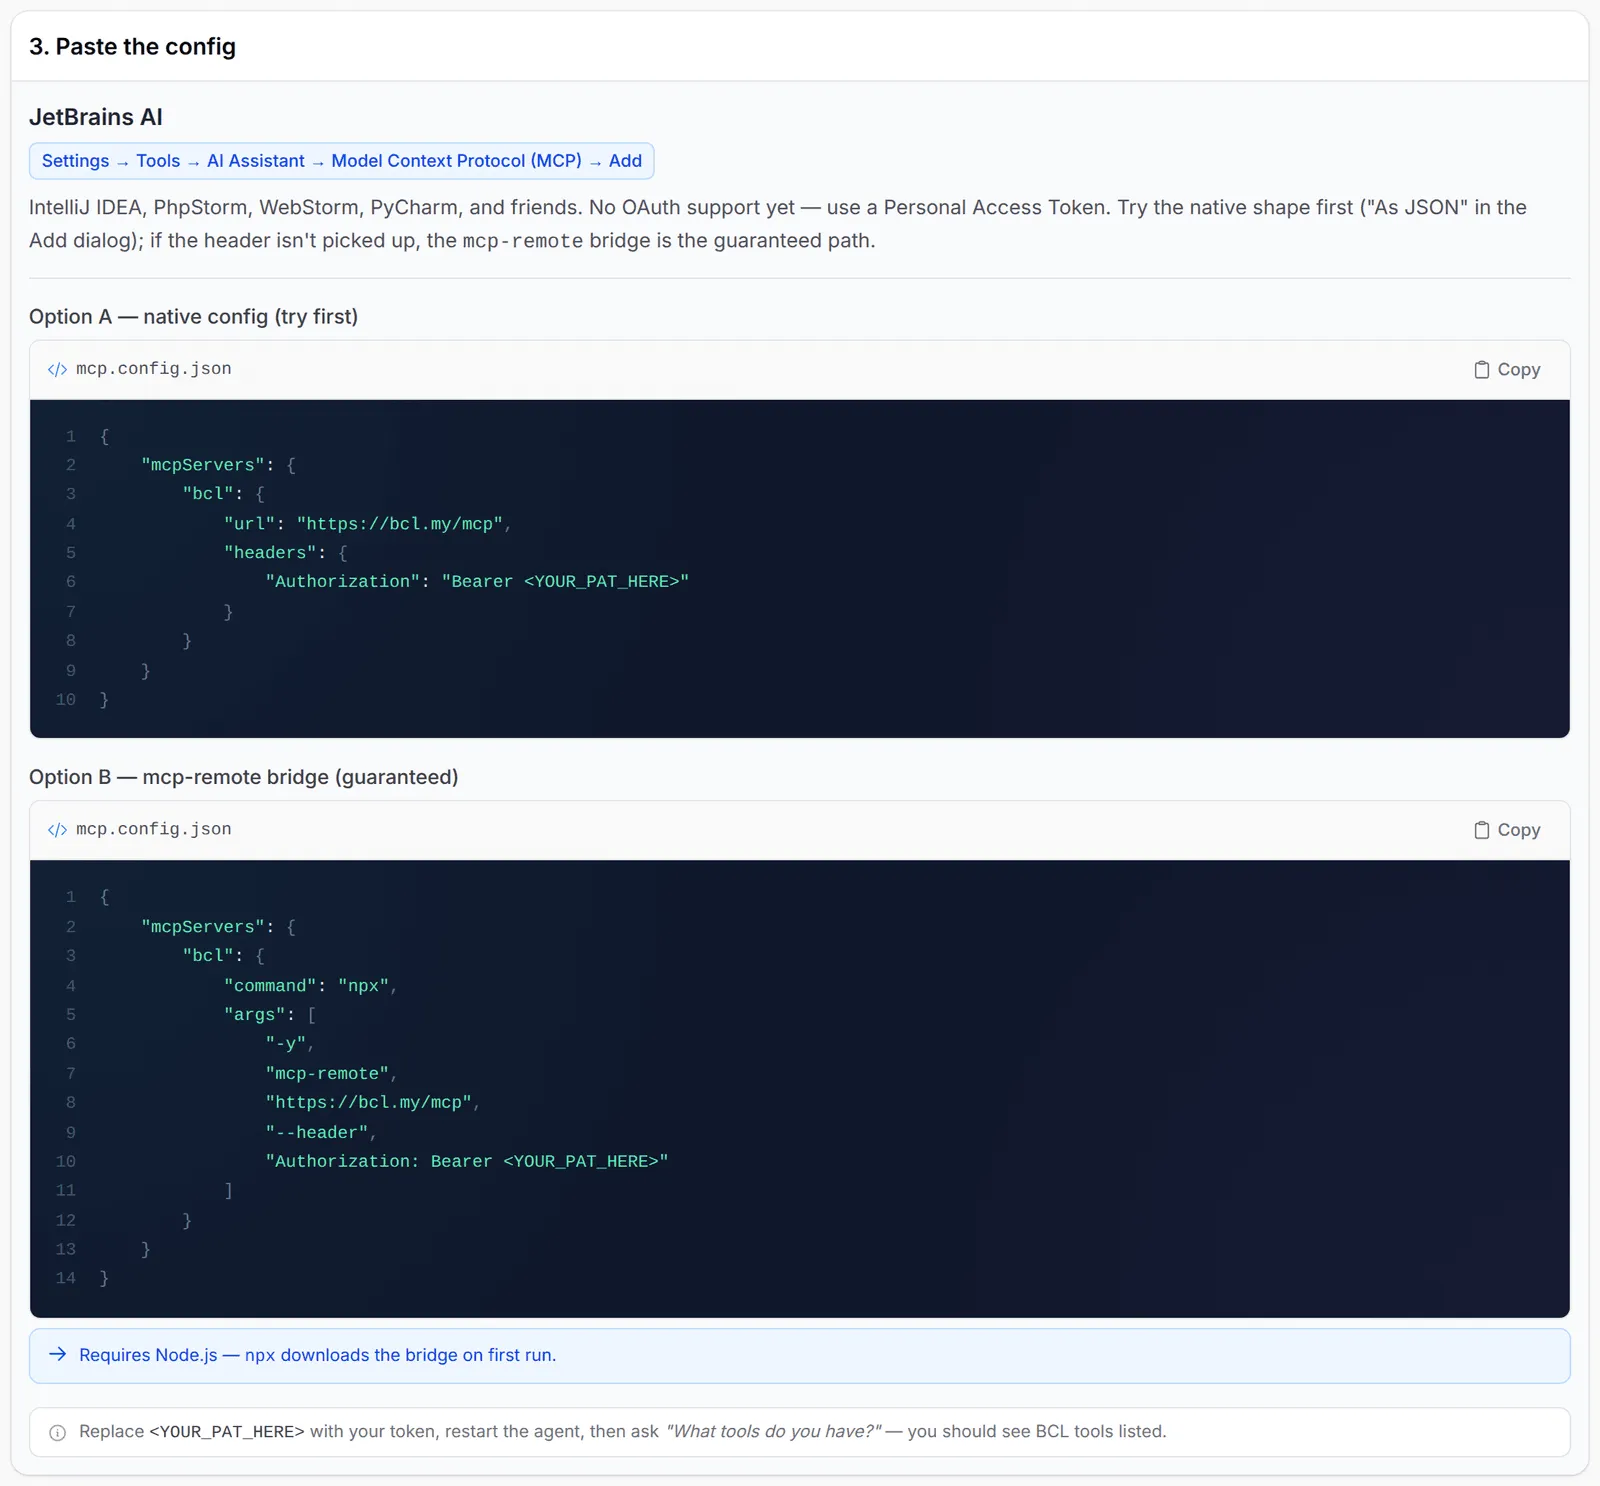
Codex, Gemini CLI, OpenCode and Warp
Section titled “Codex, Gemini CLI, OpenCode and Warp”These apps sign in through the browser.
Codex (CLI, desktop app and IDE extension share one file): add this to ~/.codex/config.toml, then run codex mcp login bcl.
[mcp_servers.bcl]url = "https://bcl.my/mcp"oauth_resource = "https://bcl.my/mcp"Gemini CLI: run the command below. On first use it opens the browser to sign in.
gemini mcp add --transport http --scope user bcl https://bcl.my/mcpWith a token: gemini mcp add --transport http --scope user --header "Authorization: Bearer <YOUR_PAT_HERE>" bcl https://bcl.my/mcp. In ~/.gemini/settings.json, the key is httpUrl, not url.
OpenCode: add this to opencode.json, then run opencode mcp auth bcl.
{ "$schema": "https://opencode.ai/config.json", "mcp": { "bcl": { "type": "remote", "url": "https://bcl.my/mcp" } }}Warp: under Settings → Agents → MCP servers → + Add, choose Streamable HTTP or SSE Server (URL) and paste:
{ "mcpServers": { "bcl": { "url": "https://bcl.my/mcp" } }}Hermes Agent, OpenClaw and your own agent
Section titled “Hermes Agent, OpenClaw and your own agent”These use a token.
Hermes Agent: add this to ~/.hermes/config.yaml, then restart the agent.
mcp_servers: bcl: url: "https://bcl.my/mcp" headers: Authorization: "Bearer <YOUR_PAT_HERE>"OpenClaw: it defaults to SSE, so set the transport:
openclaw mcp set bcl '{"url":"https://bcl.my/mcp","headers":{"Authorization":"Bearer <YOUR_PAT_HERE>"},"transport":"streamable-http"}'Your own agent: point your MCP SDK’s Streamable HTTP client at https://bcl.my/mcp with the Authorization: Bearer header. To test the connection, list the tools:
curl -X POST https://bcl.my/mcp \ -H "Authorization: Bearer <YOUR_PAT_HERE>" \ -H "Content-Type: application/json" \ -d '{"jsonrpc":"2.0","method":"tools/list","id":1}'A token with MCP Read and MCP Write gets back 62 tools. BCL answers every request as plain JSON over POST; it does not open an event stream. For the tool list, limits and errors, see MCP tools reference.
Check that it works
Section titled “Check that it works”After you save the settings, restart the app and ask it:
What tools do you have? Summarise what I can ask you to do.It should list the BCL tools. Each request then shows in Tools → MCP Audit Log, with pat or oauth in the Auth column. See Check what your AI agent did.
A few habits make tokens and connections easier to manage:
- One token per app and computer. If a laptop is lost, you delete only that token and the other apps keep working.
- Prefer OAuth where you can. There is no token to copy, and you can revoke the app under Connected Apps.
- Set an expiry on tokens. A token with Never keeps working until someone deletes it.
Common issues
Which is better, OAuth or a Personal Access Token?
Use OAuth when your app supports it: you sign in with your BCL account in the browser and there is no token to copy or leak. Use a token for JetBrains AI, Cline, Hermes Agent, OpenClaw, scripts and machines without a browser.
My token works with the BCL API but the AI app says it is not allowed. Why?
MCP needs its own permissions. The token must have MCP Read (and MCP Write to make changes). API Read and API Write alone are refused.
The AI app connects but shows no BCL tools. What do I check?
Check the address is exactly https://bcl.my/mcp, that you replaced <YOUR_PAT_HERE> with your token, and that the token is not expired. Then restart the app and ask "What tools do you have?".
Was this article helpful?
Thanks for your feedback.
Sorry this didn't help. WhatsApp us and we'll sort it out with you.