
Ask an AI about this page
 ChatGPT
 Claude
 Perplexity
 Google AI Mode
 Microsoft Copilot
 Grok
Grok Mistral Le Chat
Give buyers access to protected content
Updated

Protected content does nothing until you link it to something you sell. Link it to a payment form item or an event ticket, and every buyer who pays gets their own access straight away. For people who bought before you linked it, one click gives them access too.
Link content to a payment form item
Section titled “Link content to a payment form item”This works on payment forms that sell items (Multiple Items). Save the form once so the items exist, then:
-
Go to Payments → Forms and click Edit on the form.
-
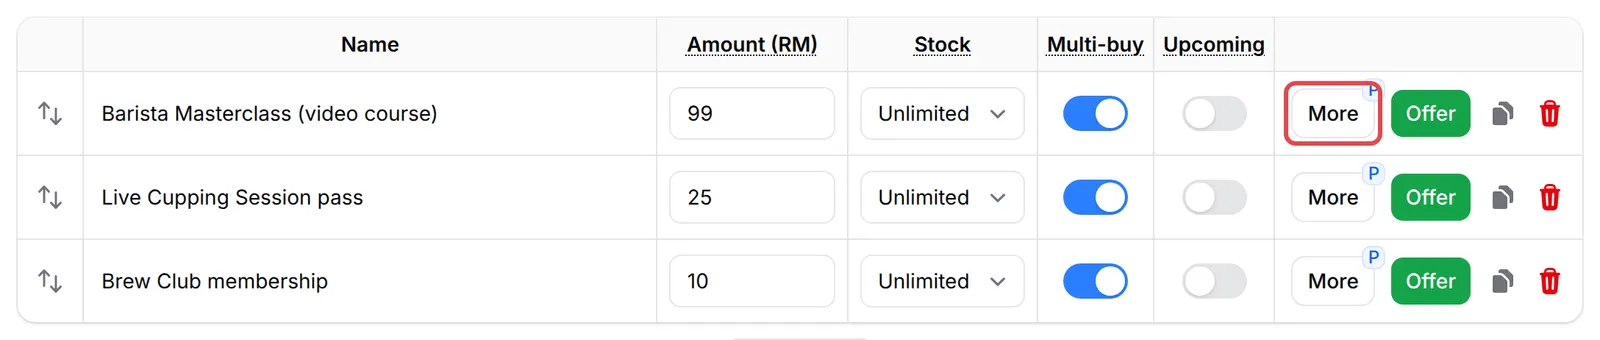
On the Payment Details tab, click More on the item.
-
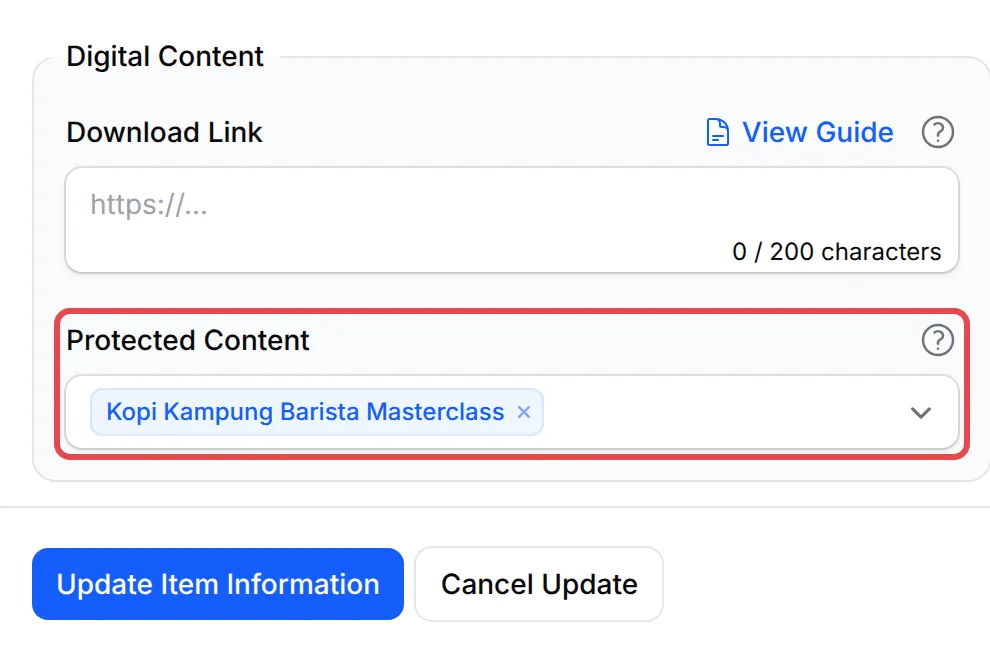
Under Digital Content, pick one or more contents in Protected Content. Only Active content is listed.
-
Click Update Item Information.
-
Click Update Form.

A small P on the item’s More button shows it has protected content. From now on, each paid order for that item gives the buyer access, shows the content on their receipt (if Show on Receipt is on) and sends them the access email.
Link content to an event ticket
Section titled “Link content to an event ticket”Each ticket type can unlock its own content, for example a recording for all tickets and a bonus video for VIP only:
-
Go to Events → Events and click Edit on the event.
-
Under Event Tickets, click Edit on the ticket type’s row.
-
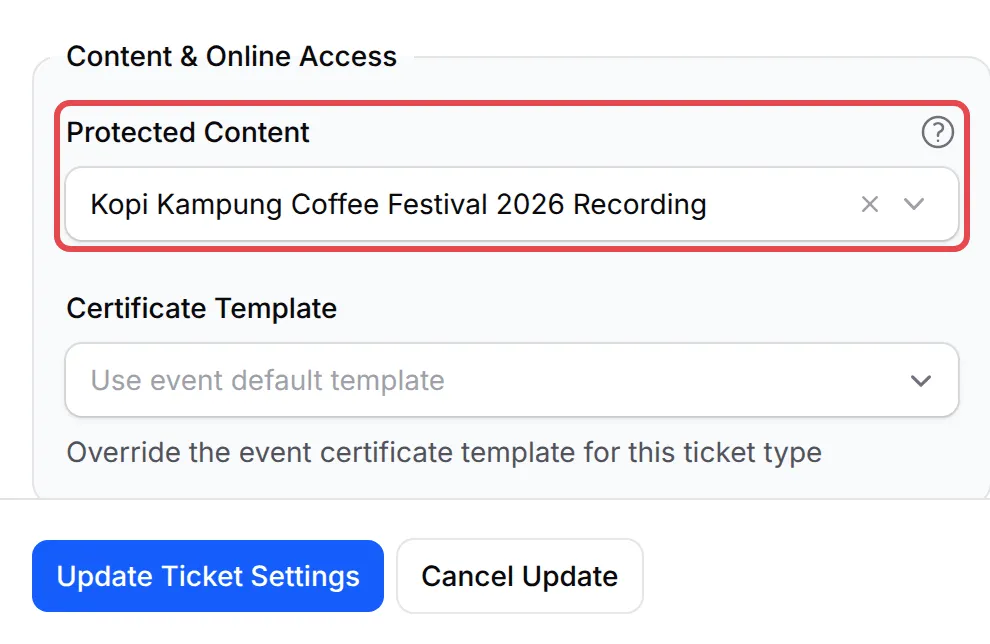
Under Content & Online Access, pick the content in Protected Content.
-
Click Update Ticket Settings.
Everyone who pays for that ticket type gets access, and the ticket’s Edit button shows a small P. The content’s list row shows how many products and tickets use it in Used In.
Give access to people who bought earlier
Section titled “Give access to people who bought earlier”Linking only affects new orders. To give access to everyone who already paid for the linked items or tickets:
-
Go to Protected Content, open the menu next to Edit on the content and click Customer Access.
-
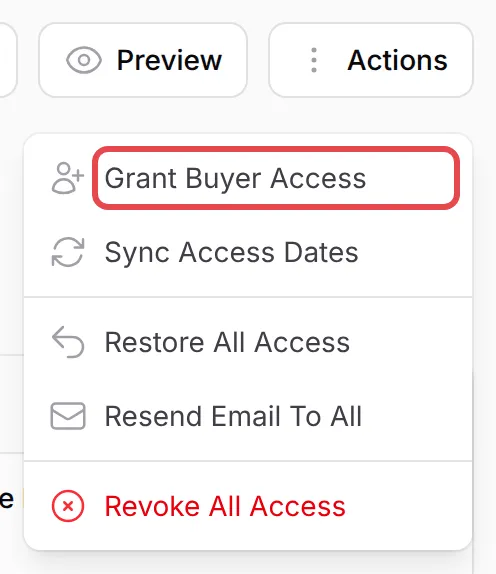
Click Actions, then Grant Buyer Access.
-
The window shows how many Eligible Transactions were found, how many buyers already have access, and which forms or tickets are linked. Turn on Send email notification to buyers if you want each buyer to get their access link by email.
-
Click Yes, Grant Access.
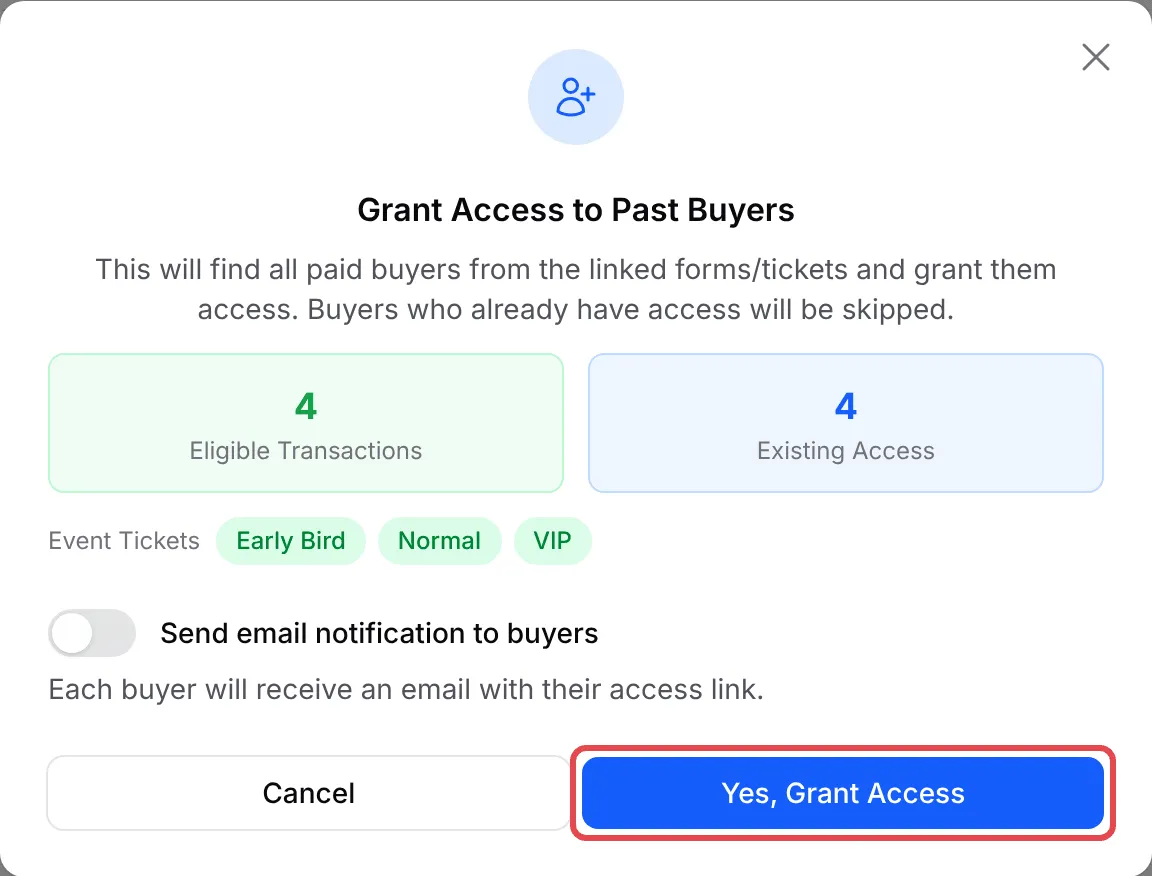
BCL shows how many buyers got access and how many were skipped because they already had it. The buyers then appear on the Customer Access page.
You can do the same for a whole payment form. In Payments → Forms, open the menu on the form’s row and click Transactions, then click Grant Content Access above the list. It grants every protected content linked to the form’s items.

What the buyer gets
Section titled “What the buyer gets”After a successful payment, BCL:
- Creates the buyer’s access, with start and end dates from the content’s Access Type.
- Opens Your Content is Ready! on the receipt, with a button for each content that has Show on Receipt on.
- Emails them Your Protected Content is Now Available, with a button to each content.
Only successful payments give access. Pending, failed and cancelled orders do not.
A few habits keep access simple:
- Link before you launch. Buyers then get access from their first order and you never need to grant it by hand.
- Leave the email off when granting to many old buyers. Turn it on only if you want them all to hear about it now. You can resend it later from Customer Access.
- Linking is copied with the item. When you clone a form or an item, the copy unlocks the same content. Duplicating the content itself does not copy its links.
Common issues
My customer paid but cannot open the content. What should I check?
Open the content's Customer Access page. If the buyer is not listed, the content is probably not linked to the item or ticket they bought. Link it, then use Grant Buyer Access to give access to everyone who already paid.
I linked content to a product I have sold for months. How do earlier buyers get access? One by one?
No. On the content's Customer Access page, click Actions → Grant Buyer Access. BCL finds every paid buyer of the linked items and tickets, gives them access, and skips anyone who already has it.
Can one ticket unlock several pieces of content?
Yes. The Protected Content field on an item or ticket takes more than one content, and the receipt shows a button for each.
Was this article helpful?
Thanks for your feedback.
Sorry this didn't help. WhatsApp us and we'll sort it out with you.