
Ask an AI about this page
 ChatGPT
 Claude
 Perplexity
 Google AI Mode
 Microsoft Copilot
 Grok
Grok Mistral Le Chat
Let a cashier take QR payments
BCL has no “Cashier” role. To give a counter staff member QR Terminal and nothing else, add them as a Team member with only Can View Transactions turned on. That one permission opens QR Terminal for them. Each cashier signs in with their own login, picks their own portal, and sees only the payments they take.
Add the cashier
Section titled “Add the cashier”Only an admin can do this. Have the cashier’s name and email address ready, then:
-
Click your company name at the bottom of the sidebar and choose Team Member.
-
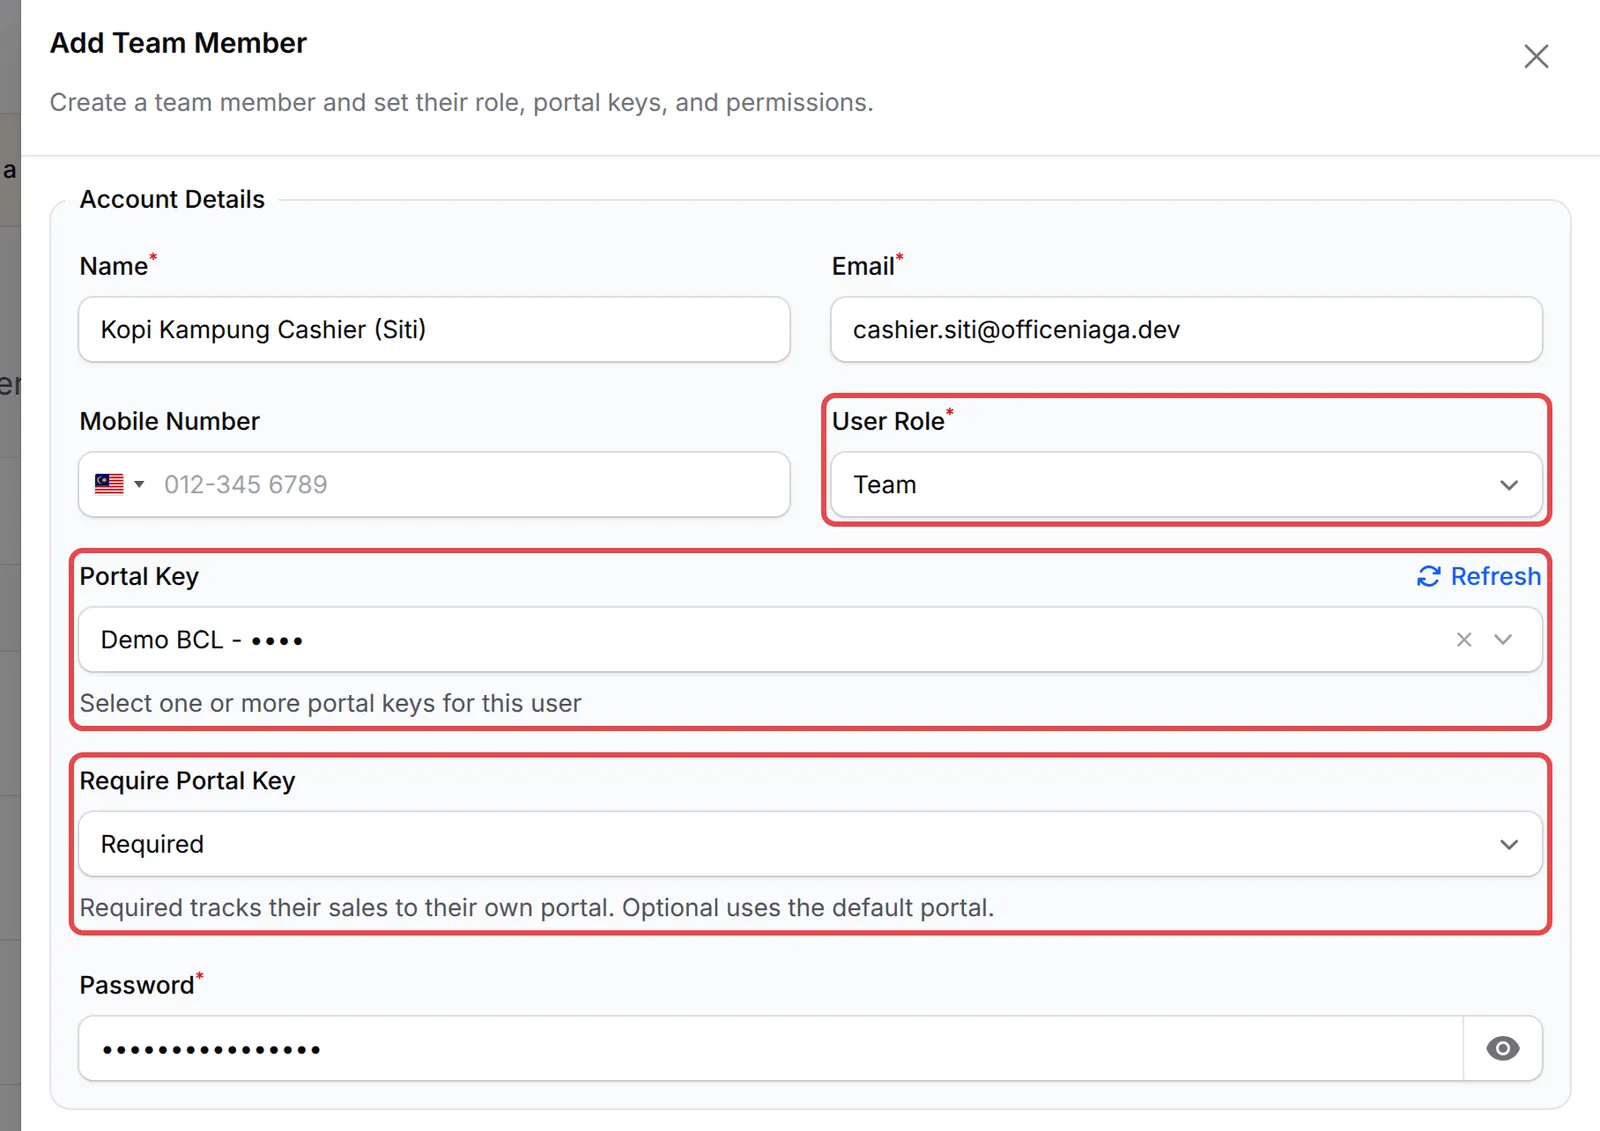
Click Add Team Member and fill in Name and Email.
-
In User Role, choose Team. Crew Event can never open QR Terminal, and Admin can see your whole account.
-
In Portal Key, choose the Bayarcash portal (or portals) for this cashier’s payments. The cashier can only pick from these when they set up QR Terminal, so do not leave it empty.
-
In Require Portal Key, choose Required to track their sales to their own portal.
-
Set a Password of at least 8 characters.
-
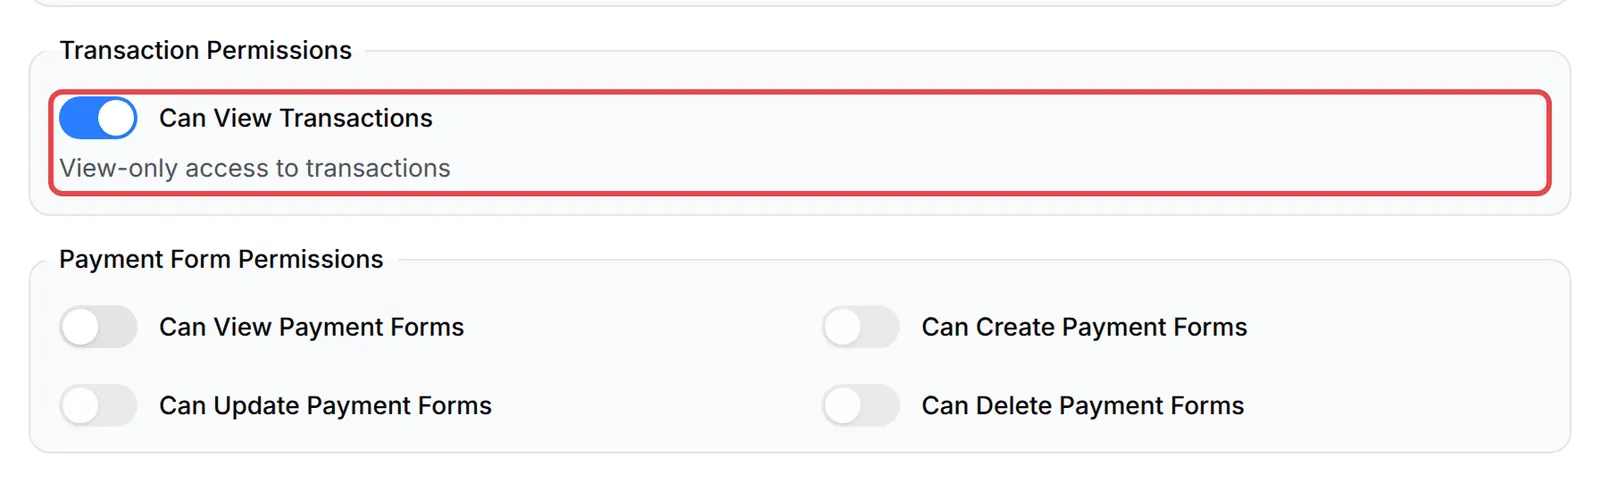
Under Transaction Permissions, turn on Can View Transactions. Leave every other permission off.
-
Click Create. BCL shows Member added.
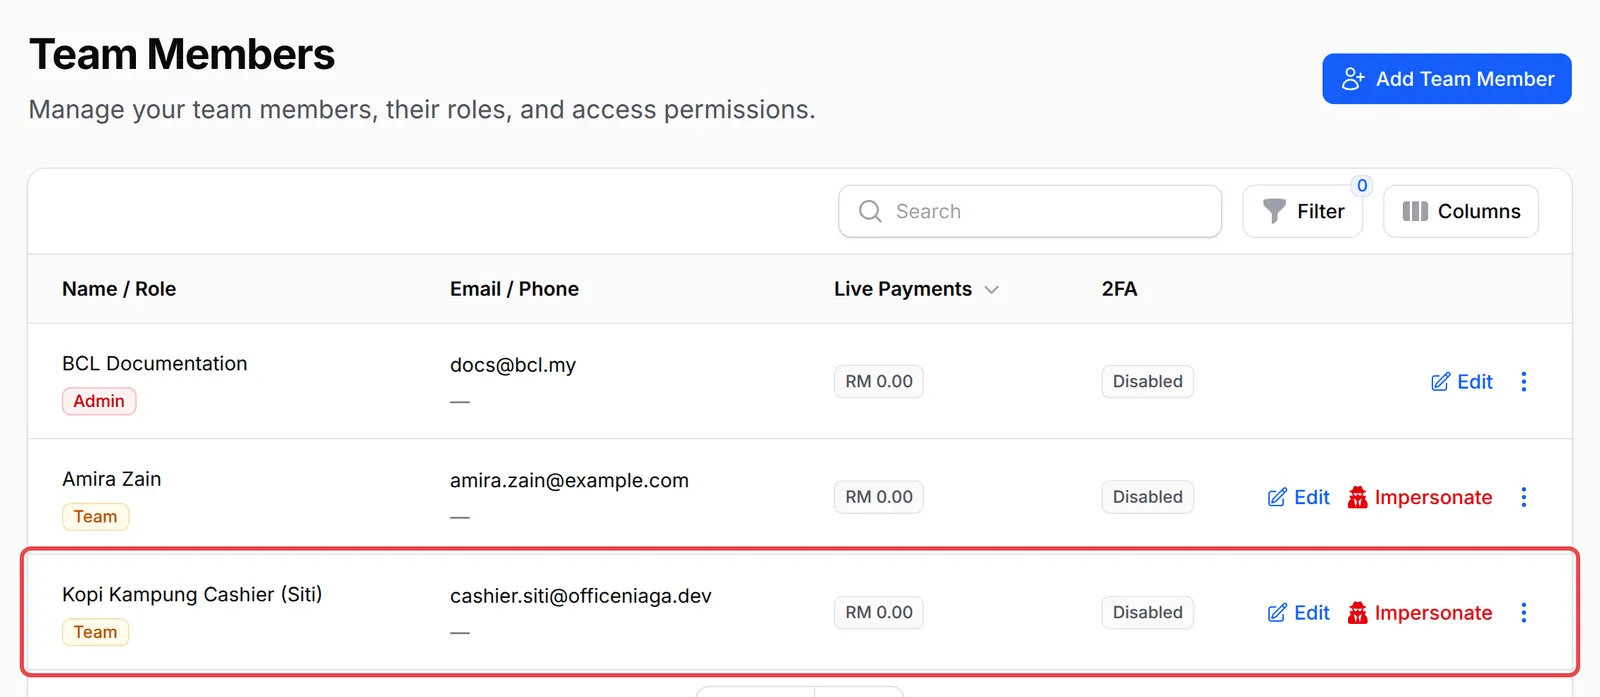
BCL does not send an invitation email. Give the cashier their email and password yourself. See Add a team member for the other fields.
Choose how staff portals work
Section titled “Choose how staff portals work”Require Portal Key on each member follows your account’s setting unless you change it. The account setting is Require staff to select a portal key under Platform Setup → Payment, below Default Portal. It shows once Test Mode is off, and only the account owner can change it.
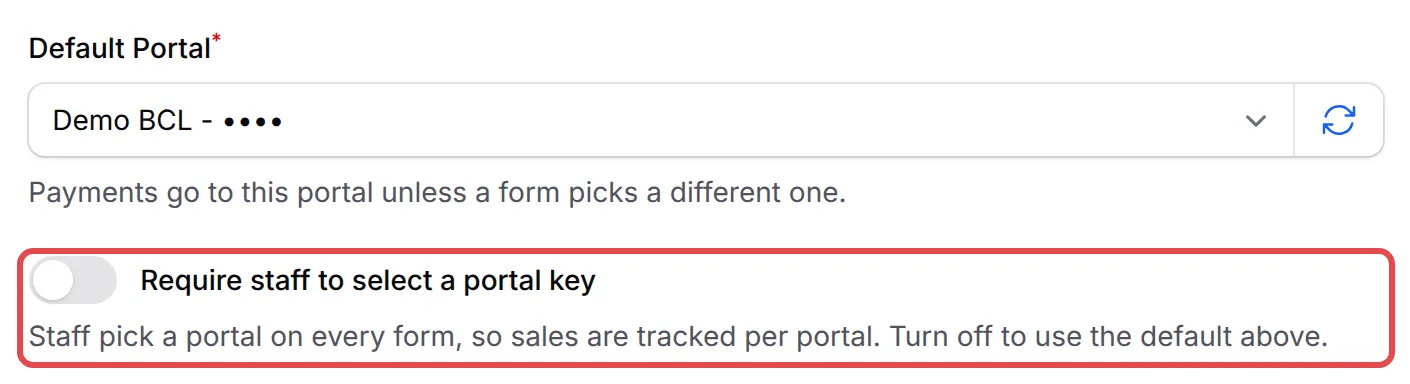
QR Terminal itself always uses the portal the cashier picks in their own settings. The portal rules also apply to the payment links the cashier creates. See Choose a Bayarcash portal key.
Set up QR Terminal on the cashier’s login
Section titled “Set up QR Terminal on the cashier’s login”QR Terminal settings belong to each person, so the cashier does this once, signed in as themselves:
-
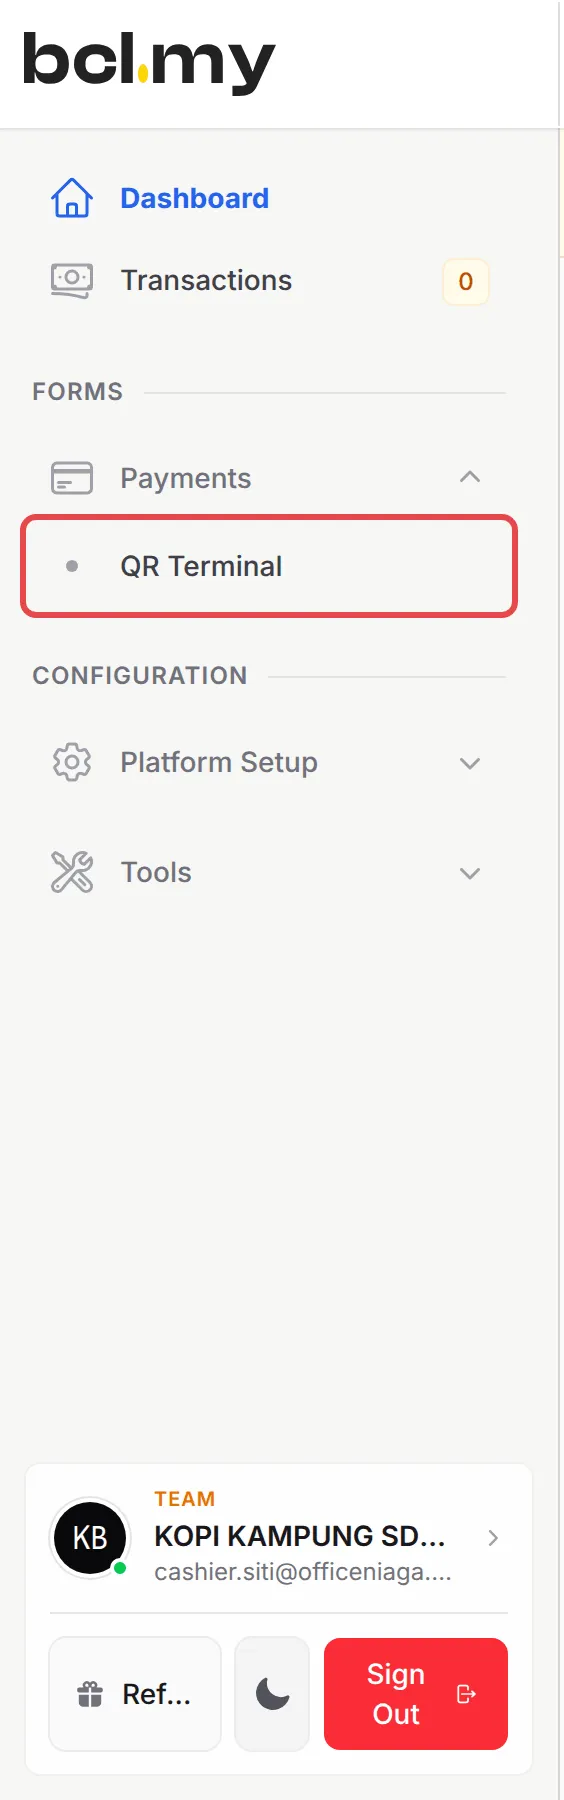
In the sidebar, click Payments → QR Terminal.
-
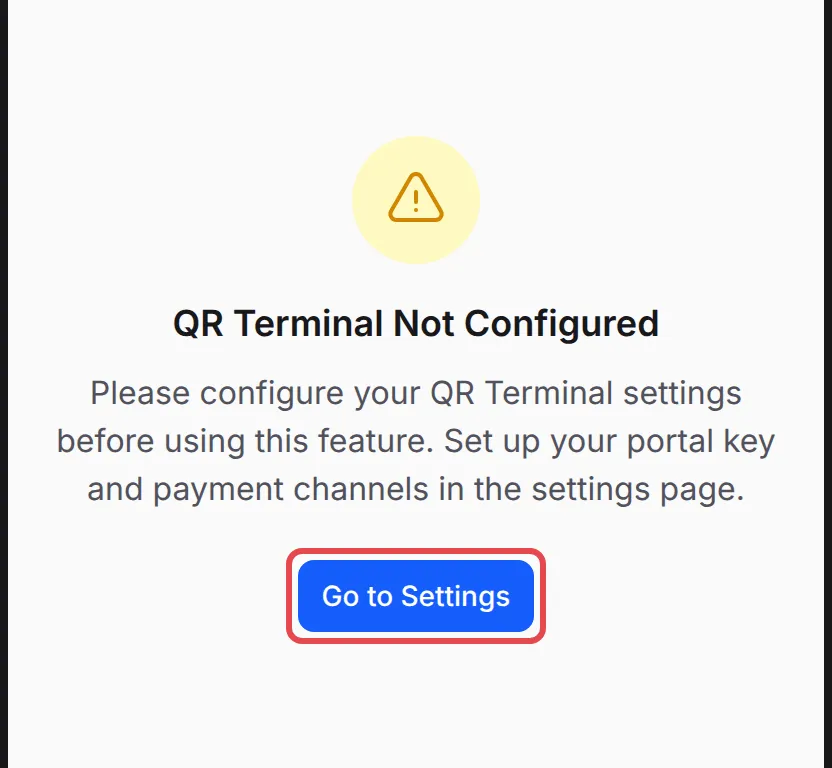
The first time, the terminal shows QR Terminal Not Configured. Click Go to Settings.
-
On QR Terminal Settings, choose a Portal Key. The list shows only the portals the admin gave this cashier.
-
In QR Payment Channels, choose the channels to offer, such as DuitNow QR.
-
Click Save QR Terminal Settings. The cashier sees QR Terminal settings saved successfully.
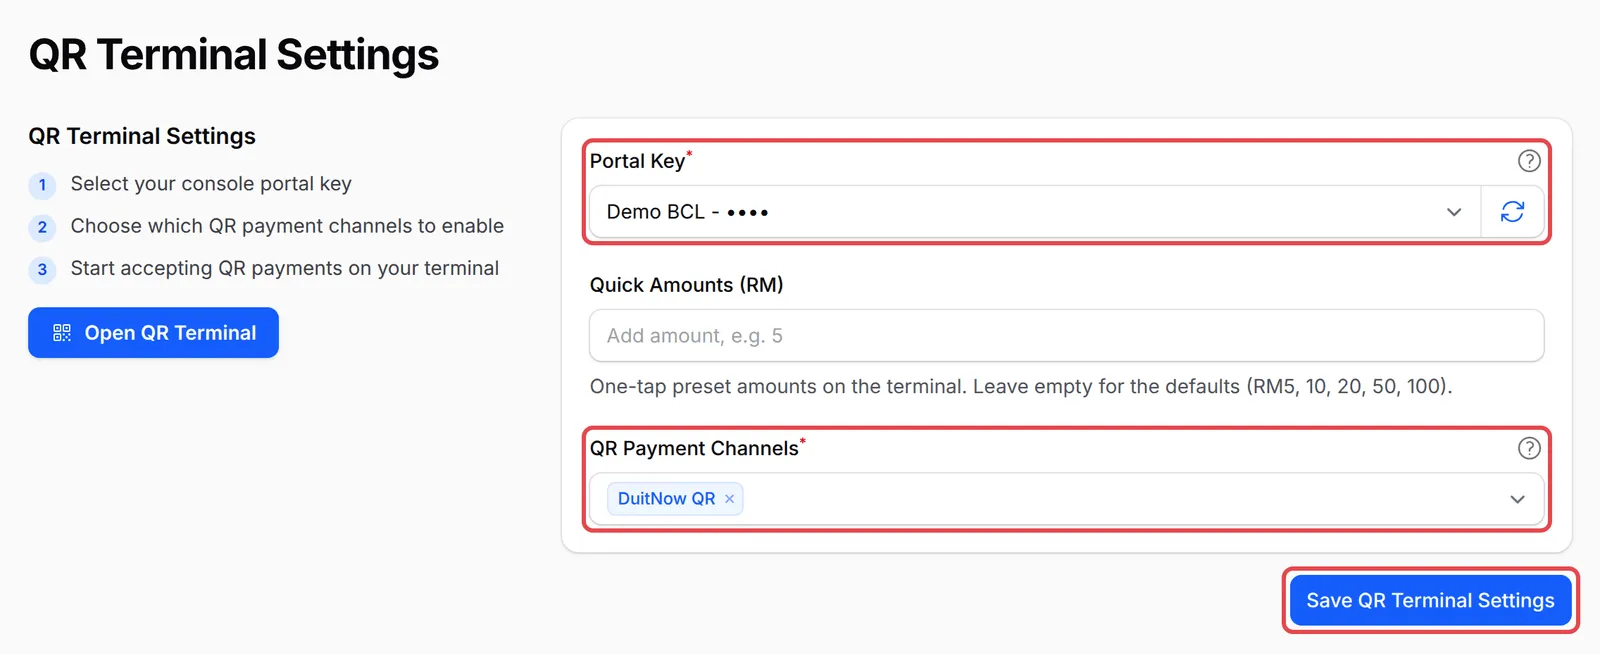
Only the cashier’s own login can save these settings. As an admin, you control which portals they can pick through Portal Key in Team Members.
Take a payment
Section titled “Take a payment”The cashier takes each payment the same way as the owner:
-
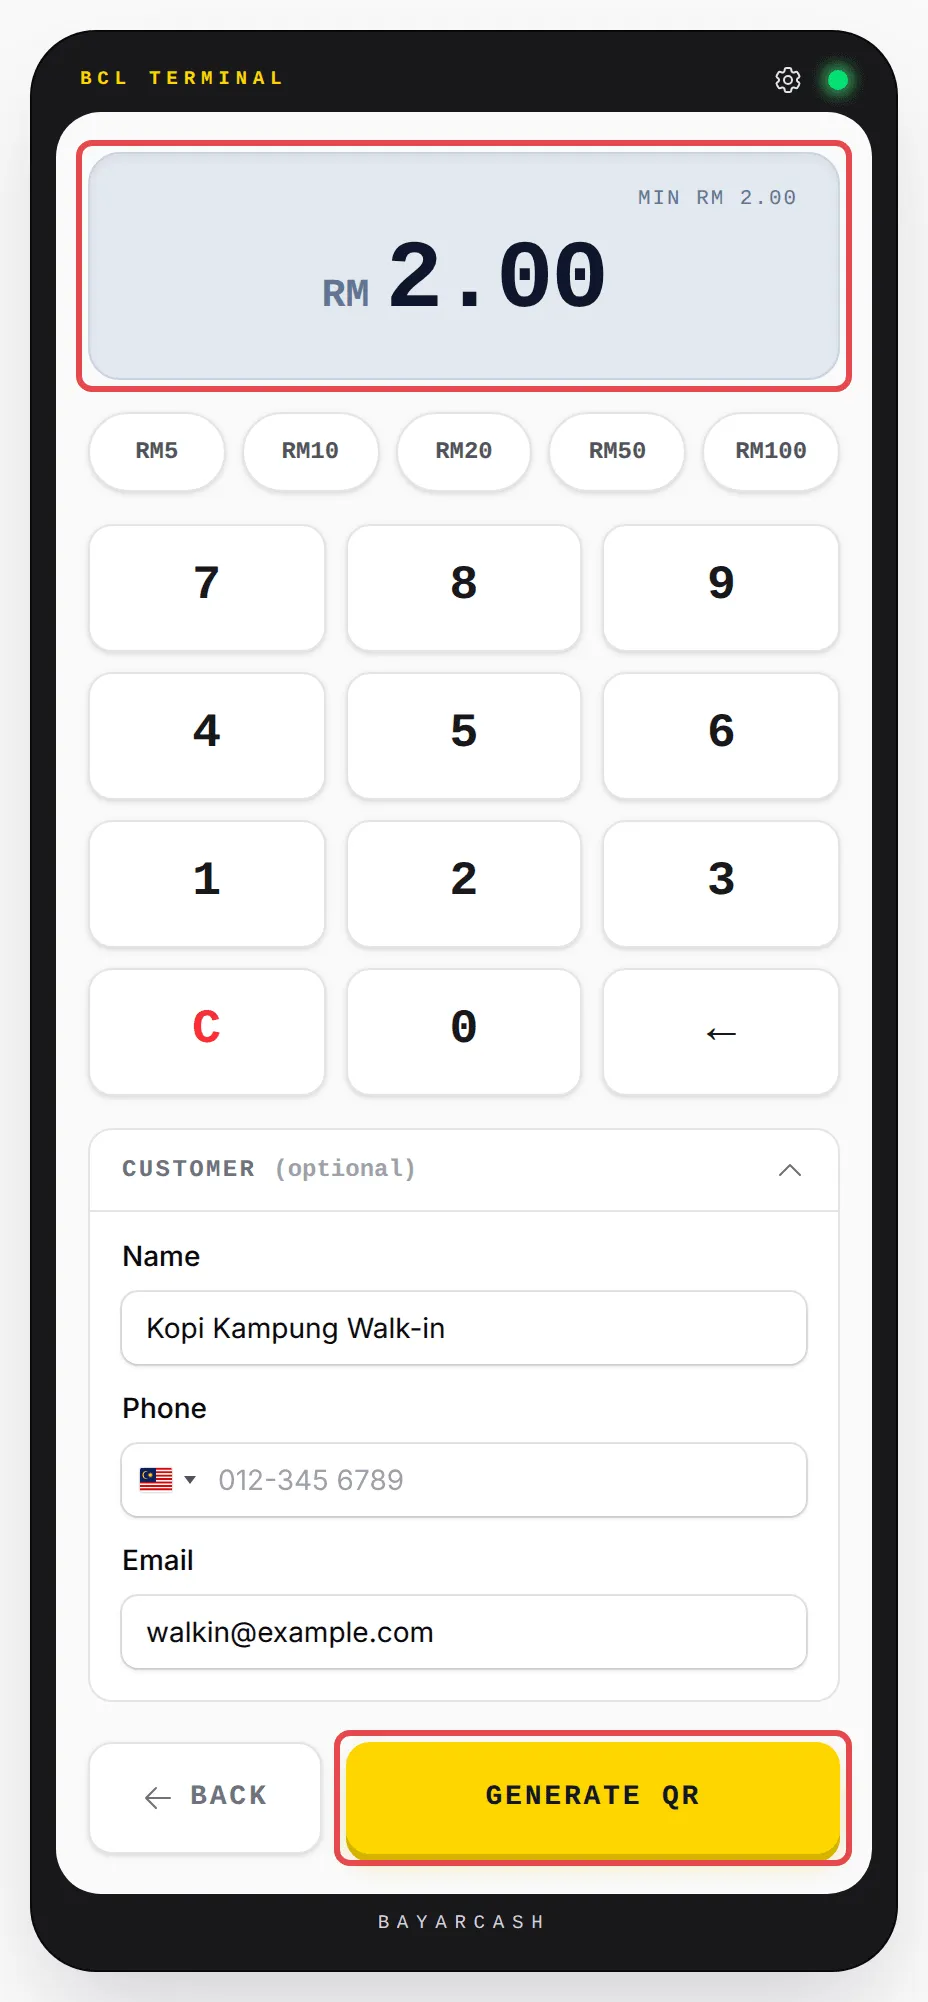
Open QR Terminal, key in the amount and, if you like, the customer’s details under Customer (optional).
-
Tap GENERATE QR.
-
Show the Scan to Pay code to the customer. The screen shows the order number and a countdown.
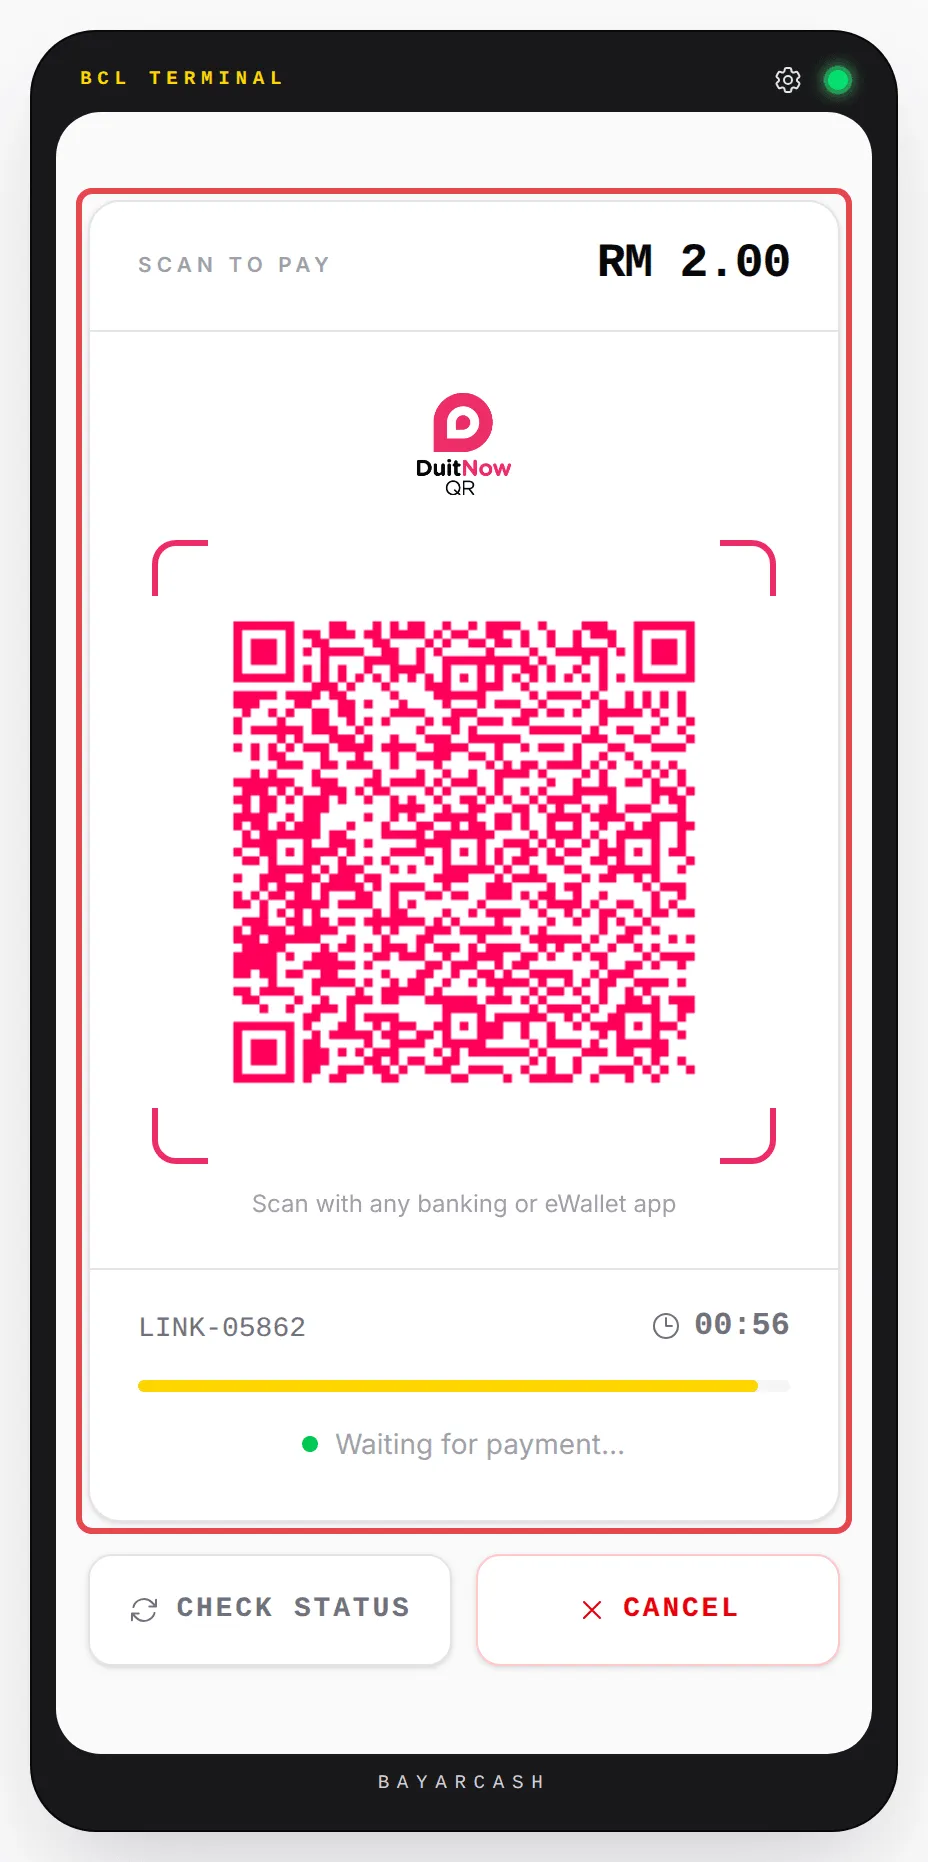
See Take payments with QR Terminal for what happens when the code expires or the payment arrives.
Once your account is live, each QR payment appears in Transactions, recorded against the cashier who took it. A Team member sees only their own payments there. While Test Mode is on, Transactions lists test payments only, so QR payments do not show.
What the cashier can and cannot do
Section titled “What the cashier can and cannot do”With only Can View Transactions on, this is what a cashier gets:
| Area | Cashier | Notes |
|---|---|---|
| QR Terminal | Can use | Also in Quick Actions. |
| QR Terminal Settings | Can change their own | Under Platform Setup → Payment. They see nothing else on that page. |
| Transactions and Dashboard | Can view their own | Everyone’s, if you turn on Show data for all team members. |
| Payment Link | Can create | In Quick Actions. |
| Tools | Can open | Marketing Logs, Notification Logs and Webhook Logs. |
| Payment forms, events, bookings, leads | Cannot see | Unless you turn on their permissions. |
| Customers, Team Profile, Team Members | Cannot open | Admins only. |
| Bayarcash keys and payment settings | Cannot see | Admins only. |
A few habits keep counter sales easy to check:
- Give each cashier or counter its own Bayarcash portal. Create a portal per counter in Bayarcash, give it to that cashier in Portal Key and set Require Portal Key to Required. Each Bayarcash settlement then matches one counter, which makes reconciliation much simpler. See Choose a Bayarcash portal key.
- One login per person, never a shared one. Each payment is recorded against the login that took it, so a shared login hides who collected what.
- Keep Show data for all team members off. It is off by default. Turning it on in Team Profile lets every Team member see all of your account’s data, not just the cashier.
- Check the cashier’s view with Impersonate. On Team Members, click Impersonate on their row to see BCL exactly as they do. See Team roles and permissions.
Common issues
Is there a Cashier role in BCL?
No. The roles are Admin, Team and Crew Event. Add your cashier as Team and turn on only Can View Transactions. That is the one permission QR Terminal needs.
My cashier's Portal Key list in QR Terminal Settings is empty. Why?
A Team member can only choose from the portals you gave them. Go to Team → Team Members, click Edit on their row and choose a Portal Key.
Can my cashier see other staff's sales?
Not by default. Team members see only their own data unless you turn on Show data for all team members in Team Profile.
Was this article helpful?
Thanks for your feedback.
Sorry this didn't help. WhatsApp us and we'll sort it out with you.