
Ask an AI about this page
 ChatGPT
 Claude
 Perplexity
 Google AI Mode
 Microsoft Copilot
 Grok
Grok Mistral Le Chat
Create an automation
Updated

Build an automation yourself when no template is close to what you need. You name it, choose the event that starts it, and add the actions BCL should run. In this example, Kopi Kampung emails its sales team every time the wholesale enquiry form is sent.
To start from a ready-made workflow instead, see Start an automation from a template.
Name the automation
Section titled “Name the automation”Start with a name, so you can find the automation later.
-
In the sidebar, click Automations, then click New Automation.

-
Enter a Name that says what it does, then click Create.
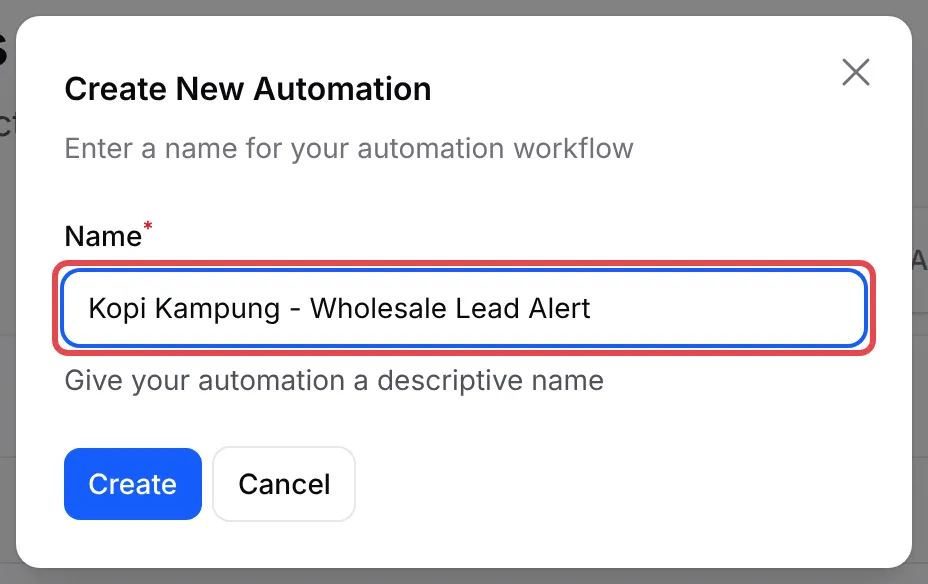
BCL opens the Edit Workflow page with an empty canvas.
Choose the trigger
Section titled “Choose the trigger”The trigger decides when the automation runs.
-
On the canvas, click Select an Event.
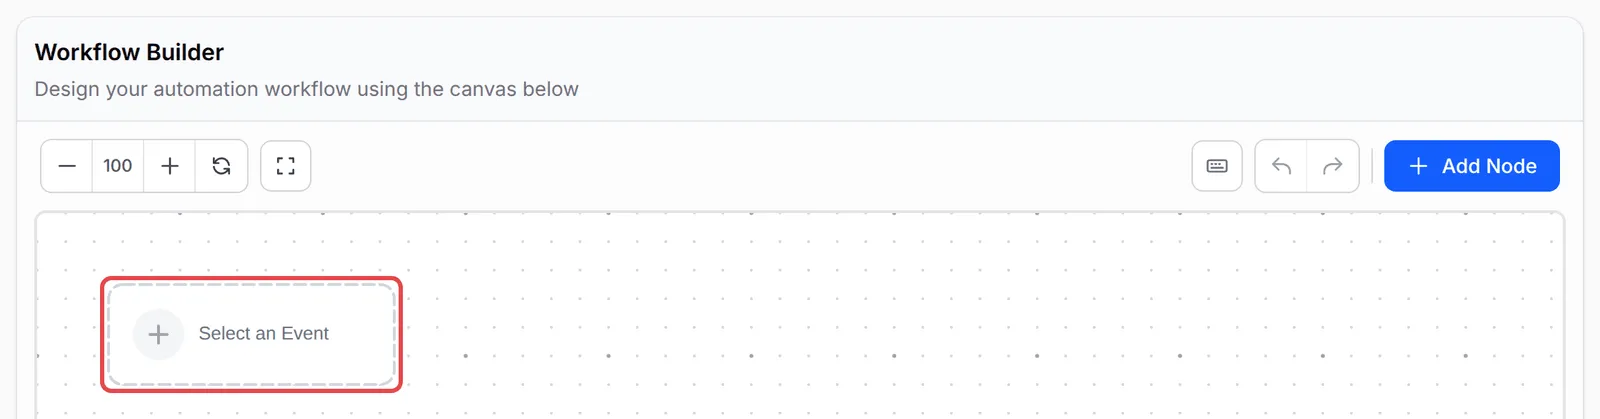
-
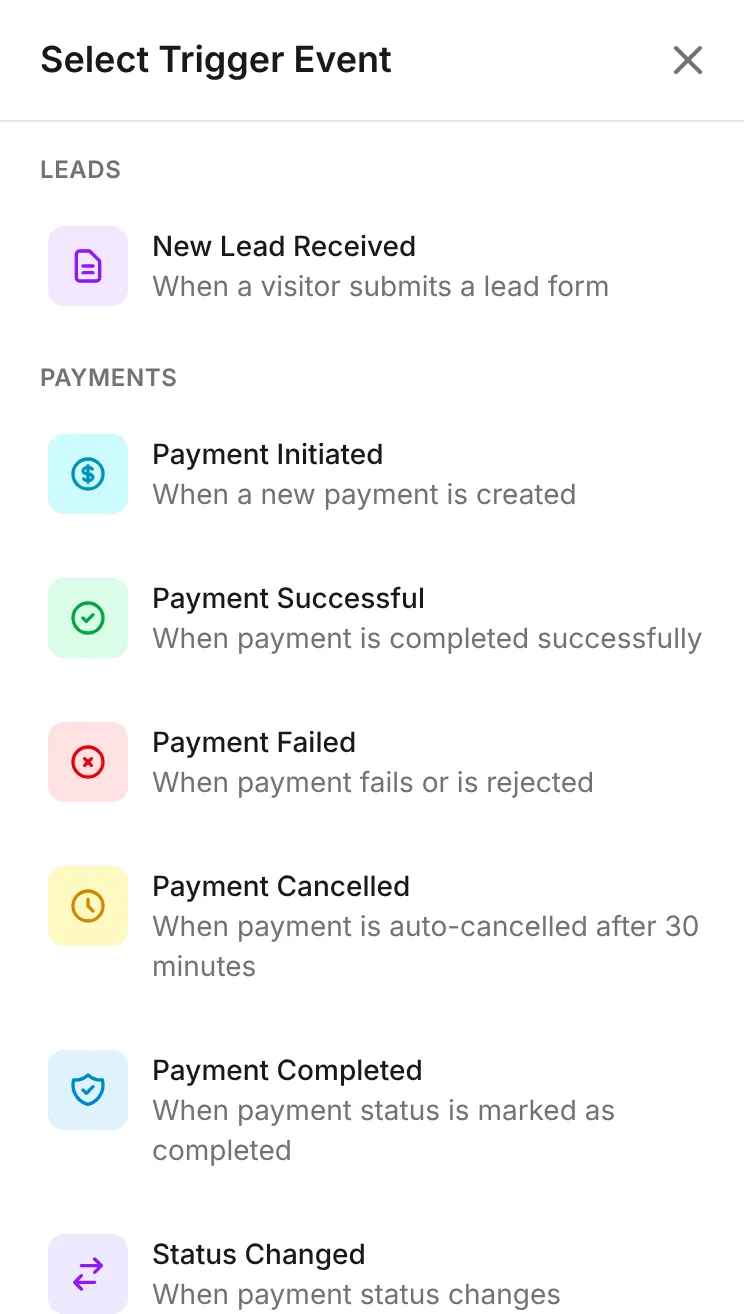
In Select Trigger Event, click the event that should start the automation, for example New Lead Received.
-
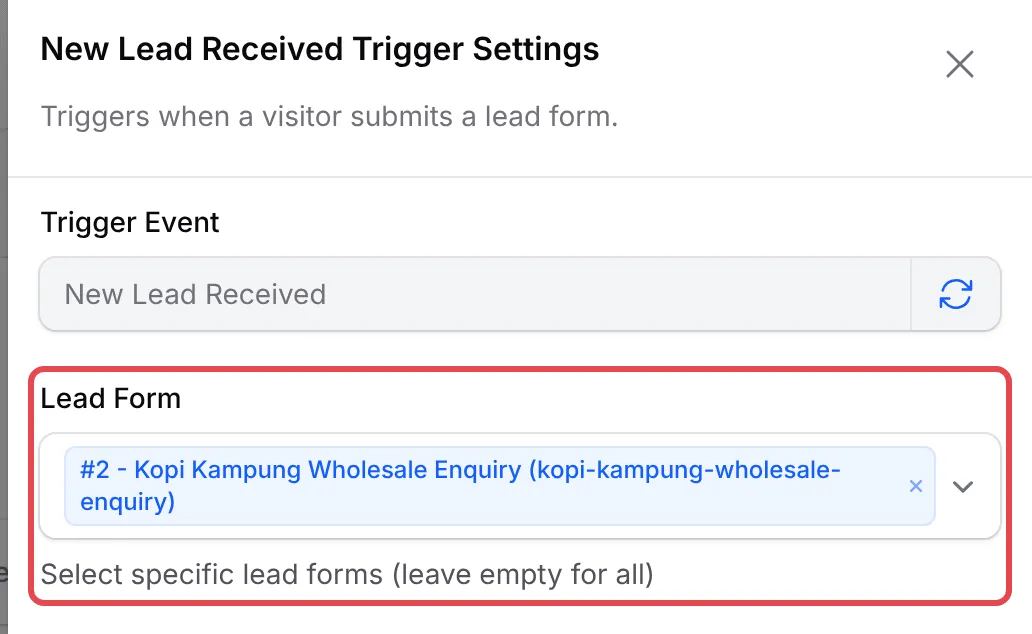
Click the trigger on the canvas, then click the gear button under it to open its settings. You can also double-click a node.
-
Choose which forms it applies to, for example your form under Lead Form. Leave it empty to run for all forms. Payment triggers ask for a Payment Source Type first, such as Payment Form, then a Specific Form.
-
Click Save Trigger.
Add an action
Section titled “Add an action”Actions are joined one after another, starting from the trigger.
-
Click the trigger on the canvas so it is selected, then click Add Node. The new node is joined to the one you selected.
-
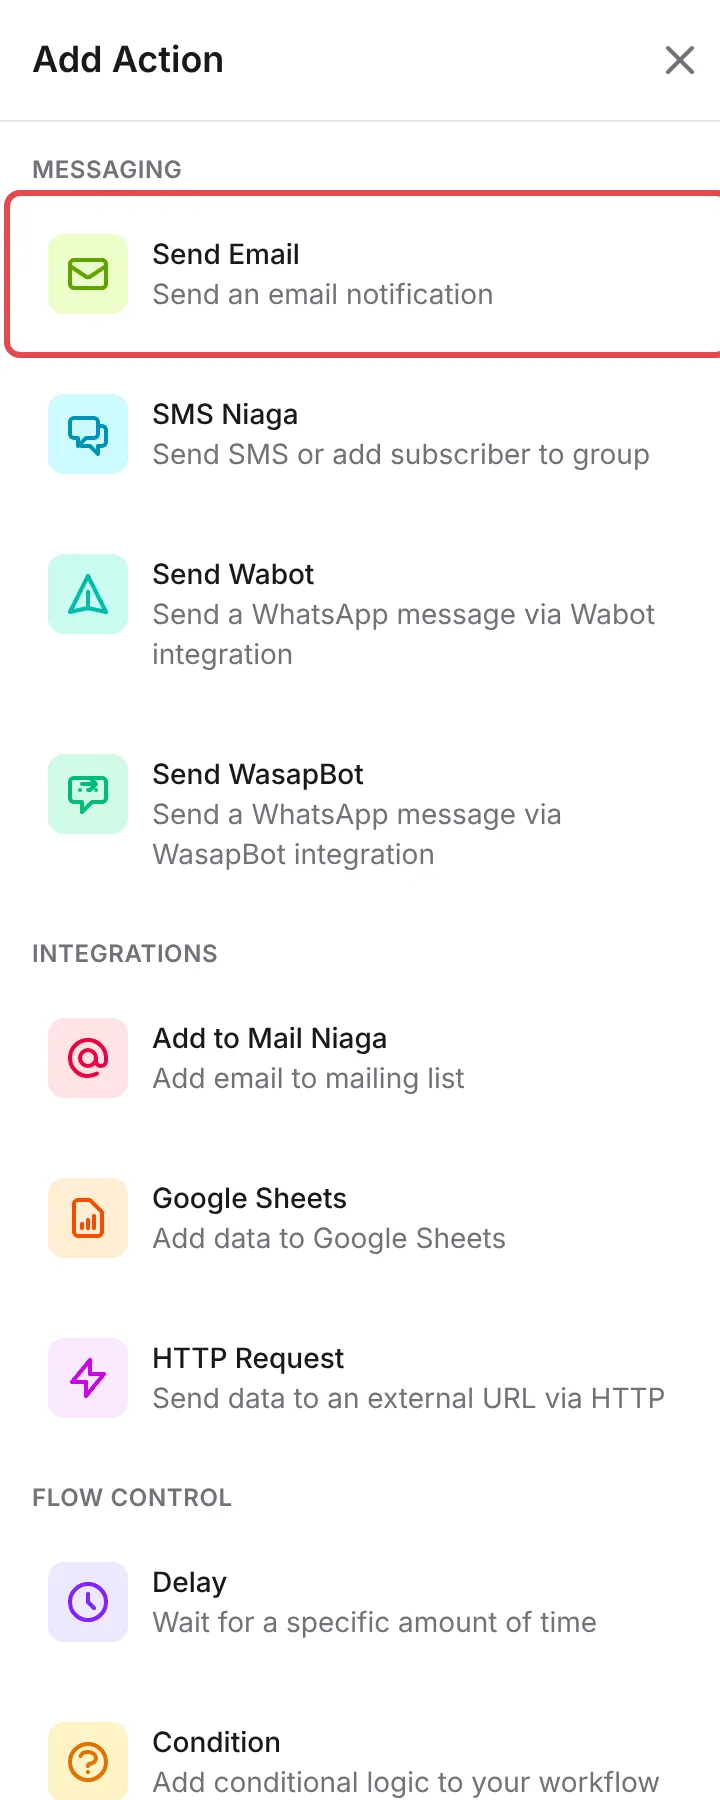
In Add Action, click what BCL should do, for example Send Email.
-
The new node shows a red mark until it is set up. Click it, click the gear button and fill in the settings. For Send Email:
Field What to enter Action Name A short name shown on the canvas. Recipient Email An address, or {email}for the customer’s email on payment triggers.Email Subject and Email Content Your message. Click Variables to insert details such as a form answer. 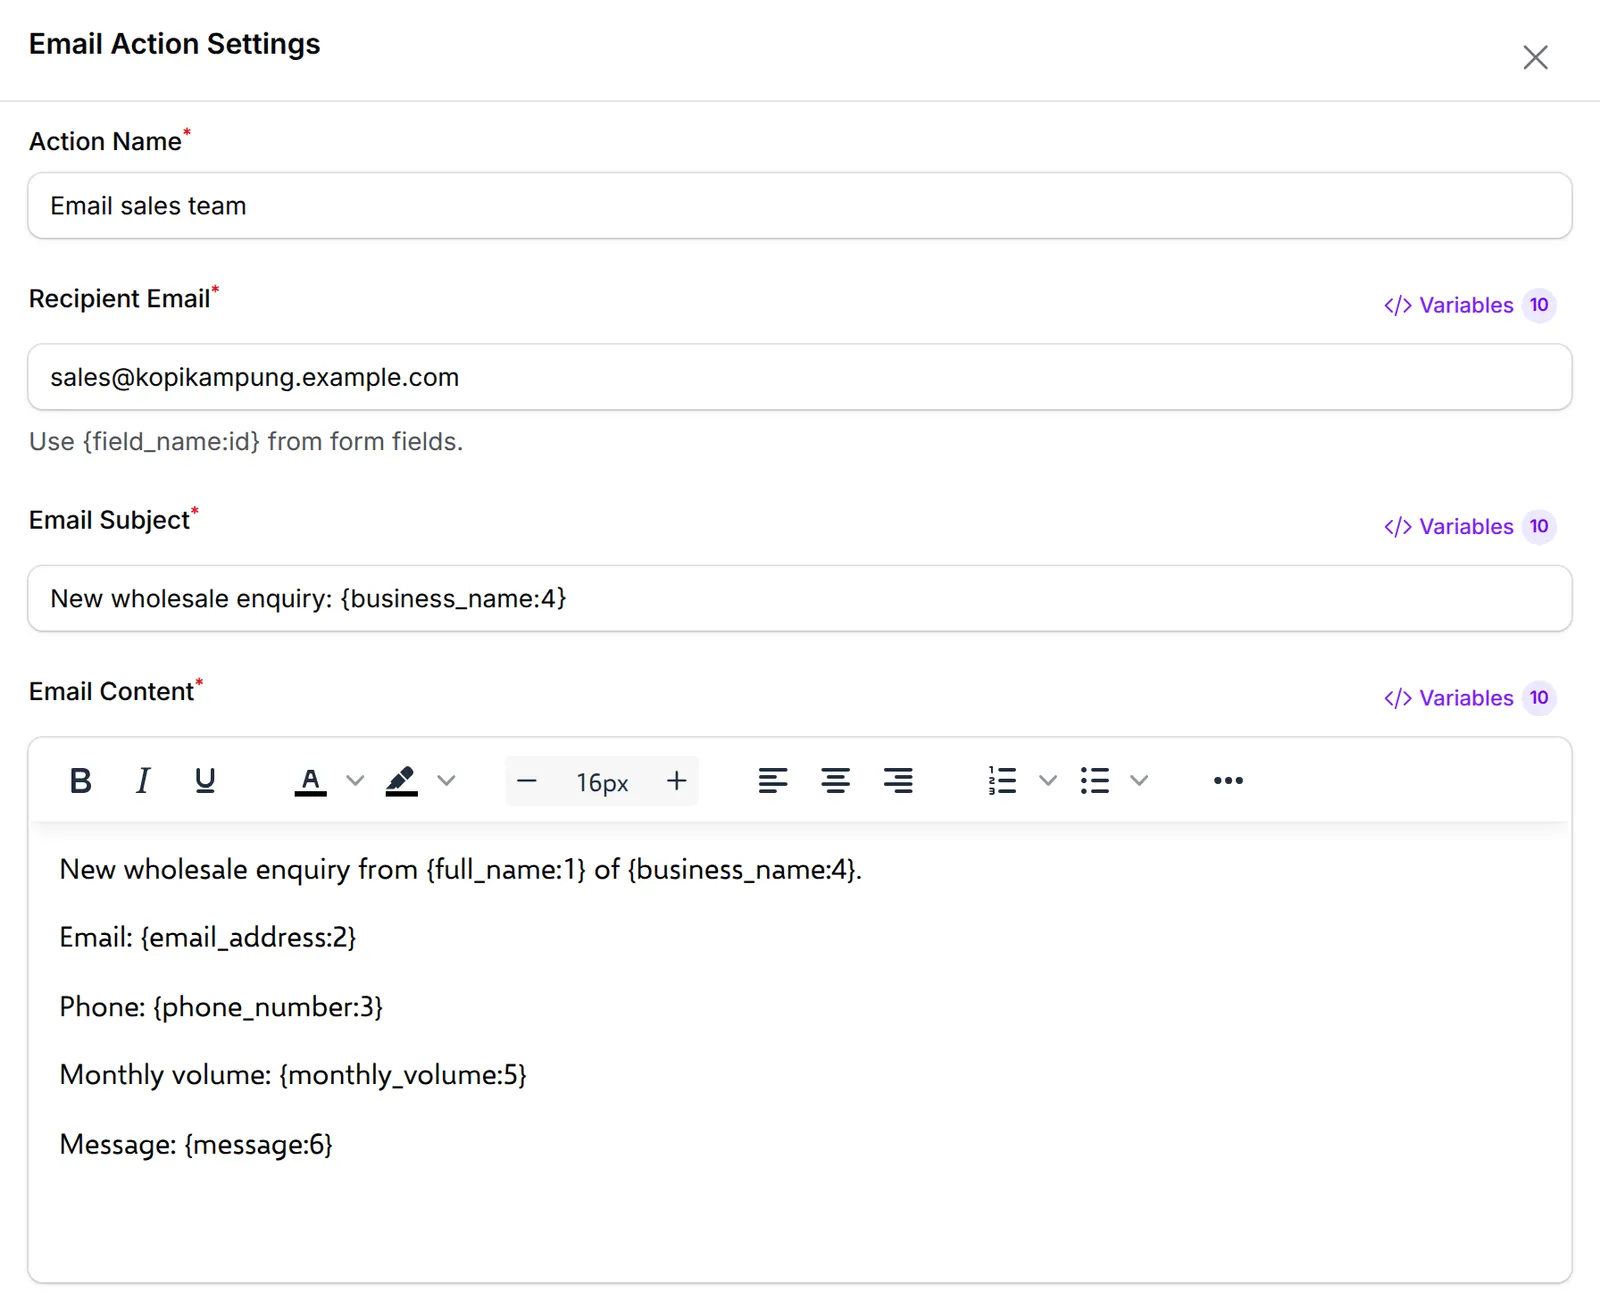
-
To check the result, enter your own address under Test Email in the same panel and send a test.
-
Click Save Email.
Add more nodes the same way. Under a selected node, the buttons next to the gear copy or delete it.
Save and switch it on
Section titled “Save and switch it on”Node settings are saved one by one, but the workflow needs saving too.
-
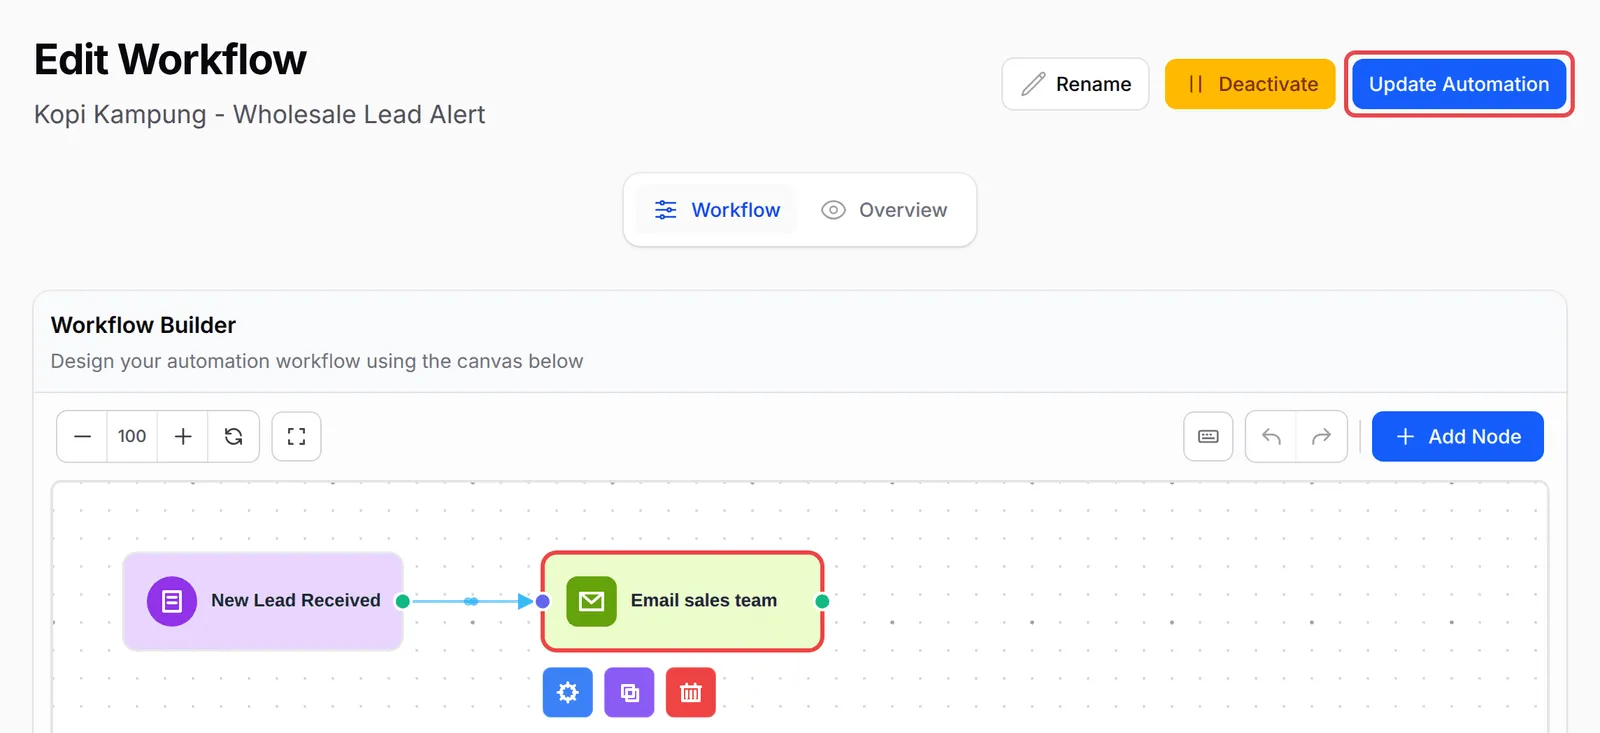
Click Update Automation.
-
Check that it is on: the button at the top says Deactivate when the automation is on, and Activate when it is off. On the Automations list, the Status switch shows the same.
Build carefully, because an automation runs by itself:
- Test with your own details first. Use the test option in the action, or make a test purchase in Test Mode, then check the automation’s history.
- Pick specific forms in the trigger. An empty form list means every form, which is easy to forget when you add a new form later.
- Use the variable picker. A mistyped variable is sent as an empty value without any error, so pick variables from Variables instead of typing them.
Common issues
How do I send an email to my sales team every time a lead form is sent?
Create an automation with the New Lead Received trigger, choose your form under Lead Form, then add a Send Email action with your team's address as the Recipient Email.
Why is there a red mark on a node in my workflow?
The node is not set up yet. Click it, click the gear button under it, fill in the required fields and save.
How do I put the customer's name or a form answer into the message?
Click Variables next to the field and pick one from the list. Payment automations use names like {name} and {order_number}, and lead form fields look like {full_name:1}.
Was this article helpful?
Thanks for your feedback.
Sorry this didn't help. WhatsApp us and we'll sort it out with you.