
Ask an AI about this page
 ChatGPT
 Claude
 Perplexity
 Google AI Mode
 Microsoft Copilot
 Grok
Grok Mistral Le Chat
Send orders to Excel with Power Automate
Updated

BCL has no built-in Microsoft connector, but you can still log every paid order in an Excel workbook. A BCL automation sends each order to a Power Automate flow, and the flow adds a row to a table in your OneDrive. It takes about 15 minutes to set up.
Before you start
Section titled “Before you start”You need three things:
- A Microsoft 365 work or school account with OneDrive and Excel for the web.
- A Power Automate Premium licence or trial. The When an HTTP request is received trigger is a Premium feature, so the free Power Automate that comes with Microsoft 365 is not enough. You can start a free 90-day trial while you build the flow.
- A BCL admin login, so you can create automations.
Prepare the Excel workbook
Section titled “Prepare the Excel workbook”The flow writes into an Excel table, not a plain range. Set up the workbook first:
-
In OneDrive, create a folder (for example BCL Demo) and a new Excel workbook in it.
-
Type these headers in row 1:
Column What the flow puts there Order Number The BCL order number Payment Date Date and time of the payment Customer Customer name Email Customer email Phone Customer phone number Form The form the customer paid on Items Items and quantities, for example 2x House Blend 250g Amount Amount paid, as a number Payment Method For example FPX or DuitNow QR Status Payment status -
Select the headers and click Home → Format As Table. Tick My table has headers.
Excel keeps one empty row under the headers of a new table. After the first order arrives, you can delete that empty row.
Create the flow in Power Automate
Section titled “Create the flow in Power Automate”The flow gives you a web address that BCL posts each order to:
-
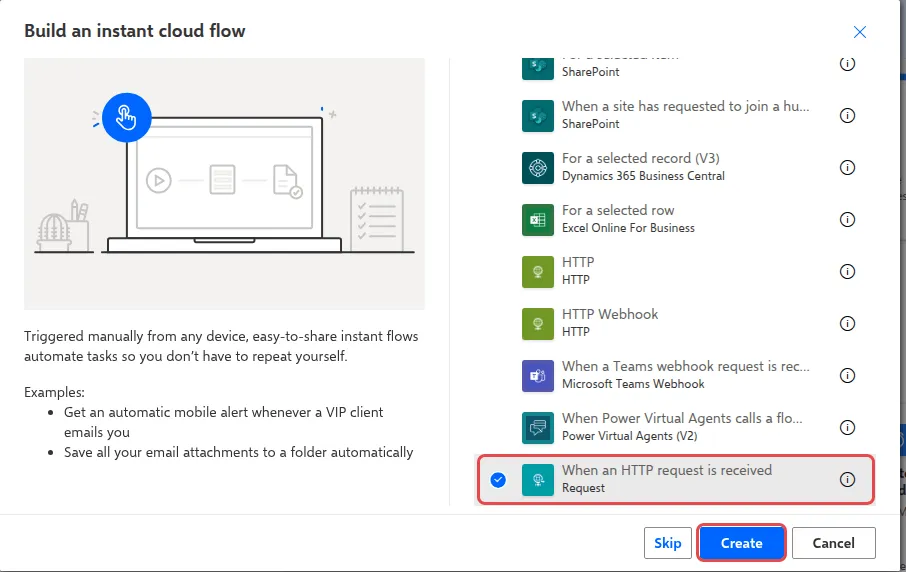
Go to make.powerautomate.com, click Create → Instant cloud flow, and name the flow.
-
Choose When an HTTP request is received and click Create.
-
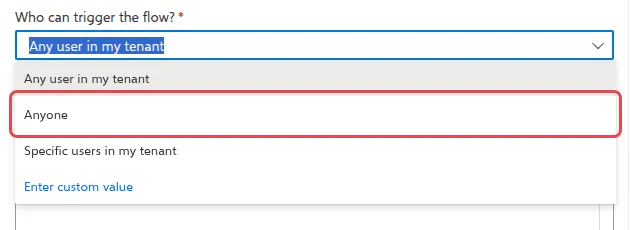
Click the trigger. In Who can trigger the flow?, choose Anyone. BCL does not sign in to Microsoft, so the default Any user in my tenant blocks it.
-
Click Use sample payload to generate schema, paste this sample and click Done:
{"order_number": "BC-00123","payment_date": "2026-09-27 14:05:11","name": "Nurul Aina","email": "nurul.aina@example.com","phone": "60133456789","form_title": "Kopi Kampung Coffee Beans","items": "2x House Blend 250g","amount": "70.00","payment_method": "FPX","status": "Successful"}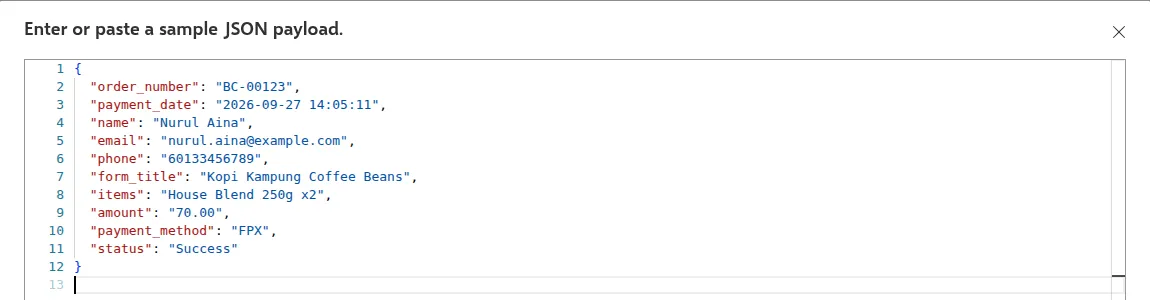
-
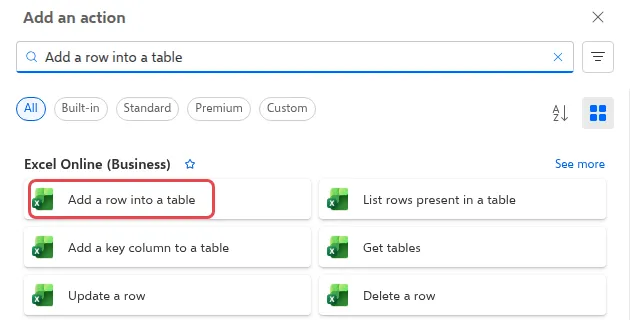
Click + under the trigger, search for Add a row into a table and pick the Excel Online (Business) action. Sign in if Power Automate asks you to create a connection.
-
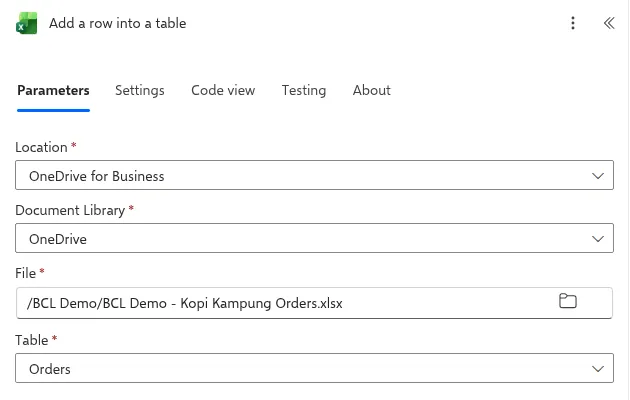
Set Location to OneDrive for Business, Document Library to OneDrive, pick your workbook in File and your table in Table.
-
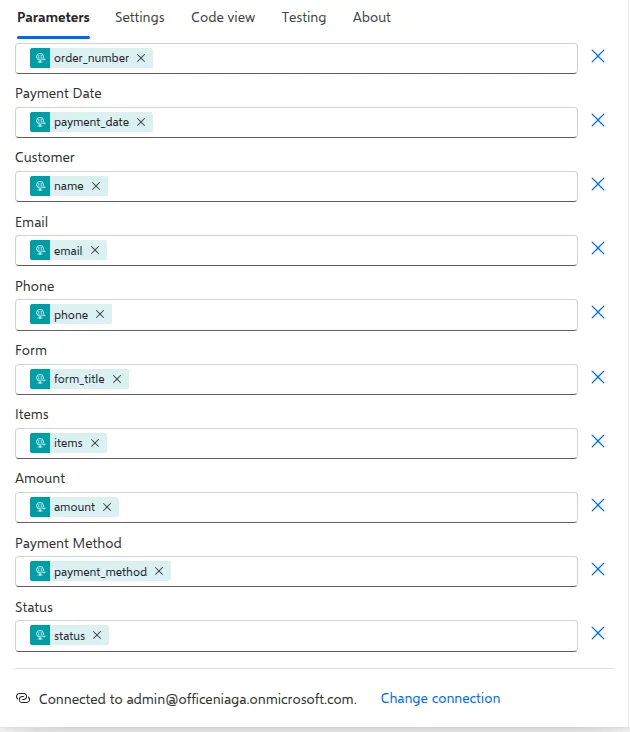
Under Advanced parameters, click Show all. Click in each column and pick the matching value with the lightning icon: order_number for Order Number, name for Customer, form_title for Form, and so on.
-
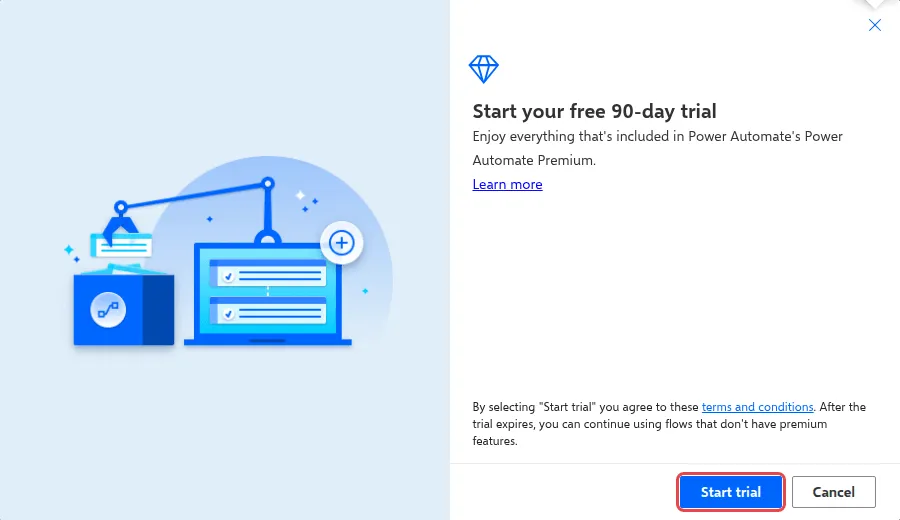
Click Save. If the flow checker says the owner needs a Power Automate Premium licence, click Test, then free 90-day trial in the warning, and Start trial. The trial asks for no card. Save the flow again after the trial starts.
-
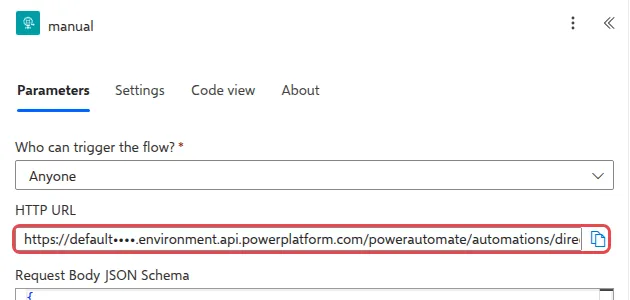
Click the trigger again and copy the HTTP URL. Power Automate only creates it after the first save.
Check on the flow’s details page that the flow is On. If it shows Off, click Turn on.
Send paid orders from BCL
Section titled “Send paid orders from BCL”Next, create a BCL automation that posts each paid order to the flow:
-
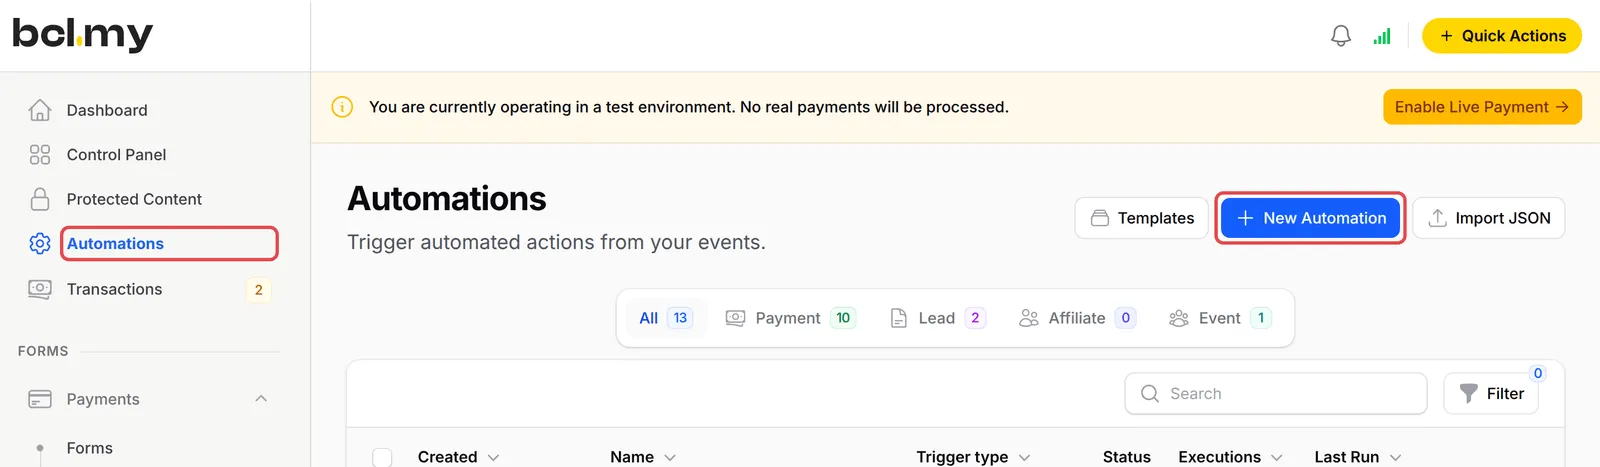
In the sidebar, click Automations, then New Automation. Name it, for example Orders to Excel, and click Create.
-
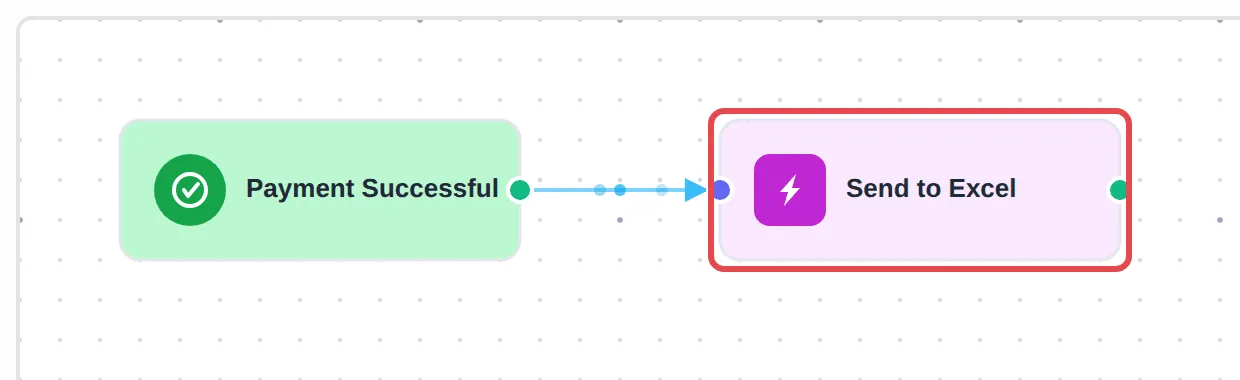
Click Add Node and choose the Payment Successful trigger. Leave Payment Source Type on All Sources to log every form, or pick one form. Click Save Trigger.
-
Click Add Node again and choose HTTP Request.
-
Double-click the new node. Give it an Action Name, keep Method on POST, and paste the flow’s address into Request URL.
-
Open the Body tab, choose Raw JSON and paste this body. Each
{variable}is replaced with the order’s value:{"order_number": "{order_number}","payment_date": "{payment_date}","name": "{name}","email": "{email}","phone": "{phone}","form_title": "{form_title}","items": "{items_summary}","amount": "{amount_value}","payment_method": "{payment_method}","status": "{payment_status}"}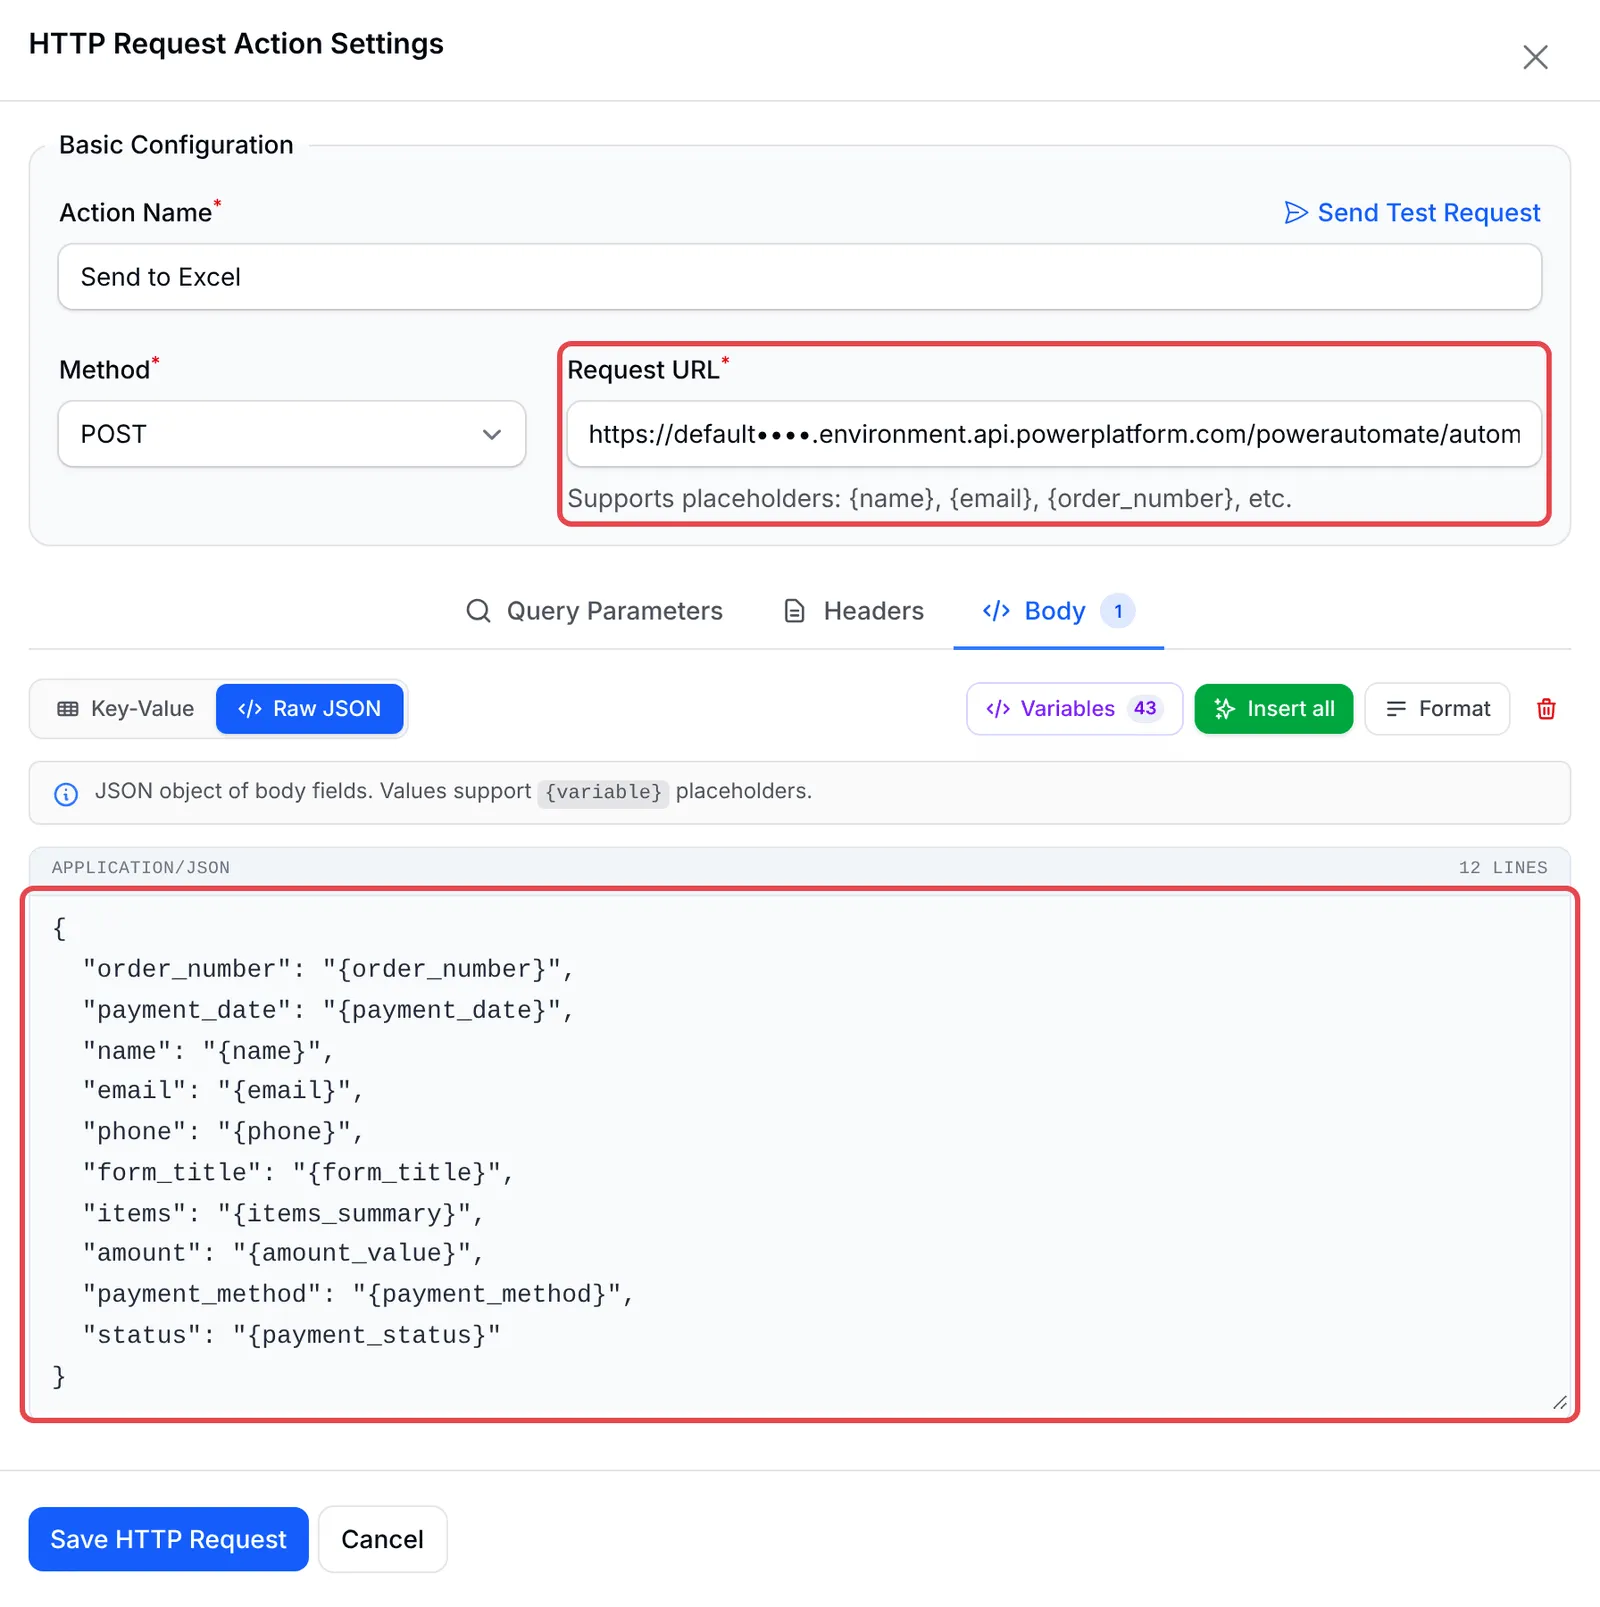
-
Click Save HTTP Request, then Update Automation.
To check the link, click Send Test Request in the HTTP Request action, or make a test payment on one of your forms. A new row appears in your Excel table within a few seconds.

Automation or form webhook?
Section titled “Automation or form webhook?”A payment form’s own webhook can also call a Power Automate flow. An automation is usually the easier choice:
| Automation with HTTP Request | Form webhook | |
|---|---|---|
| Where you set it | Once, under Automations | On each form, under Advanced → Webhook Settings |
| Which sales | All sources (payment, event and booking forms, QR Terminal) or one form | Only that form |
| What BCL sends | Only the fields you list, with your own names | The full payload, nested under data, with items as a list |
| In the flow | One flat schema, one Add a row into a table | A nested schema, and Apply to each for item rows |
Use the form webhook when you need every field BCL has, such as custom fields and the full item list. See Payment form webhook payload.
A few habits keep the link reliable:
- Keep the flow address private. Anyone with the HTTP URL can add rows to your workbook. Do not paste it in chats or screenshots. If it leaks, turn the flow off and build a new one, which gets a new address.
- Match the Excel columns before you rename them. If you rename or delete a column in the table, open the flow and pick the table again, or the flow fails.
- Use the order number to spot duplicates. If an order appears twice, sort the table by Order Number and remove the extra row.
- Want charts too? Point Power BI at the same workbook. See Analyse your BCL sales in Power BI.
Common issues
How can my own spreadsheet know when a payment comes in?
Create an automation with the Payment Successful trigger and an HTTP Request action that posts the order to your Power Automate flow. The flow adds one row to your Excel table for each paid order.
Power Automate says my flow needs a Premium licence. Why?
The When an HTTP request is received trigger is a Premium feature. Start the free 90-day trial from the flow's licensing warning, or ask your Microsoft 365 admin for a Power Automate Premium licence.
My flow receives nothing. How do I test it?
Open the HTTP Request action in your BCL automation and click Send Test Request, then check the flow's run history in Power Automate. Make sure Who can trigger the flow? is set to Anyone and the flow is turned on.
Was this article helpful?
Thanks for your feedback.
Sorry this didn't help. WhatsApp us and we'll sort it out with you.