
Ask an AI about this page
 ChatGPT
 Claude
 Perplexity
 Google AI Mode
 Microsoft Copilot
 Grok
Grok Mistral Le Chat
Follow up on new leads automatically
Updated

A lead who hears back within minutes is far more likely to buy. This automation emails every new lead a thank-you as soon as they submit your lead form, then waits three days and sends a follow-up with an offer. It runs for one lead form, using that form’s own fields.
What you need
Section titled “What you need”A lead form with an email field. The example uses the demo form “Kopi Kampung Wholesale Enquiry”, whose fields are {full_name:1}, {email_address:2}, {phone_number:3} and {business_name:4}. Your form’s keys will differ: copy them from the Variables list.
Build it
Section titled “Build it”Start from a blank automation (see Create an automation):
-
Go to Automations, click New Automation, name it “Wholesale Lead Follow-up” and click Create.
-
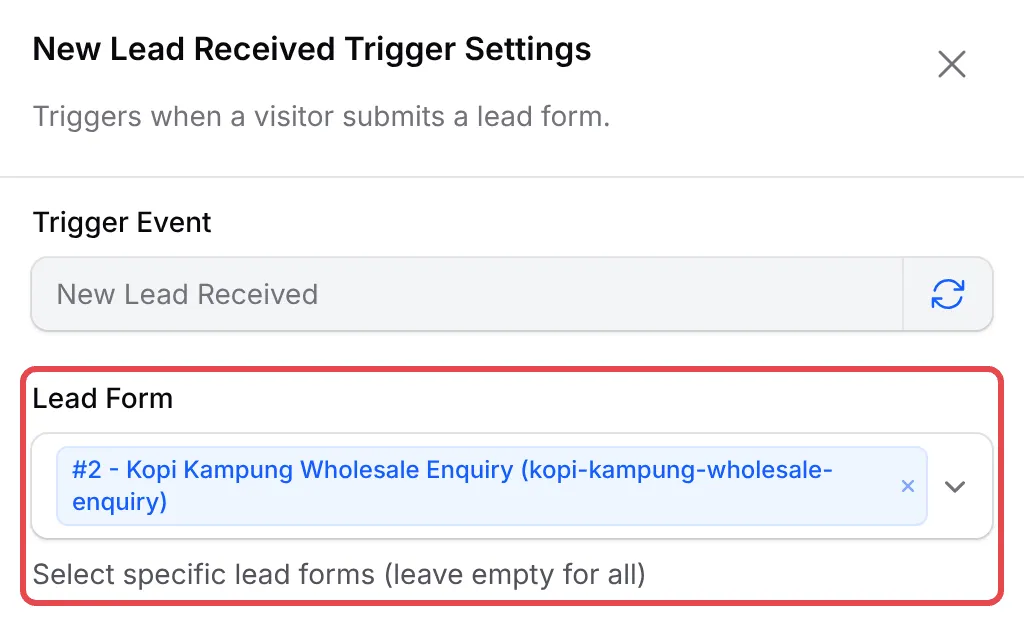
Click Add Node and pick New Lead Received. Double-click the trigger, pick your form in Lead Form and click Save Trigger.
-
Click Add Node and pick Send Email. Double-click it and fill it in as below, then click Save Email.
Field Enter Action Name Thank the lead Recipient Email Your form’s email field, such as {email_address:2}Email Subject Thanks for your enquiry, {full_name:1}Email Content The first message below Hi {full_name:1},Thank you for asking about wholesale coffee for {business_name:4}.We have your details and will reply within one working day with our wholesale price list.Your reference: {submission_id}{business_name}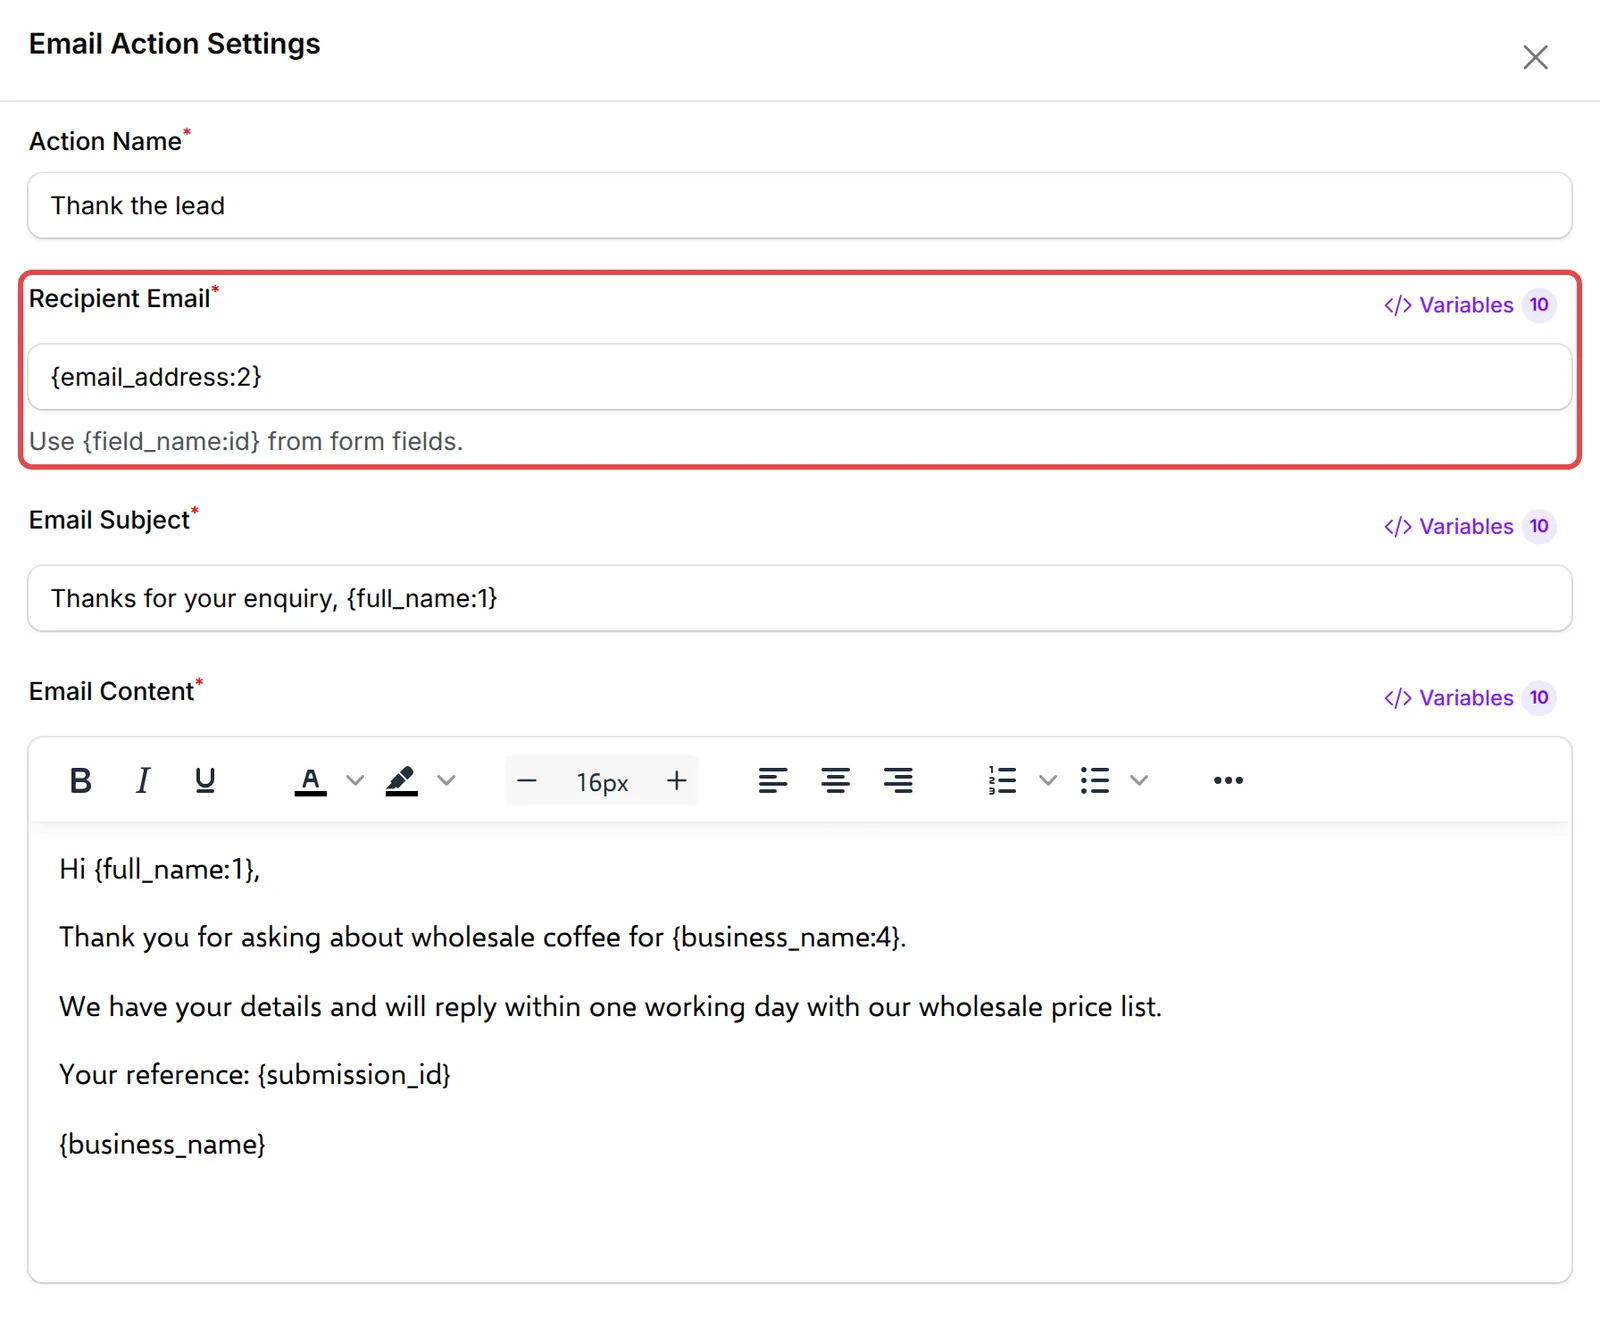
-
Click Add Node and pick Delay. Double-click it, keep For a Specific Period, enter
3in Duration, choose Days in Time Unit, and click Save Delay.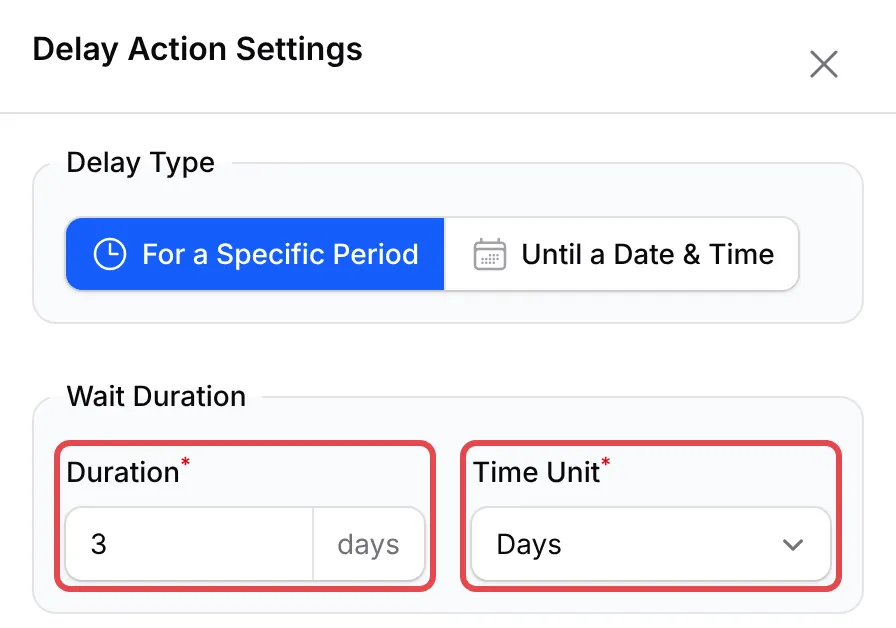
-
Click Add Node and pick Send Email again. Name it “Follow up”, use the same Recipient Email, the subject
Would you like to try our beans, {full_name:1}?and the second message below. Click Save Email.Hi {full_name:1},A few days ago you asked about wholesale coffee for {business_name:4}.Would a free tasting pack help you decide? Just reply to this email and we will post one to you.{business_name}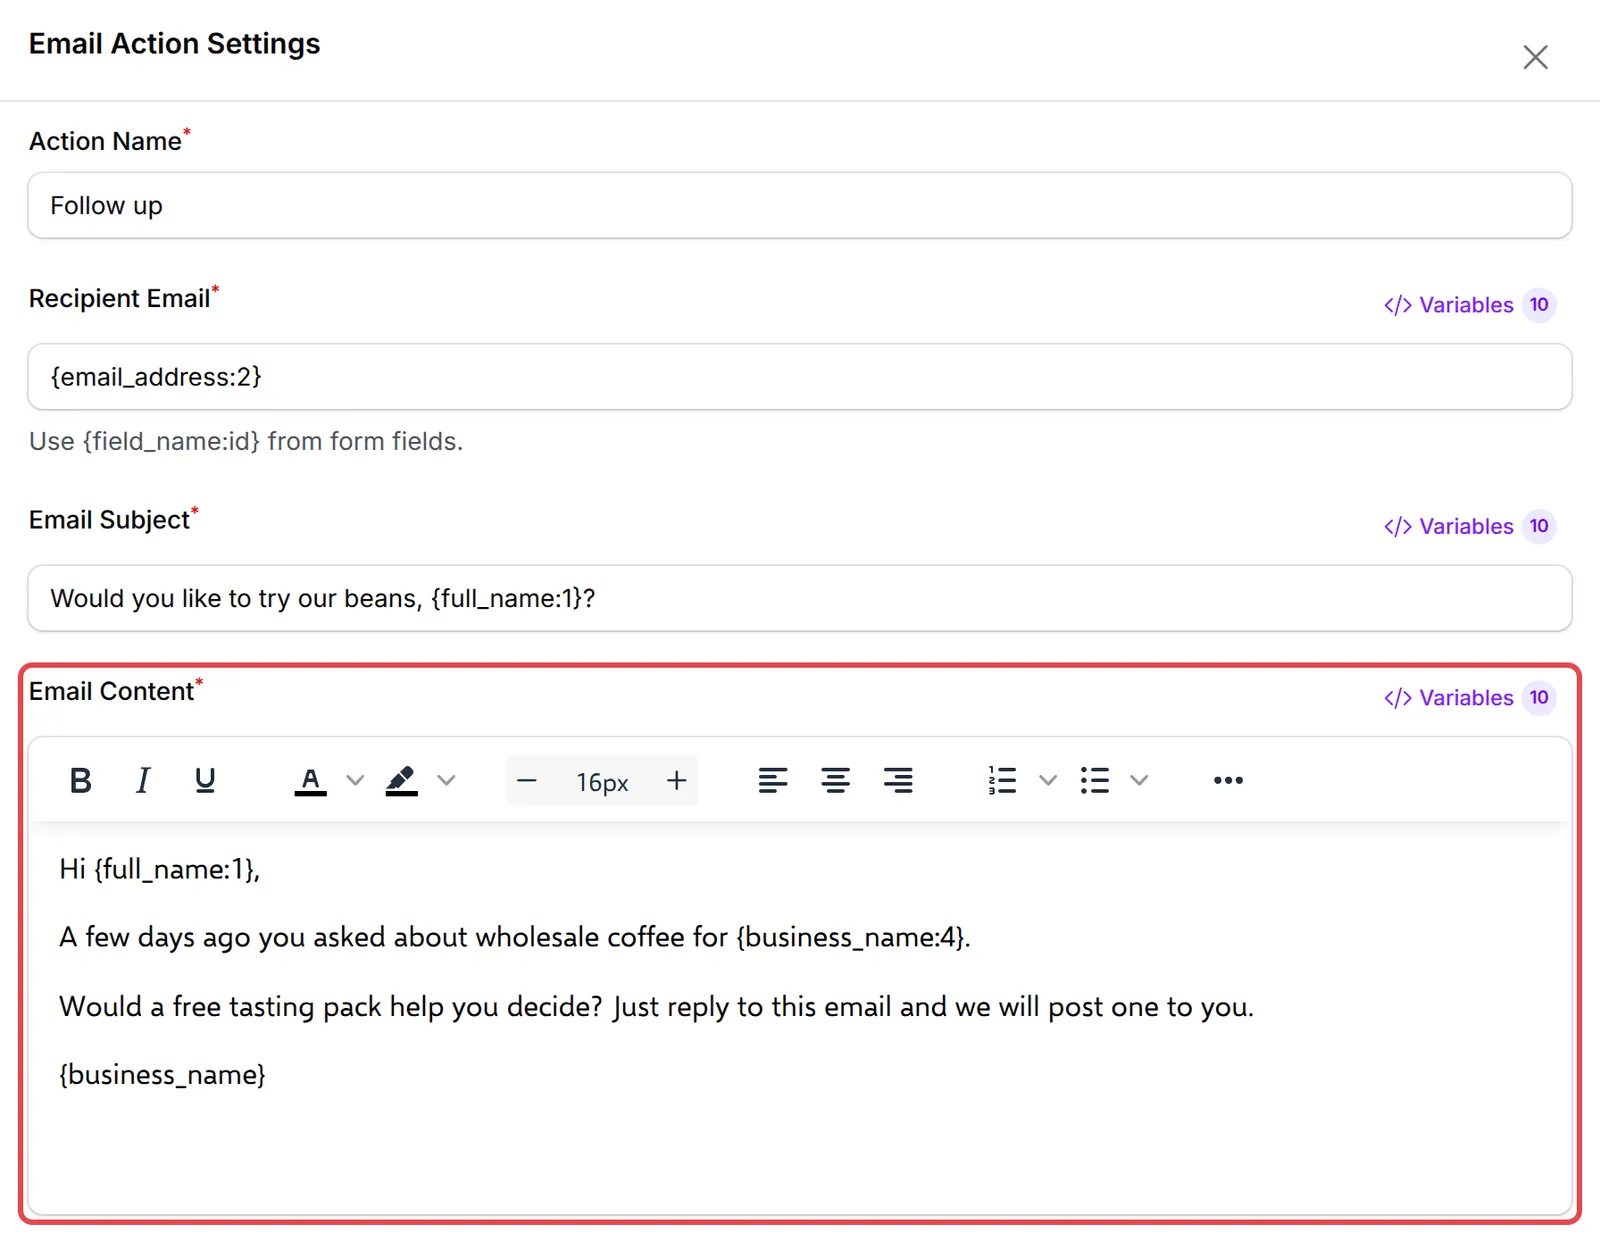
-
Click Update Automation.
The finished workflow runs in a line: thank-you, wait, follow-up.
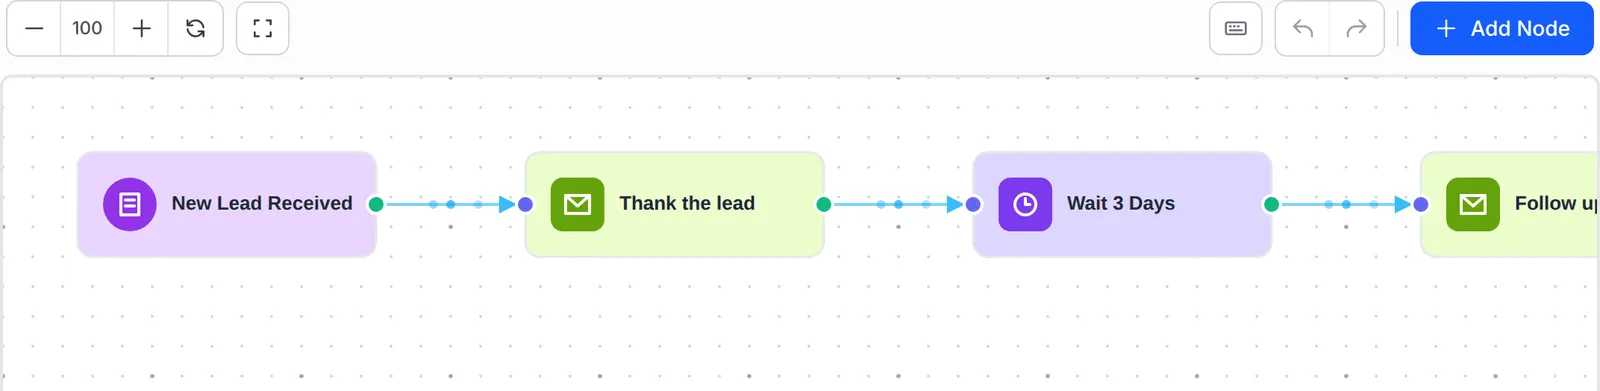
Note the two kinds of business name: {business_name:4} is the lead’s answer on the form, and {business_name} is your own business name.
Test it
Section titled “Test it”Check the recipe with a test run before you rely on it:
- Submit your lead form yourself, from a normal browser, with your own email address.
- Open the automation and click Overview. The submission shows as a run: the first email is sent at once and the run stays Running until the 3 days are up.
A few ways to get more from this recipe:
- Replies go to you. BCL sets the reply-to address to the team member who created the automation, so a lead who answers the email reaches a person.
- Keep the follow-up soft. The automation cannot see whether a lead has already replied or bought, so write the second email so it still reads well if they have.
- Alert your sales team too. Add a Send Email step to your team’s address right after the trigger, as in Alert your team about new orders.
Common issues
Which variable do I use for the lead's email address?
Lead form fields use their name and id, such as {email_address:2}. Open Variables next to Recipient Email: your lead form's fields are listed under the form's name. {email} does not exist for leads.
Can I send leads to my CRM or mailing list instead?
Yes. Use an HTTP Request step to send the fields to your CRM, or Add to Mail Niaga to put the email on a mailing list. See Send paid orders to your CRM for the HTTP set-up.
Was this article helpful?
Thanks for your feedback.
Sorry this didn't help. WhatsApp us and we'll sort it out with you.