
Ask an AI about this page
 ChatGPT
 Claude
 Perplexity
 Google AI Mode
 Microsoft Copilot
 Grok
Grok Mistral Le Chat
Manage bookings
Updated

Bookings → Bookings lists every booking made on your booking forms or added by you. From here you add walk-in bookings, change a booking’s status, reschedule or cancel it, and check customers in when they arrive.
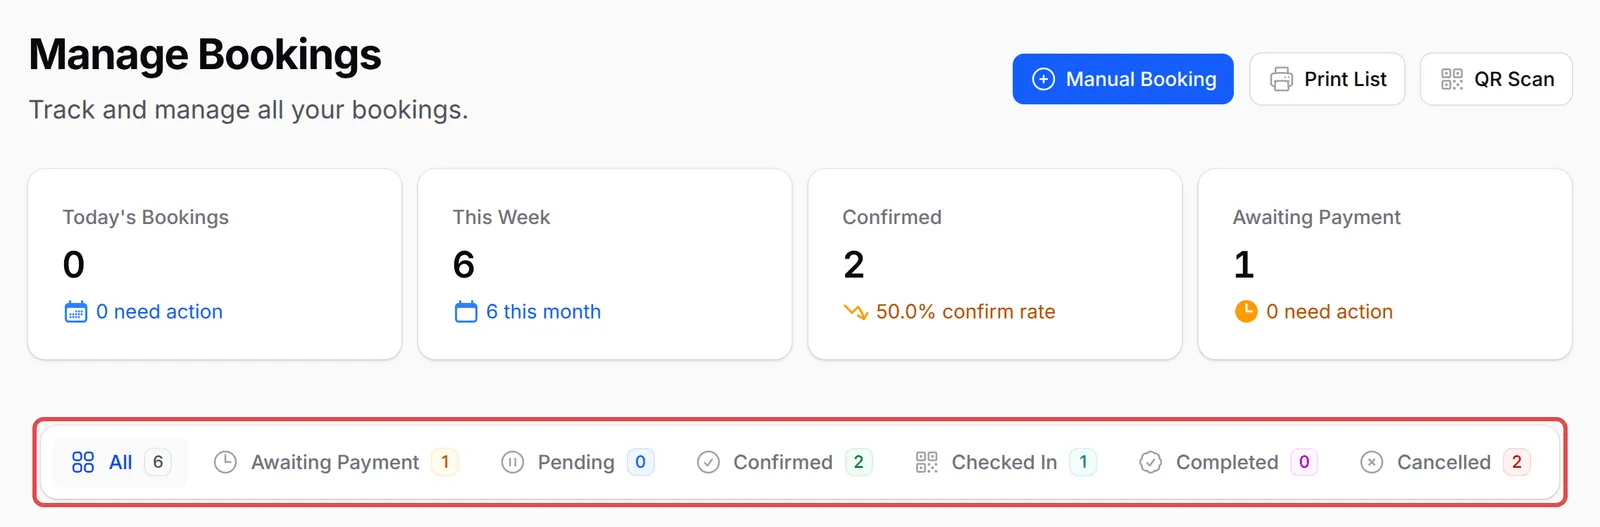
Booking statuses
Section titled “Booking statuses”Each booking moves through these statuses:
| Status | Meaning |
|---|---|
| Awaiting Payment | The customer is paying. Unpaid bookings are cancelled after about 15 minutes. |
| Pending | Paid, waiting for you to confirm. Happens when the service has Auto Confirm Booking off. |
| Confirmed | The slot is booked. |
| Checked In | The customer has arrived. |
| Completed | The service is done. |
| Cancelled | Cancelled by you, the customer or BCL. The slot is free again. |
| No Show | The customer did not turn up. |
The list hides Cancelled bookings by default. Click the Cancelled tab, or remove the status filter, to see them. Use Search to find a booking by its reference, the customer’s name, phone or email, the service or the order number.
Change a booking
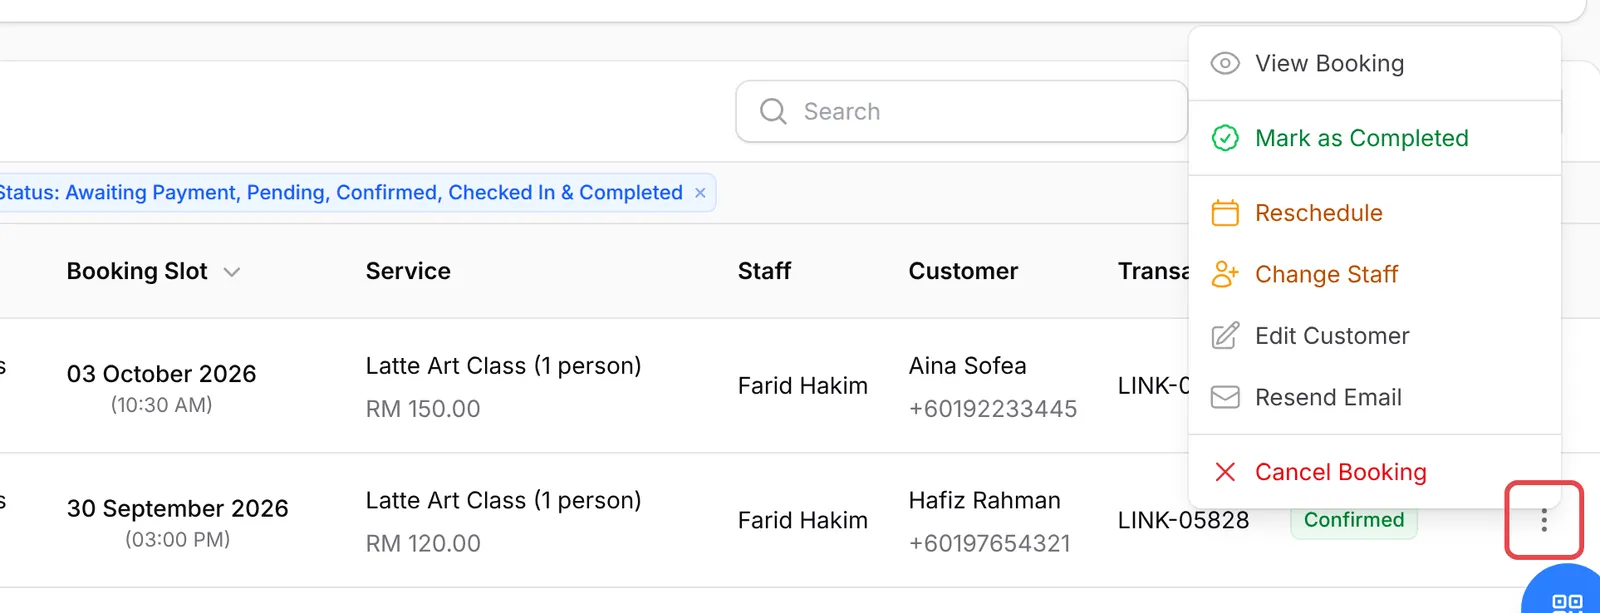
Section titled “Change a booking”Every row has an Actions menu (⋮) at the end:
-
Find the booking and click Actions on its row.
-
Choose what to do:
Action What it does View Booking Shows the schedule, service, staff, customer and payment. Mark as Confirmed, Mark as Pending, Mark as Completed Changes the status. Only the moves that make sense for the current status are shown. Reschedule Moves the booking to a New Date & Time. Assign Staff or Change Staff Sets the employee who delivers it. Edit Customer Corrects the customer’s name, email or phone. Resend Email Sends the booking email again. Cancel Booking Cancels it and asks for a reason.
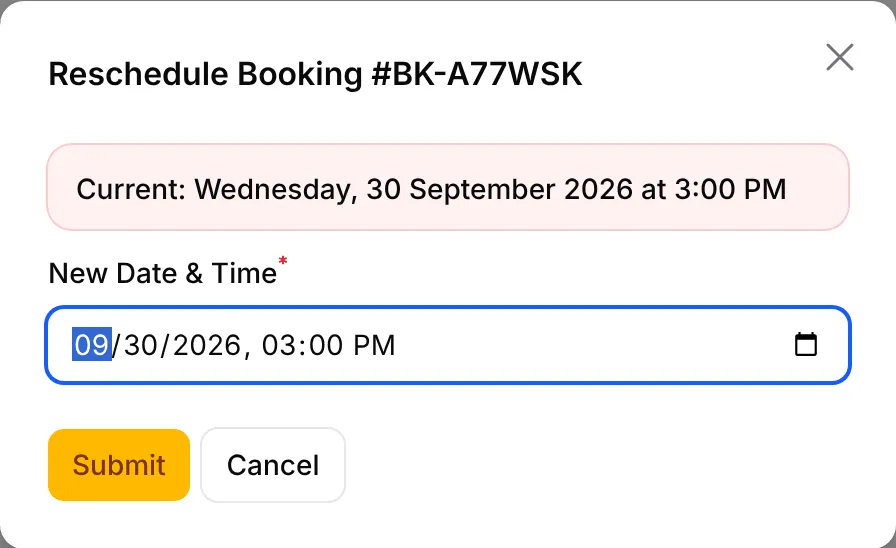
To reschedule, choose the New Date & Time and click Submit:
To change many bookings at once, tick their rows and use Mark as Confirmed, Mark as Completed or Cancel Bookings.
Add a manual booking
Section titled “Add a manual booking”Use a manual booking for walk-ins and phone bookings:
-
Click Manual Booking.

-
Under Select Booking Form, choose the Booking Form.
-
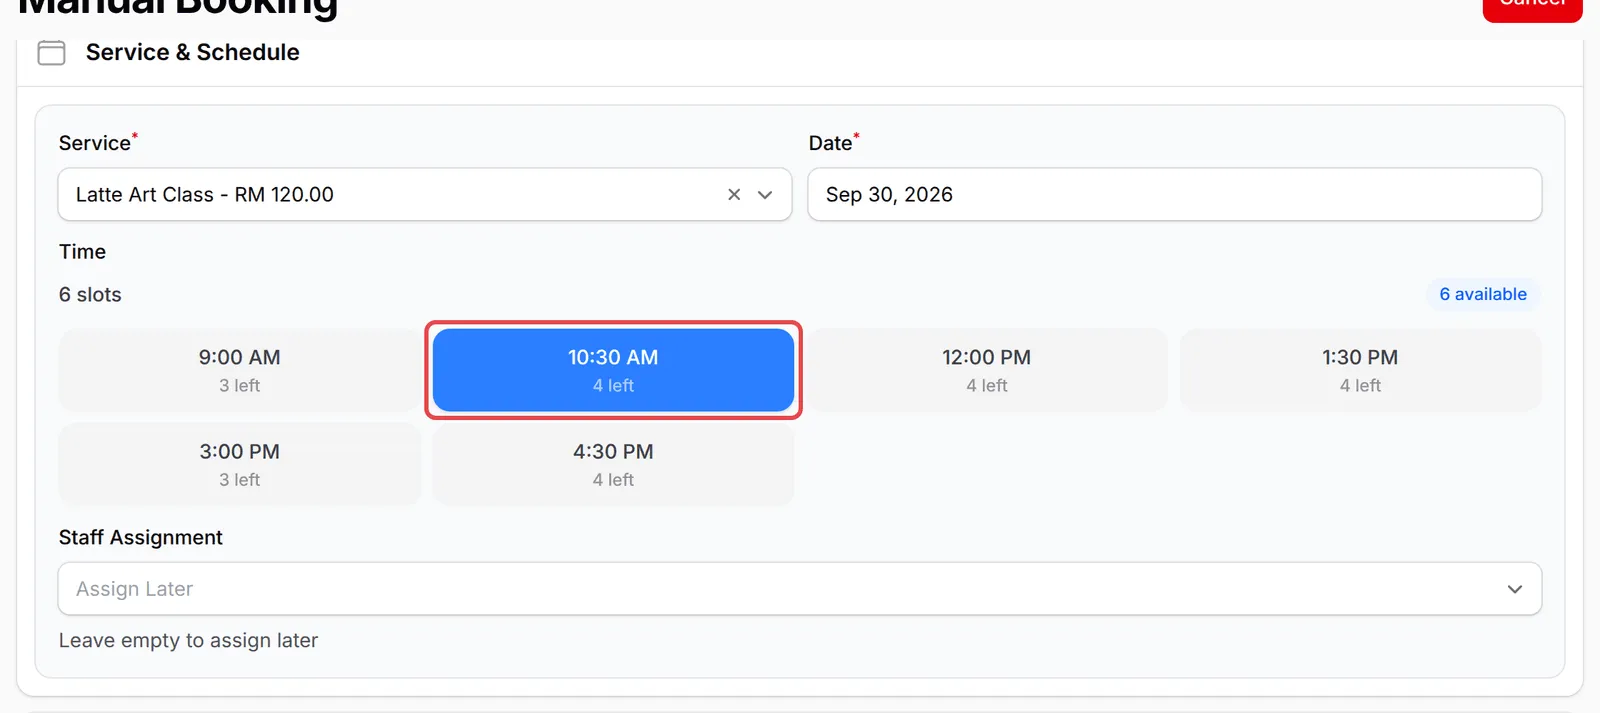
Under Service & Schedule, choose the Service and the Date, then click a time. Each time shows how many places are left. Pick an employee in Staff Assignment, or leave it on Assign Later.
-
Under Customer Information, enter the Name, Mobile Number and Email.
-
Under Additional Details, choose the Booking Status: Confirmed if the customer has paid, or Awaiting Payment. Add Admin Notes if you like, and turn on Send Booking Email to Customer to email them the booking.
-
Click Create Booking.
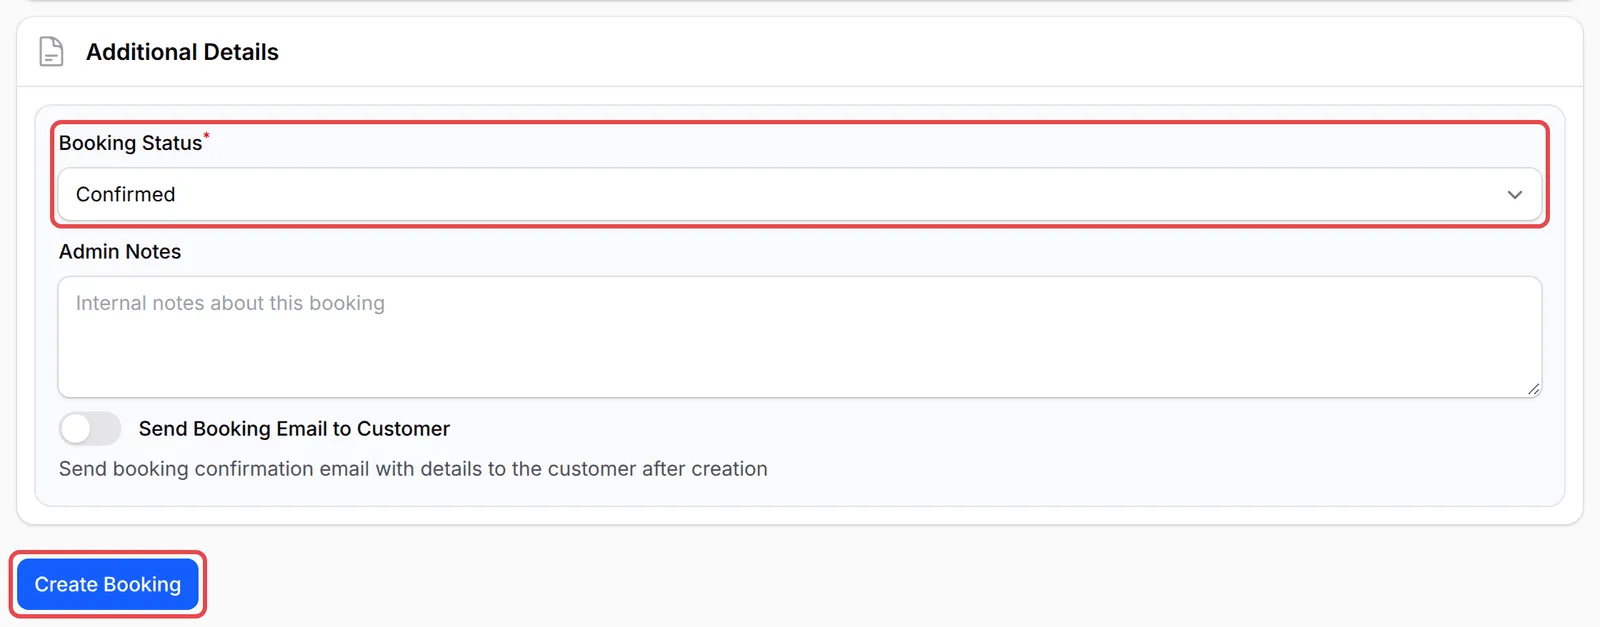
BCL shows Booking created successfully! with the booking reference, and the booking appears in the list and on the calendar.
Check customers in
Section titled “Check customers in”Every booking email has a QR code with the booking reference. When the customer arrives:
-
Click QR Scan. Quick Check-in opens your camera. Scan the customer’s QR code.
-
If there is no camera, type the reference under Or enter manually and click Search.
-
Check the details. If the booking is not for today, BCL warns you. Click Confirm Check-In.
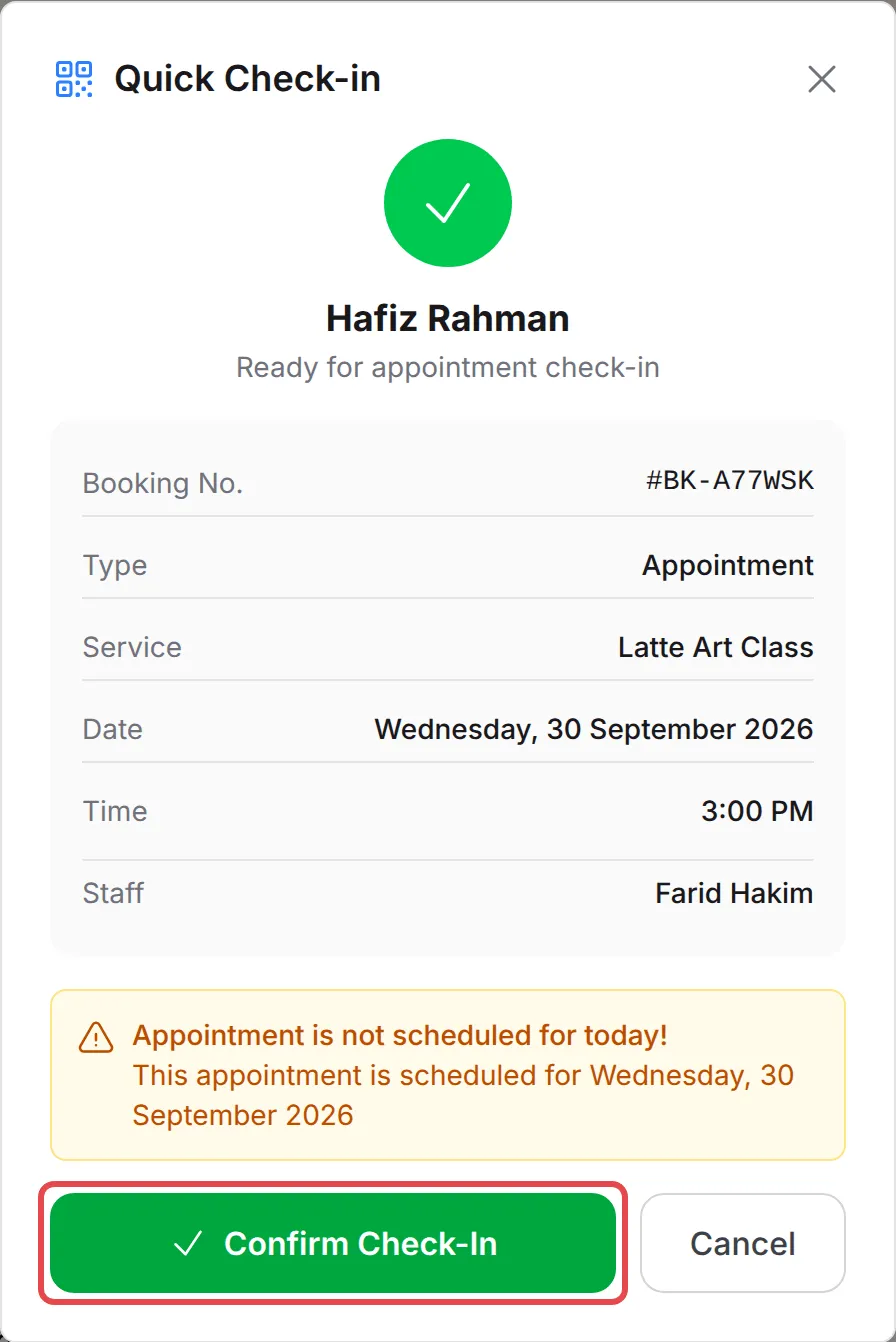
The booking changes to Checked In. When the service is done, choose Mark as Completed in its Actions menu.
Print the day’s list
Section titled “Print the day’s list”For a front desk or an event, print the list of bookings:
-
Click Print List, or go to Bookings → Print List.
-
Choose the date, or click Today. Narrow it with All Forms and All Statuses, and choose Simple or Detailed.
-
Click Print, or click Export to choose columns and download an Excel file.
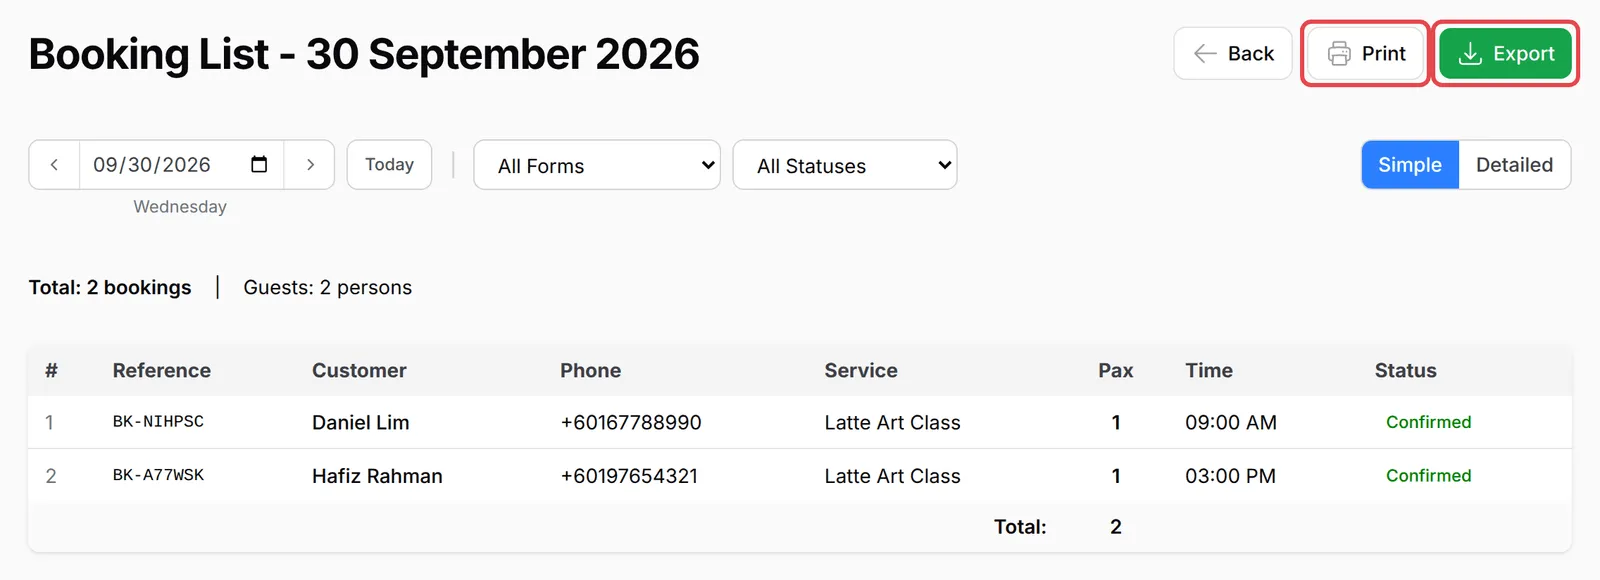
Small settings save time on busy days:
- Turn on Auto Confirm Booking on your services. If you do not need to approve each booking, paid bookings then go straight to Confirmed.
- Check in from your phone. QR Scan works in a phone browser, which makes scanning at the door easier than with a laptop.
- Use Detailed for staff. The Detailed print list shows each customer’s email, service price and staff, which helps on busy days.
Common issues
Why did a booking change to Cancelled on its own?
It was never paid. A booking waits as Awaiting Payment while the customer is on the payment page. If payment does not come through within about 15 minutes, BCL cancels it with the reason "Payment session expired" and frees the slot.
How do I check a customer in without scanning their QR code?
On Bookings → Bookings, click QR Scan. Under Or enter manually, type the booking reference, such as BK-A77WSK, click Search, then click Confirm Check-In.
Can I add a booking for a walk-in customer who pays at the counter?
Yes. Click Manual Booking, choose the form, service, date and time, enter the customer's details, set Booking Status to Confirmed and click Create Booking.
Was this article helpful?
Thanks for your feedback.
Sorry this didn't help. WhatsApp us and we'll sort it out with you.