
Ask an AI about this page
 ChatGPT
 Claude
 Perplexity
 Google AI Mode
 Microsoft Copilot
 Grok
Grok Mistral Le Chat
Send a WhatsApp after payment
Updated

To WhatsApp every customer when their payment succeeds, connect a WhatsApp provider once, then turn on an automation made from the Wabot Payment Notification template. BCL sends WhatsApp through Wabot or Wasapbot, so you need an account with one of them.
WasapBOM is no longer supported. If you used it, connect Wabot or Wasapbot instead and move your messages into an automation.
Connect Wabot or Wasapbot
Section titled “Connect Wabot or Wasapbot”First, at your provider:
- Sign up at Wabot or Wasapbot.
- Connect your WhatsApp number in their dashboard.
- Copy your Access Token and Instance ID from the dashboard.
Then in BCL:
-
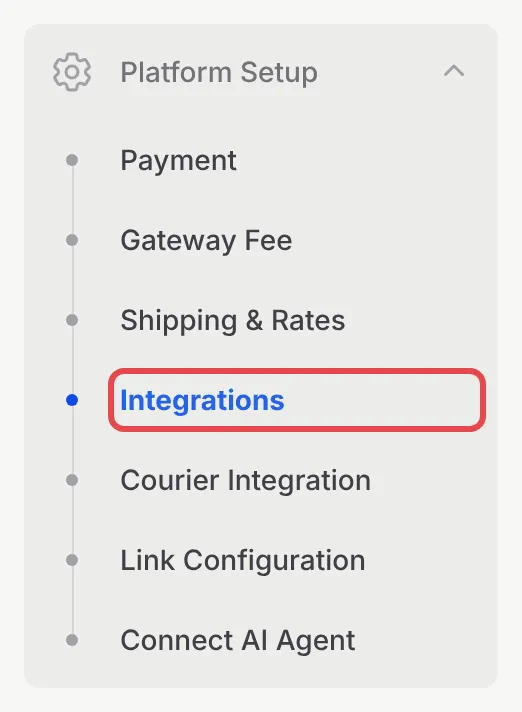
In the sidebar, go to Platform Setup → Integrations.
-
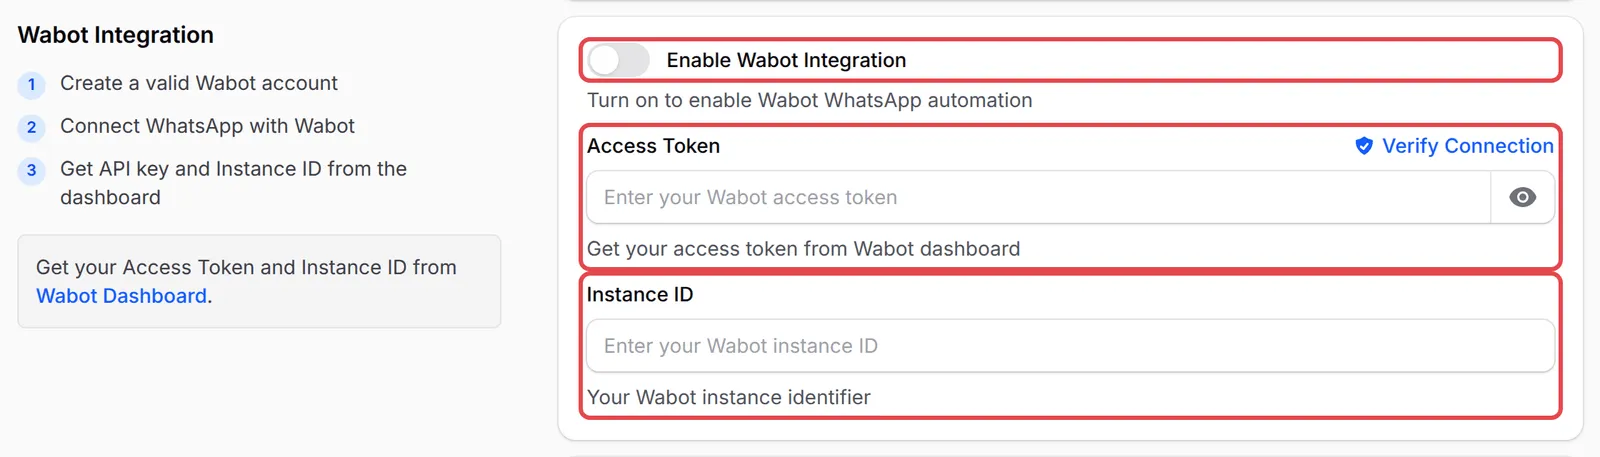
Open the WhatsApp (Automation) tab. Under Wabot Integration (or Wasapbot Integration), turn on Enable Wabot Integration.
-
Paste the Access Token and Instance ID, then click Verify Connection at the end of the Access Token field to check them.
-
Click Save Automation Node Configuration.

The Admin Phone Number at the top of the same tab is the default number for WhatsApp alerts to you from your forms.
Create the automation from the template
Section titled “Create the automation from the template”With the provider connected, the template does most of the work.
-
Go to Automations and click Templates.
-
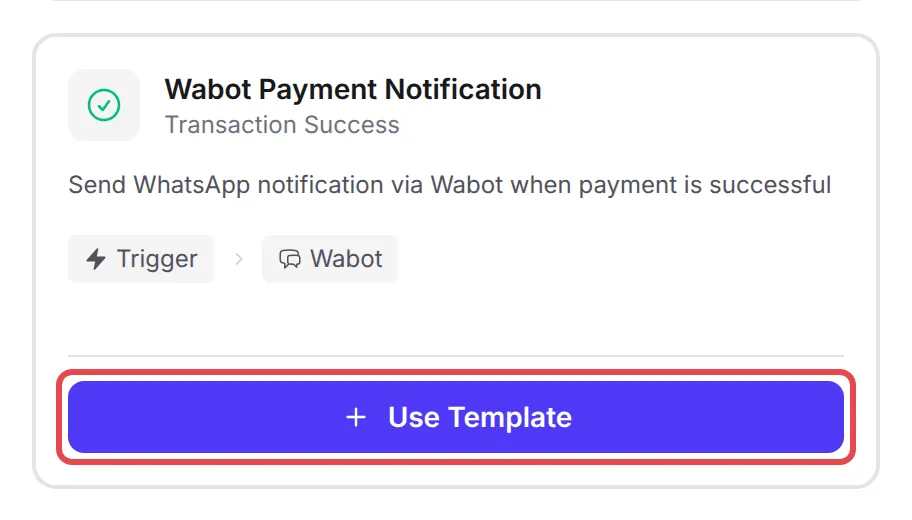
On Wabot Payment Notification, click Use Template.
-
BCL creates the automation with a Payment Success trigger joined to a Send Wabot node, and opens it. Click Rename to give it your own name.
-
Click the Send Wabot node, then the gear button under it. Phone Number is set to
{phone}, the phone number the customer entered at checkout. The Wabot Message is a sample in Malay with the order number, amount and receipt link.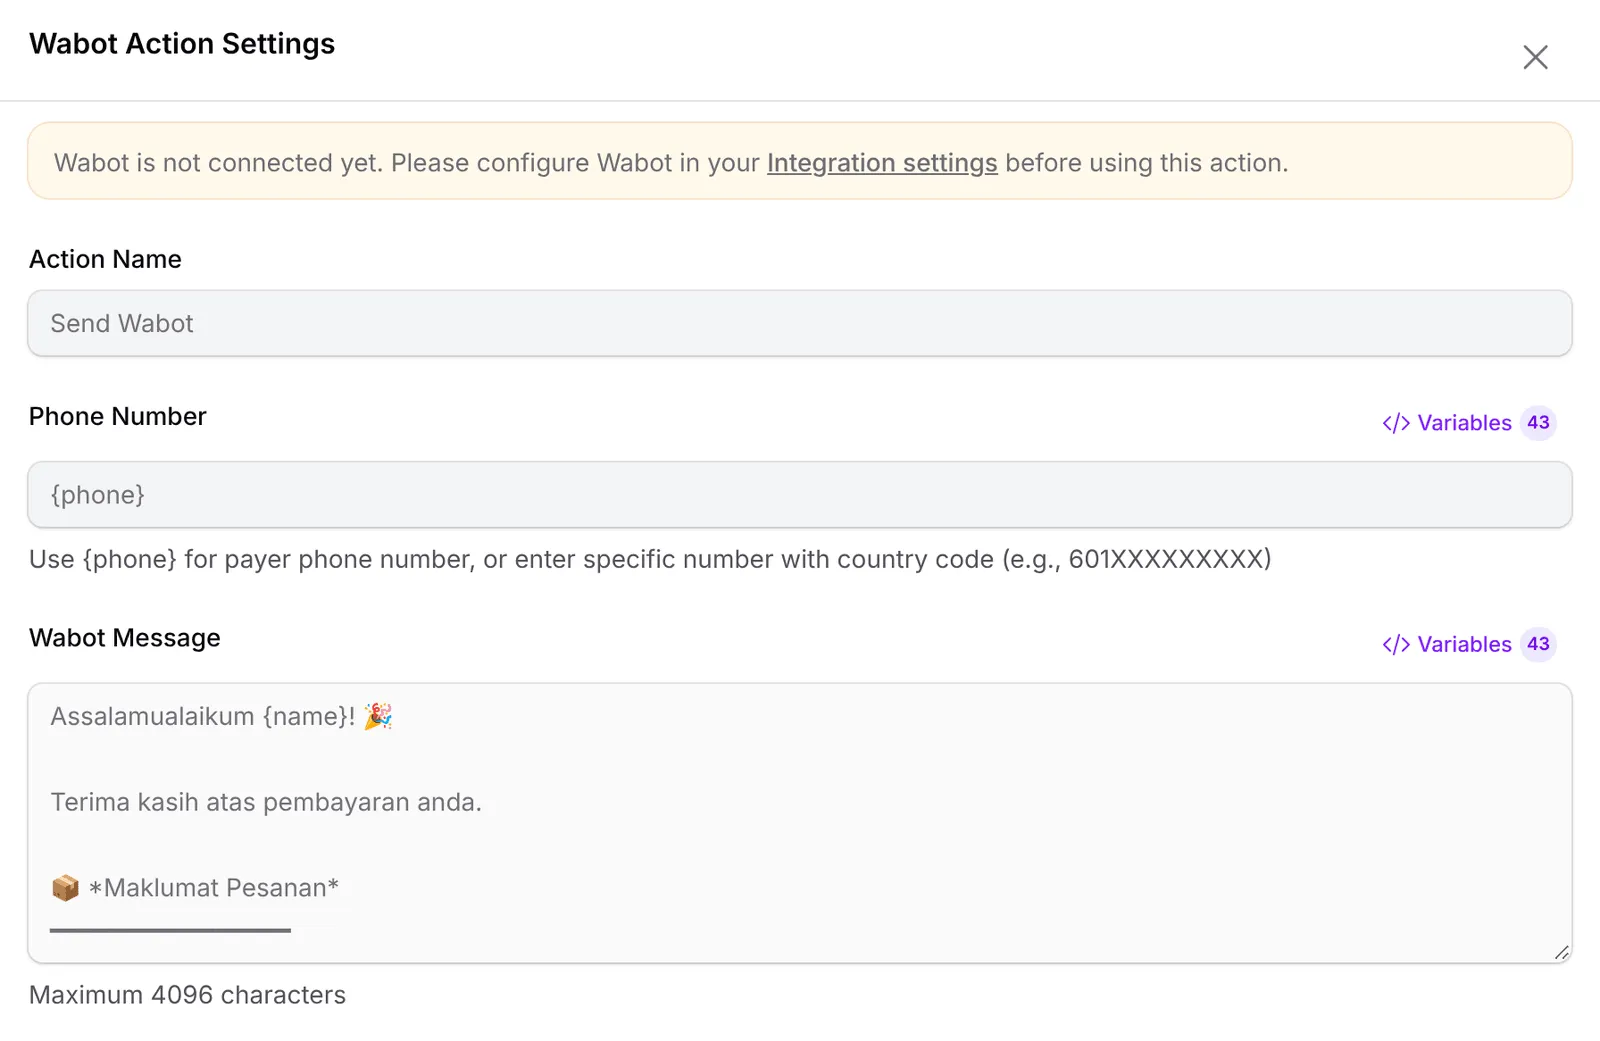
-
Change the message to your own words, up to 4,096 characters. Click Variables to insert details such as
{name},{order_number},{amount}or{receipt_url}. -
Under Test Wabot, enter your own number as 601XXXXXXXXX and click Send to see the message as a customer would. This section only appears once Wabot is connected.
-
Click Save Wabot.
-
To limit it to some forms, open the Payment Success trigger, choose a Payment Source Type and pick the forms under Specific Form, then click Save Trigger.
-
Click Update Automation, then Activate.

Using Wasapbot? Build the same workflow with a Send WasapBot node: click the trigger, click Add Node and choose Send WasapBot. See Create an automation.
WhatsApp is personal, so keep it short and useful:
- Send the receipt link.
{receipt_url}lets the customer open their receipt straight from WhatsApp. - Use the number format your provider expects. For a fixed number, such as your own, type it with the country code, like 601XXXXXXXXX.
- Check the history after the first sale. Open the automation and click Overview to see whether each message was sent. See Check an automation’s history.
- Prefer the per-form switch? Payment, event, booking and lead forms can also send WhatsApp through Wabot or Wasapbot from their own notification settings. See WhatsApp notifications.
Common issues
How do I send customers a WhatsApp automatically after they pay?
Connect Wabot or Wasapbot under Platform Setup → Integrations → WhatsApp (Automation). Then go to Automations → Templates, click Use Template on Wabot Payment Notification, edit the message and click Activate.
My Send Wabot node is grey and says Wabot is not connected yet. What is missing?
Check that Enable Wabot Integration is on, that the Access Token and Instance ID are saved, and that Verify Connection succeeds. Then reload the automation page: it reads the connection when the page opens.
Can I test the message on my own number before customers get it?
Yes. Once Wabot is connected, the Send Wabot node has a Test Wabot section. Enter your number as 601XXXXXXXXX and click Send. Variables are filled with sample data.
Was this article helpful?
Thanks for your feedback.
Sorry this didn't help. WhatsApp us and we'll sort it out with you.