
Ask an AI about this page
 ChatGPT
 Claude
 Perplexity
 Google AI Mode
 Microsoft Copilot
 Grok
Grok Mistral Le Chat
Give certificates to event participants
Updated
BCL makes a PDF certificate for each participant from a template you design. You choose when to issue them, for example only for people who checked in, and BCL can email them for you.
Create a certificate template
Section titled “Create a certificate template”A template is a background image with text placed on top of it:
-
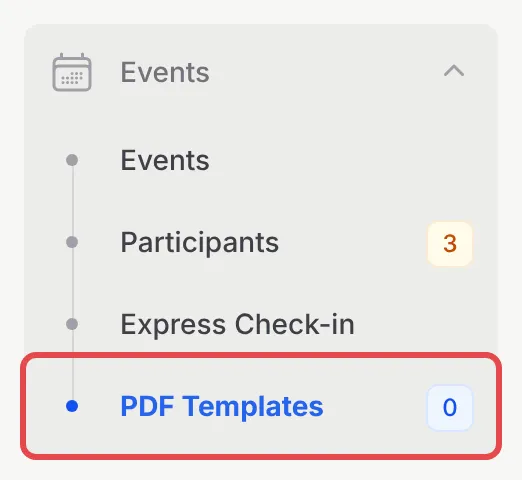
In the sidebar, go to Events → PDF Templates.
-
On the Certificate Templates tab, click Create New Template.

-
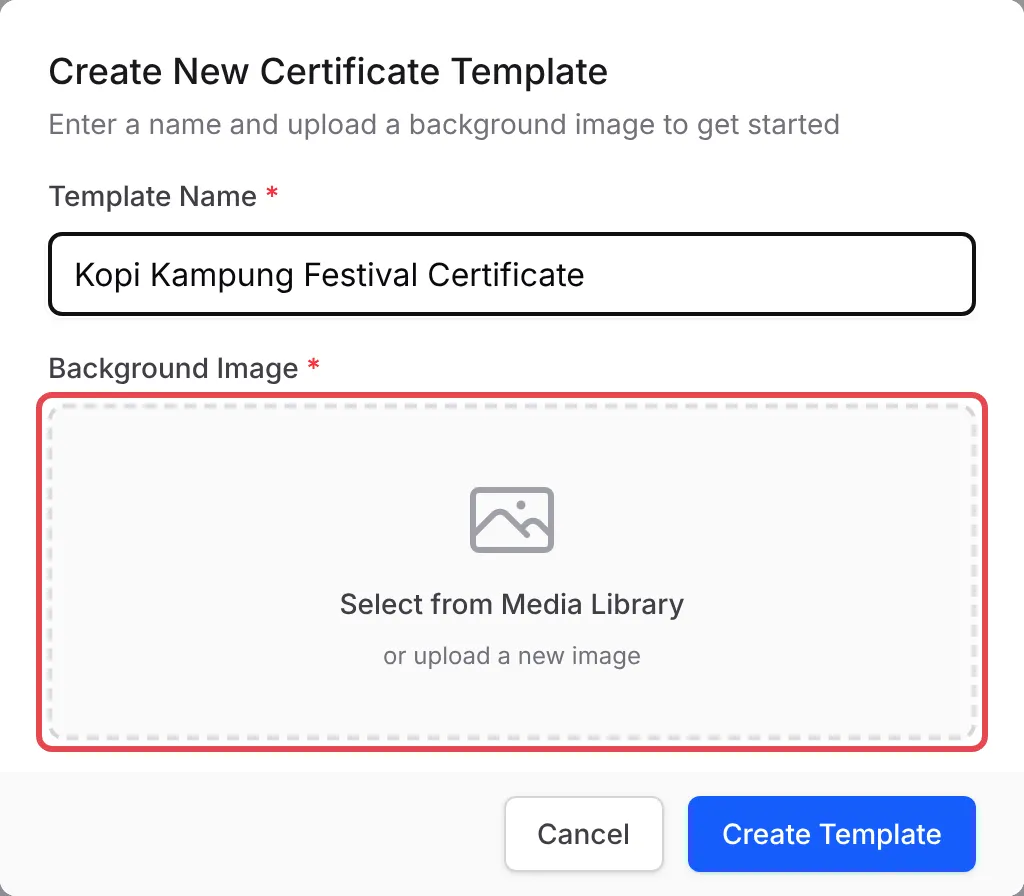
Enter a Template Name, click Select from Media Library and choose or upload your Background Image, then click Create Template. The template takes the size of your image.
-
The editor opens. Add text, image and signature elements and place them on the certificate. For details that change per person, insert placeholders such as
{{attendee_name}},{{event_name}},{{event_date}}and{{ticket_number}}. -
Click Save.
The Ticket Templates tab works the same way, for the PDF ticket each buyer receives.
Link the template to your event
Section titled “Link the template to your event”Each event uses one certificate template:
-
Go to Events → Events and click Edit on your event.
-
Open the Event Configuration tab. Under PDF Templates, choose your Certificate Template.

-
Click Update Event.
To give one ticket type a different certificate, click Edit on that ticket type and choose its own Certificate Template.
Generate and send certificates
Section titled “Generate and send certificates”After the event:
-
Go to Events → Participants. Open the Checked In tab to list only the people who attended.
-
Tick the participants, then click Certificates → Generate Certificates. To email them as well, tick Also send certificate emails when generation finishes.
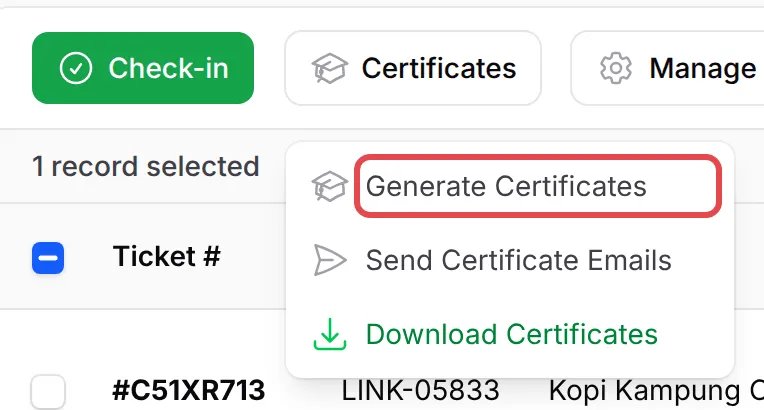
Certificates are made in the background. The Cert column shows who has one. Later, use Send Certificate Emails to send them, or Download Certificates to share them yourself. For one person, click ⋮ on their row and choose Generate Certificate or View Certificate.
For certificates that look right:
- Match the image to the paper. Make your background the shape you will print, for example A4 landscape, so the certificate prints without borders being cut.
- Issue after check-in. Generating from the Checked In tab makes sure only people who came get a certificate.
Common issues
Can I use my own certificate design?
Yes. Upload your design as the template's Background Image, then place text such as the participant's name and the event date on top of it in the editor.
Are certificates sent automatically after the event?
No. You choose when. On the Participants page, tick the participants who attended, then click Certificates → Generate Certificates. Tick Also send certificate emails when generation finishes to email them at the same time.
Can I write my own certificate email?
Yes. Create an automation with the Certificate Generated trigger. It runs each time a certificate is made, and you write the email yourself.
Was this article helpful?
Thanks for your feedback.
Sorry this didn't help. WhatsApp us and we'll sort it out with you.